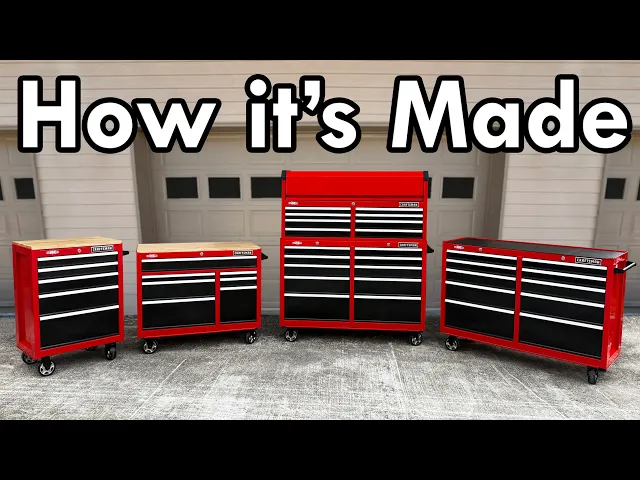
How Tool Boxes are Made
ChrisFix
0:00 Hey guys ChrisFix here and today I'm going
0:02 to take you to a toolbox Factory so I can
0:04 show you how toolboxes like these are made so
0:07 as you probably noticed I finally got my own house
0:10 with my own garage and now I could build
0:13 out my dream garage setup and the first thing I
0:15 had to do is get these dirty concrete floors epoxy
0:18 so it went from this to this and this came
0:21 out absolutely incredible next I installed a two post
0:24 lift and don't worry I'm still going to be working
0:27 with a jack and jack stand in my driveway
0:29 with hand tools for the videos but it's going to be
0:32 awesome to be able to use this lift for maintenance
0:34 like brake jobs and oil changes or any repairs
0:36 that I'll need to do off camera in order
0:39 to keep my cars in tiptop shape I can't wait
0:41 because this is something I've always dreamed of having
0:43 so with the lift and the floors done the last
0:46 thing to do is get tool storage so workbenches toolboxes
0:49 stuff like that so I can keep all my tools
0:52 in one place and this right here is my first
0:54 ever toolbox this is what my parents got me
0:57 when I was a kid it's very special to me
0:59 and this is what started it all and the cool
1:02 thing is this is a Craftsman toolbox and Craftsman
1:04 is the company that's letting us film in their Factory
1:07 that way I can show you how toolboxes are
1:09 made so thank you very much Craftsman for supporting
1:11 the video and with that said let's head out
1:14 to the factory so while many of today's toolboxes are
1:17 made in China or Taiwan I'm grabbing a flight
1:19 from my new home in Florida and I'm heading to Sedalia,
1:22 Missouri and this right here is the massive 475,000 sq-ft Craftsman
1:26 Factory that started back in 1978 and since then it's built
1:31 over 30 million toolboxes and what's really cool is I'm able
1:33 to say that these toolboxes are made right here in the USA
1:36 with global components and I can't wait to show you
1:39 the process so let's get started so this right here is
1:42 the toolbox we'll be making it's a Craftsman 52in 10 drawer
1:45 rolling toolbox and I wanted to show you this model specifically because
1:48 this is one of the bestselling models they have and the cost
1:51 to buy one of these is very competitive while still
1:53 being made here in the USA so let me show you
1:56 from start to finish how these toolboxes are made and we'll start
1:59 by making the draw drawers now so you have an idea
2:01 here are the basic steps for making a drawer first a coil
2:03 of Steel gets cut and pressed into this piece of sheet
2:06 metal then the two sides of the sheet metal are bent which
2:09 forms the sides of the drawer next the back of the drawer
2:11 is made separately and that fits in here just like
2:13 that then we have the front of the drawer which is
2:15 also made separately and fits right in here and then this drawer
2:18 is welded together to make one solid piece finally the drawer
2:21 goes to paint which is a really cool process I can't wait
2:24 to show you that and then the drawers are installed
2:26 into the toolbox so it looks like this so we're going to start
2:30 at the very beginning right here in the slitter Bay where
2:33 there's hundreds of Master coils in storage waiting for their chance
2:35 to be turned into toolboxes now at the far end
2:38 of the bay is where the tractor trailers come in to deliver
2:40 the steel coils and this is one of 15 coil deliveries
2:43 that this Factory receives every day and each delivery has two coils
2:47 now these two coils right here are made from American Steel
2:50 coming from Arkansas which is the largest steel producing state in America
2:53 and to get these steel coils off the truck a worker
2:57 uses a wireless remote to control a mass of 20 ton
3:00 crane and this crane has to be so massive because each
3:02 of these coils weighs 24,000lb and to put that into perspective one
3:06 coil weighs the same as six passenger cars so with the coil
3:10 removed from the truck next it's moved down to the other
3:13 end of the bay where it's unwrapped and put on the slitting
3:16 machine the worker cuts the metal strap and then unwraps
3:19 the coil and feeds it into the slitter and the slitter
3:21 gets its name because it slits the metal down into smaller coils
3:24 needed to make the individual parts of the toolbox and before
3:27 the entire coil is cut a worker goes in with giant calipers
3:30 and measures each of the cuts to make sure they're accurate
3:33 and in this case the cut is spot on so we're good
3:36 to go now these cut ends could be fed through the other
3:39 side of the machine where it gets wrapped around a drum
3:41 and once it's wrapped the slitter machine is ready to be
3:44 run at full speed and cut the entire coil now this steel
3:47 is moving quickly it's traveling at about 1200 ft per minute
3:50 which is about 20 ft per second and not only is
3:52 it getting cut down the middle but it's also getting cut
3:55 on the edges that way they're straight and true and you
3:57 can see the scrap metal being cut from the edges is
4:00 coming off and rolled up onto a separate drum on the side
4:03 that way it could be recycled because no metal is wasted
4:06 in this Factory now one coil is about 7,000 ft long
4:09 and the slitter machine takes just under 6 minutes to cut
4:12 the whole thing after it's cut the rolls are banded and taped so
4:17 they don't unravel and then they're loaded onto a trolley
4:20 and that trolley brings the coils to the was station there it's rolled
4:24 down to the scale and a forklift is used to place
4:27 the coil on the scale and the the whole purpose of weighing
4:30 this coil is that the weight tells the workers how much
4:33 scrap was removed from the original coil that way they know
4:35 how much is being recycled and just so you have
4:37 an idea roughly 7.2 million lbs of Steel is recycled every year
4:41 at this Factory so keeping count of that is pretty important
4:45 after weighing the coil the forklift driver brings the coil over
4:47 to the press to start the process of making a drawer
4:50 at the press a coil is loaded up onto the drum and then
4:54 the worker feeds the end of the coil into a series
4:56 of rollers which flattens out the metal to remove any bends
4:58 or waves that might in the metal and then he pulls it
5:00 all the way to the end where it's fed into the opening
5:03 of the press and then once it's in place he can
5:06 start the Press so now the Press is running and the coils
5:09 being fed into it and every time that press pushes down
5:11 on the metal it puts over 200 tons of pressure to Stamp
5:14 Out the holes and cut the metal into sheets which are
5:17 collected at the end of the assembly line one coil will be
5:21 stamped into about 1,500 sheets of metal in each sheet of metal
5:24 will turn into one drawer so you can make a lot
5:26 of drawers from just one coil of metal and it'll take
5:28 about an hour to to run the entire coil through the press
5:31 and we're only at 15 minutes when the press needs
5:33 to be stopped because the collector Hopper is full so the hopper
5:36 lifted off the stack of freshly stamped sheets of metal
5:38 and then the sheets are moved to the side and the hopper
5:41 is placed back down on a new pallet so the next
5:43 batch could get stamped so here's a good view of the sheet
5:45 metal that comes out of the press you can see the holes
5:47 that are stamped into the metal as well as the cutouts
5:50 made on the perimeter which plays an important role later
5:52 on so with the first batch of metal press next we're going
5:54 to take one sheet of metal over to Quality Control
5:56 to make sure it's within spec so this is the dimensional analysis
5:59 machine for quality control all you do is take the sample
6:01 in this case the sheet metal we're going to use to make
6:04 the drawer and place it on the glass then weights are
6:06 placed on the metal to hold it down and the worker make
6:09 sure it's completely flat now this machine uses a laser to make
6:12 sure that the stamp sheet of metal is the correct size
6:14 and all the cutouts done by the Press are accurate
6:17 and within the correct tolerances and as you can see here everything
6:20 is green which means we're spot on and good to go
6:23 this passes quality control once the tolerances are within spec the entire
6:26 stack of Metal Sheets are approved to be used so the work
6:29 can wrap them up for transport to the next station then
6:32 the forklift driver comes in and takes them to a spot
6:34 to be stored until the front pieces of the drawers are made
6:36 so let's go make those front pieces now okay so the front
6:40 of the drawer starts out as a skinny coil of metal
6:42 which goes through a set of rollers that flattens and removes
6:45 any bends or waves in the coiled metal and then after
6:47 it goes through those rollers it gets stamped in this mini
6:50 press right here this mini press stamps the edges of the coil
6:54 on both sides and that's the only stamping for this entire
6:57 process next the stamp coil moves through the roll for forming machine
7:00 and the roll former uses a series of rollers that bends
7:02 the edge of the drawer and this becomes the handle you
7:05 use to open and close the drawer if you look closely
7:07 you can see the edge slowly getting bent more and more
7:09 into the shape of a handle and then after the front
7:12 of the drawer is shaped it moves to the last step which
7:15 cuts the metal to the correct size the cutter machine's unique because
7:17 it follows the metal as it cuts that way the assembly line
7:21 doesn't have to stop this makes the whole process a lot
7:23 quicker so drawer fronts could be made quickly and if you
7:26 take a look you can see the red laser identifies the cutout
7:28 that was stamped into the Ed edge of the metal then
7:30 the cutting machine locks into that cutout that way it could
7:33 match the speed of the metal and make an accurate cut
7:35 every time finally once the Metal's cut it moves down
7:38 to the conveyor belt to the worker and the worker carefully collects it
7:41 by hand and places it into the hopper to make sure
7:44 it doesn't get damaged all right so here's our finished product
7:46 the front of the drawer you can see it has the bent
7:49 edges for the handle up here and the bottom has a nice
7:51 finished curve to it as well so now these are ready
7:54 to be welded together okay so you remember that first coil
7:56 of metal that we stamped into sheets well it's right here
7:59 and ready to be turned into a drawer first the machine uses
8:02 a vacuum to lift up the stamp sheet of metal
8:04 and place it onto the conveyor belt then the conveyor belt moves
8:08 the sheet to the brake which bends the edges of the sheet
8:11 so the brake first holds the sheet of metal in place
8:14 that way it doesn't move and then the side of the brake
8:17 bends the edges upward here's a closer look you can see
8:20 the sheet metal moves to the brake and then it's lowered
8:22 in and then the brake holds down the middle of the sheet
8:25 that way it can't move and now the clamping bar pushes
8:27 down along the edge of the sheet and then the bending
8:29 Leaf swings upwards to bend the edge of the sheet metal
8:32 now you can see the small 90° lip on the edge
8:34 of that sheet now the conveyor brings the sheet metal to the next
8:38 brake and this brake is going to bend it to make
8:40 the sides of the drawer so with the sheet metal in place
8:43 there are two clamping bars that move into place to make
8:45 sure the metal doesn't move at all and then the two
8:48 bending leaves fold the sides of the drawers upwards and now
8:50 you can really see the drawer is starting to take shape
8:53 with those two sides so now it follows along the conveyor belt
8:56 and gets moved to The Next Step at the next Next
8:59 Step a worker takes the drawer and mounts the rear piece
9:02 of the drawer and the front piece of the drawer and now
9:05 it's ready to move to welding here the welding machine grabs onto
9:09 the drawer and holds it in place then eight welding arms
9:11 are lowered over the drawer and a total of 16 spot welds
9:14 are made to hold the front and rear to the main
9:16 part of the drawer this spot welder is pumping out over 5,000
9:20 amps of electricity into each weld that way you know it's
9:23 a solid weld after the sides are welded now the bottom is
9:25 welded in 12 different places six on the front piece
9:28 of the drawer and six on the back piece and with that now
9:31 the drawer is completely welded together and technically now we could
9:34 call an actual drawer for the last step here a worker
9:37 visually inspects all the welds to make sure that they're complete
9:40 she also bends the front and rear of the drawer to make
9:42 sure the welds are solid and there's no play in the drawer
9:45 once that drawer has been inspected and it's good to go
9:47 it's neatly stacked up and when that stack is full
9:50 a worker takes the drawers over to the next station to get
9:52 ready for paint all right so that's how drawers are made
9:55 and now we need to make the actual box that holds
9:58 the drawers so we're going to get started by making the back
10:00 piece of the Box first so this is the freshly cut
10:03 and stamped sheet metal that just came out of the press
10:05 and it's completely flat and for the next step we're going
10:08 to create this we're going to put ridges into it
10:10 and these ridges give the metal Extra Strength so this is a very
10:13 important step to create a sturdy and well-built toolbox and to put
10:16 these ridges into the sheet metal we're going to use
10:18 the Factory's newest edition an industrial robot arm so first the robot
10:22 moves over to a stack of sheet metal and grabs one
10:25 using a vacuum then it puts the sheet metal on the Homing
10:28 rack and gravity pushes the that sheet metal into the corner
10:30 of the rack so now the robot knows where it's holding
10:33 the metal and it's in the exact same place every time then
10:35 the arm picks up the sheet metal and moves it
10:37 to the Press so the robot places the metal in the Press precisely
10:40 where it needs to be and then this press pushes down
10:43 and creates the first of four ridges now they're using a robot
10:46 for this specific job because it's very precise and way more
10:49 consistent than a human could be and this robot replaces a lower
10:52 paying job and creates a higher paying job because a technician's
10:56 needed to run maintain and program the robot so this is
10:59 the perfect place for this robot in this Factory now once
11:02 all the ridges are pressed in the metal is stacked up
11:04 and we're ready to move on to the next step and that step
11:07 is to weld the sides onto the back of the box
11:10 so a worker places the back of the box the robot
11:12 arm just pressed onto the platform and then both the left
11:15 and right side of the toolbox are set in place
11:17 that way they could be welded to the back so this spot
11:20 welding machine works similar to the one that spot welded the drawers
11:23 together but this one is able to do 12 spot welds
11:26 at one time and then once the welding is complete the sides
11:29 are permanently bonded to the back of the box and now
11:31 the machine flips this over and you can finally start to see
11:34 the toolbox taking its shape next a worker moves the metal
11:37 shell down the assembly line over here a worker has
11:39 the top part of the box and he positions it into place
11:42 that way it fits correctly between the sides and the back
11:44 once installed the worker moves the box to the edge
11:46 of the table and then he gets a handheld spot welder
11:49 and puts a single weld right in the middle and that weld will
11:52 hold the top in place that way it doesn't fall off
11:54 for the next step so after that's welded the worker moves
11:57 the Box along to the next step over here one worker
12:00 mounts the middle support brace and then another worker mounts the bottom
12:02 of the box and now this whole thing is finally beginning
12:05 to look like a toolbox and it's ready for the squaring welder
12:07 so the squaring welder does two things first when the box
12:10 is loaded into the welder it clamps the box together to make
12:13 sure the sides top and bottom are completely Square once it's
12:16 Square it makes five separate spot welds in each of the corners
12:19 of the box to hold the box together and once that's
12:22 complete this is now one solid box now after the box
12:24 is done in the Square welder it's moved down the assembly
12:27 line where a couple parts need to be riveted so first
12:29 the workers install the supports for the drawer sliders to mount
12:32 to and the reason why this is riveted instead of welded is
12:35 because the location of the drawer supports makes it very complex
12:37 and time consuming to get a welder in there so the solution
12:40 is to use rivets which works perfectly well for this part
12:43 after those are installed now the Box moves down to the next
12:46 two workers the first worker installs the lock rods which locks
12:49 the drawers into the toolbox when you turn the key and again
12:52 these are riveted in and then the other worker installs two
12:55 long metal braces at the bottom of the box where the caster
12:58 wheels mount these braces are designed to better distribute the weight
13:01 of the Box onto the wheels and with the two braces
13:04 riveted to the Bottom now the workers can move the box
13:06 to the next part of the assembly line called The Hang line.
13:09 At the Hang line the workers hang the toolbox up on the monorail
13:12 and that monorail takes the box to the area that it
13:15 gets painted and in this case it's on the red hang line
13:17 and right next to it is the black hang line and the drawers
13:20 are being hung there now it might look like the workers are
13:22 just randomly hanging the drawers up but they're actually hung at a specific
13:26 angle and orientation that way when they're submerged in the paint
13:29 the air could escape and the paint could adhere properly to the metal
13:32 and you're going to see that in a couple seconds so
13:34 with the box and the drawers hung now they're being transported to the paint
13:37 section of the factory and get this there's just shy of 2
13:40 mi worth of monorail in this entire Factory and it's important
13:43 cuz the monorail is how all this tool storage is painted so
13:46 once the toolbox and drawers arrive to the paint section the most
13:49 important part of painting anything is the prep so the first step
13:52 here is cleaning the boxes and drawers and they undergo a seven-stage
13:56 cleaning process that takes about 15 minutes what you're looking at is
13:59 basically like a giant dishwasher but for tool storage so the boxes
14:02 and drawers get blasted by high pressure warm water then they get
14:05 covered in high strength cleaners that remove
14:07 anything that might contaminate the paint
14:09 job like dust dirt oil even fingerprints then after everything's cleaned it
14:13 has one final rinse before it leaves the washing machine and this rinse
14:17 is done with an extremely pure reverse osmosis deionized water that way
14:20 when the water dries it doesn't leave any residue or water
14:23 spots and speaking of drying that's the next step so now
14:26 the boxes and drawers head to the convection Drive this dryer is
14:30 at 325° F and that will evaporate all the water in a matter
14:34 of minutes and now once this exits the dryer everything is prepped
14:37 and ready for paint so the boxes head over to the red
14:40 paint tank and the drawers head over to the black paint tank
14:42 so first we're going to paint the Box this process is called
14:46 electrophoresis coating or E coating for short and here's how it works
14:49 so the entire metal box gets submerged in the tank of red
14:52 paint now all the paint particles in the tank are positively charged
14:55 and the metal box is negatively charged so the positively charged particles
14:58 attract to the negatively charged metal and it Bonds on a microscopic
15:02 level and if you look closely you could actually see how
15:05 the monorail spark sometimes when the Box travels through the tank and that's
15:08 from the electricity flowing through it finally once the Box makes its
15:11 way through the 27,000 G bat of paint it comes out and gets
15:14 rinsed off by filtered water to remove any excess paint that way
15:17 there's no drips or runs on the painted surface now it heads
15:20 to the roof of the factory to cure where it goes through
15:23 an oven set the 400° F next the drawers undergo the same
15:26 e-coating process but with black paint now real quick some of the benefits
15:30 of e-coating is that it's significantly more efficient than powder coating
15:33 or spray painting because any paint that isn't bonded to the metal
15:36 stays in the tank and it can be applied on the next
15:39 part that goes through it the next benefit is it's easy
15:41 to make sure that the entire part is coated since it's completely
15:44 submerged into paint with powder coating or spray paint it's more difficult
15:48 to get into the nooks and crannies such as the tight corners
15:50 of the toolbox or the drawers and finally the e-coating paint makes
15:53 a very strong bond to the metal and it's chemical and Chip resistant
15:56 so it lasts a long time so now with the drawers painted
15:59 and rinsed they're on their way to the oven on the roof which
16:02 unfortunately we don't have access to but it's similar to the drying
16:05 oven we just saw after the cleaning step all right and just
16:08 15 minutes later the paint is fully cured and the box
16:11 and drawers are arriving to the last step the final assembly line so
16:14 here the Box makes its way down and two workers add foam
16:17 to the bottom and then carefully remove the box from the monorail
16:21 next one of the workers adds two locks to the box then
16:24 the Craftsman logo is placed on the box and then the box is
16:27 ready to move on to the next step now one of the workers
16:30 wants me to put a logo on the box that I'm
16:32 taking home so here comes the box and there's two pegs
16:35 on the back of the logo so we need to get one
16:37 in good and then the other one should align like that good
16:40 and they also want me to put a safety sticker on here
16:43 as well now the Box moves on to the next step adding
16:46 the sliders for the drawers the different
16:48 drawers have different depths and they're
16:51 so good that they get accurately eyeball the spacing after the sliders
16:55 are installed the Box moves to the next step and that's
16:58 to rivet them into the box each slider gets one rivet to make
17:01 sure it doesn't come out when you use the drawers and when
17:03 that's done the maiden USA with global material sticker goes
17:06 on and with that sticker in place now the Box can move to the next
17:09 step and that is adding the drawers so a worker grabs
17:12 the drawers from the monorail as it passes by and stacks them up
17:16 then he slides on the aluminum handle trim and then uses
17:19 an air hammer to hammer it into place then the last
17:23 of the drawers are brought over and the last of the trim
17:26 is added to the handles to complete the look and now they're ready
17:29 for the next step and that's to add the drawers to the box
17:31 so this worker starts from the top and works his way
17:34 down and he only installs the drawers on the left side
17:36 of the box once he's done installing the drawers on one side he moves
17:39 the box down to the next worker and this worker installs
17:42 the drawers on the other side and I don't know how many
17:44 of you have ever install drawers into a toolbox but these guys
17:46 make it look easy next up the drawers are riveted to the end
17:49 of the slider that way they won't pop off and then once
17:52 all the drawers are riveted the bottom drawer gets all the drawer mats
17:55 a box of caster wheels a handle and a mat for the top
17:58 of the toolbox all of which you install at home and then
18:01 finally a worker looks over the box for any defects he makes
18:05 sure all the locks and drawers work and any handles that aren't
18:08 perfectly aligned he knocks into alignment and just overall looks over
18:11 the box and makes sure it's perfect so this one's good to go
18:14 and the guys on the assembly line told me I should sign
18:16 it so we know this is the one that I helped make
18:19 now the Box can go over and get its cardboard box
18:22 and then the final packaging foam is added to the top that way
18:26 it helps prevent damage during shipping and then with that the box
18:29 is sent through the automatic cardboard sealer and that folds and glues
18:32 the cardboard on the bottom and the top very quickly and just
18:35 like that we have our completely finished toolbox packaged and ready to go
18:39 so for the last thing to do the forklift driver grabs
18:42 the box and loads it into the back of the tractor trailer
18:46 that way it could be sent out for delivery all right now
18:49 a few days later the toolbox has been delivered so let's check it
18:53 out and check it out this is so cool the actual
18:56 toolbox we made from start to finish from coils of metal all
19:00 the way to paint and packaging this is it right here how
19:03 cool is that and we aren't done yet that box wasn't the only
19:06 thing being made at that factory check this out and now I
19:10 have the perfect setup in my garage look at it even the original
19:14 toolbox fits in perfectly like it's meant to be so there you
19:17 go now you guys know how toolboxes are made I do want
19:21 to thank Craftsman and all their employees at the factory because they
19:25 made this possible and they helped out tremendously if you guys need
19:28 a good toolbox definitely consider this because it's made here in America
19:32 supports American families and now you know how it's made I hope
19:36 you guys enjoyed the video if you did remember to give it
19:38 a thumbs up if you're not a subscriber consider hitting that subscribe
19:41 button and if you guys are curious how other products are made
19:44 definitely comment them below and I'll see if I can make it happen!