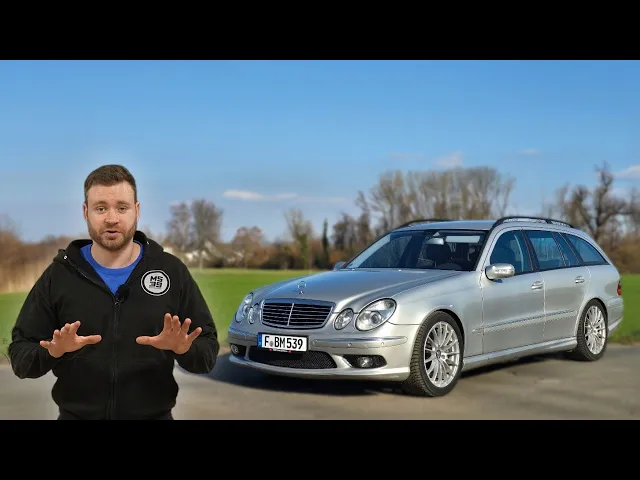
Here's What a Professional Workshop Did to This Old Mercedes E55 AMG
M539 Restorations
0:00 Coming up, the struggle is real.
0:02 Still looking well.
0:04 [clears throat] [sighs]
0:06 And why am I selling the mighty E55?
0:09 Two reasons.
0:13 I decided to sell the mighty E55 AMG.
0:17 And before I tell you why, we got some work to do on it.
0:21 Here, catch.
0:24 That's an expensive lens.
0:25 Why am I throwing snowballs at it?
0:27 It's been actually a hot minute since I've driven the car.
0:30 Explain that in a minute.
0:33 Kind of miss this car.
0:34 It is an extremely extremely comfortable car it is.
0:42 Mood, I tell you.
0:43 One of the things that I really hate is putting this thing on the left.
0:46 Checking points are tucked so far in.
0:49 I need to maneuver myself all the way in.
0:51 This annoying.
0:55 Man, this lift is so smooth.
0:57 It's been a hot minute since I've driven
0:58 this car and it's because of these stupid wheels.
1:02 This is a winter wheel set that came with the car.
1:05 The tires are good.
1:07 They're not that old.
1:08 They have a good thread.
1:09 But all four wheels are bent.
1:11 And these are aftermarket wheels.
1:13 Believe the name is the brand is Kaskins, something like that.
1:16 Anyway, when I'm driving the whole It's
1:18 just the whole car is vibrating like crazy.
1:20 And I just didn't want to drive it like
1:21 that cuz I can damage the bushings, the suspension.
1:24 So I just parked it until I found a replacement
1:26 wheel set and I got new tires from Michelin.
1:29 So we're going to take this off, pop it into the bin.
1:31 Then we need to do some work in this area here and also a little bit here.
1:37 I got original Mercedes wheels from the later generation of the CSL.
1:42 Please fit.
1:45 Yes.
1:46 Yes.
1:47 That looks much better, doesn't it?
1:48 Genuine Mercedes wheels.
1:50 That'll work great.
1:51 I'm going to go drop this off to tire shop, get the winter tires mounted.
1:54 Here's what's on the agenda.
1:55 As you know, I've been talking with the previous owner of this car
1:58 and he gave me quite a lot of info about it.
2:00 He replaced both front wheel bearings, but apparently he used incorrect grease,
2:04 so the left side one failed really quickly.
2:07 And when the bearing failed, it also took out the brake disc on that side.
2:11 So, he ordered two brand new original brake rotors,
2:14 new wheel bearings, and he started swapping them out,
2:16 but he had a problem with something on that side
2:18 and he ended up buying a complete used spindle with the hub,
2:22 with the wheel bearing, put that in, swapped new rotor,
2:26 and just left it as it is.
2:27 He was planning on doing everything else, but then the accident happened.
2:30 So, on the right side we still have the old brake disc.
2:33 We have that brand new wheel bearing, but with incorrect grease,
2:36 so he was kind enough to give me all
2:37 of these parts and we're just going to sort that out.
2:40 So, brand new disc for the right side, wheel bearings all around,
2:43 correct Mercedes grease, and he also gave me brand new Akebono pads.
2:48 These are ceramic pads, not sure if we're going to use them,
2:50 and then there's still a tiny oil leak coming from this grommet here.
2:54 This is for the oil dip.
2:56 Sorry, I'm in dipstick.
2:58 Let's start with the left side.
3:01 I tried Akebono pads once in the US and I didn't like them.
3:05 Specifically, I didn't like the bite
3:07 and the brake pedal feel because they're ceramic pads,
3:10 that means that you're going to get a lot less dust, brake dust on your wheels,
3:13 but you're going to sacrifice that initial brake bite,
3:16 especially when everything is cold in the morning.
3:19 But, because this magnificent vehicle
3:21 has this over-engineered SBC braking system,
3:24 supposedly it doesn't make a lot of difference even if you put Akebono pads.
3:28 So, we're going to give them a shot.
3:30 Also, more importante, when working on the SBC braking system,
3:34 be sure to put them in the service
3:36 mode using the diagnostic tool or disconnect the battery,
3:39 so you don't die cuz there's quite a lot
3:41 of pressure here and when you open the door, the pump is going to start pumping.
3:45 To be on the safe side,
3:46 put it in the service position or disconnect the battery like I did.
3:49 Take the pin out.
3:57 Spread the pads a little bit.
4:02 Pushed pistons in.
4:06 So, these are Textar pads, which are really nice pads.
4:08 So, we're going to save on these.
4:22 These are really nice calipers.
4:24 Inspect the pistons and the boots.
4:27 Oh, that looks quite good.
4:29 Let's get the cap off.
4:33 Well, that's some old-looking grease there.
4:35 So, before we take this wheel bearing off,
4:37 I want to check what's the play on the factory bearing.
4:41 So, we need wheel bolts, so that the brake disc is securely tightened in place.
4:51 We have a dial gauge here.
4:54 Place that on the disc.
4:55 With the dial gauge zeroed out and on the center of the shaft,
4:59 now you pull and push the brake rotor.
5:01 You don't rock it, you pull and push.
5:04 And the end play should be 0.01 to 0.02 mm.
5:11 And this one is 0.01, as you can see.
5:16 So, that's very, very little play.
5:23 See if I push it really hard, I can get it to 0.02.
5:26 But if I push a little bit, I get 0.01.
5:30 Perfectly within spec, and that's what we need to replicate with the new one.
5:36 I don't necessarily think there's anything wrong with this wheel bearing,
5:39 but since I have brand new parts,
5:41 might as well make it new for the future owner.
5:44 Cuz this is a good bearing, man.
5:47 Let's clean this area first and then pull it off.
5:55 Clean the hub.
5:56 By the way, you can also buy a complete hub
5:59 with a new bearing and just replace it as a one unit,
6:02 but we have a wheel bearing, so we're going to reuse the old hub.
6:10 So, [snorts] spin that off.
6:13 And this should just slide out.
6:17 Yes?
6:18 Yes.
6:19 Yeah, that was That was still good grease in there.
6:23 Yes, that's a nice clean shaft.
6:26 This would have been much quicker if I got the whole hub with the bearing,
6:29 but this is the smaller outer bearing.
6:33 The race is here.
6:35 And then on the other side, we have the seal that we need to remove
6:38 and then the bigger inner bearing will pop out.
6:46 Nice.
6:47 So, I'm going to get this bearing out.
6:49 And now I need to remove the grease.
6:52 That is packed with grease, man.
6:54 There it is, nice and clean.
6:55 So, this is the race,
6:57 the bigger one that we need to push out and then the smaller one as well.
7:01 Can't use a press conference room for this, so I'm going
7:04 to tap on the edge of the race here and then
7:07 push it out that way and do the same with the bigger
7:10 one and then we can press in the new bearings.
7:17 It is coming.
7:22 Nice.
7:24 That wasn't too bad.
7:26 This race is really hard.
7:27 I actually damaged the tool, the punch.
7:30 Now, let's do the trick side.
7:36 The punch is falling apart, dude.
7:38 One side is coming out, the other one not so much.
7:43 All right, so this is going swimmingly.
7:45 I destroyed every single punch that I have cuz the race is
7:49 much harder material than the punch is and it's just not coming out.
8:01 STOP IT.
8:02 IT'S OUT.
8:03 SO YEAH, THIS IS THE state of my punch now.
8:06 But it is out and I didn't damage the housing, which is good.
8:09 The hub is now nice and clean and we can start pumping in the new bearings.
8:14 Genuine Mercedes bearings.
8:16 This one is made in India.
8:18 SKF.
8:19 The old one was made in Japan and the smaller one is made in Japan.
8:24 So this stage we only need the races.
8:31 And we'll go to the press conference room to press them in.
8:34 So let's start with the smaller race.
8:37 Position that there.
8:46 Okay.
8:47 I think that's not all the way in.
8:49 It has a tiny bit more.
8:53 You'll feel when the resistance is big.
8:58 That's when it's fully seated.
9:00 You can also verify on the other side that it is fully seated, which it is.
9:04 I don't have the right size cup for this, unfortunately.
9:07 So let's try using the old bearing.
9:20 Great.
9:25 And that's fully seated.
9:27 Now, grab the new bearings and clean them with brake cleaner.
9:30 They are coated with oil.
9:32 That is so that they don't rust in the packaging
9:34 and then we can start smearing grease left and right.
9:39 So, this one there.
9:42 Make sure the housing is clean as well.
9:44 Now, you need a very clean hand and Mercedes Pinot Grigio.
9:49 This green.
9:50 And now we can start packing the bearing,
9:52 so you want to start basically filling up the bearing
9:56 like this and see it squeeze out on the other end.
10:00 That way you know the bearing is packed with Pinot Grigio.
10:06 So, this is what you want to see.
10:09 That the inside of the bearing it's full of grease.
10:12 Very good.
10:14 So, you can smear it on the outside now.
10:18 And this one is nice and packed as well.
10:21 So, there's a big cavity inside of the hub.
10:24 Fill that up with grease.
10:27 Very good.
10:28 Now, we can pop this one in.
10:32 Now, the seal comes there.
10:34 So, a brand new seal.
10:37 Oie Corteco.
10:38 Lube it up a little bit.
10:42 And now gently tap it in.
10:51 So, it needs to sit flush with the hub.
10:57 That'll do it.
10:58 Now, we can pop this one in like a boss.
11:02 I almost forgot, but quite clearly the brake shield is missing here.
11:06 This hole here is fine.
11:08 These two not so much.
11:09 We have snap bolts, so we need to drill
11:11 that out and put a helicoil insert in there.
11:14 Drill drill time.
11:15 First, we're going to make this flush, so I can drill it out easier.
11:26 So, this started to spin, so I think I can get it out and save the threads.
11:30 Un a momento, por favor.
11:32 Have a Snap-on bolt extractor kit.
11:36 I've never used it.
11:39 [music]
11:48 Huh.
11:47 Very cool.
11:53 Excellent.
11:55 So, we saved the threads there.
12:03 Well, would you look at that?
12:06 That was nice and easy.
12:09 Some of the threads are good.
12:10 Have a thread chaser here.
12:13 Just want to make sure that the threads are clean.
12:18 Yes.
12:20 Nice and smooth.
12:23 So, that blue stuff is not Loctite.
12:26 That's usually It's like thread sealer,
12:28 so that the bolt doesn't rust in there, you know?
12:35 Very good.
12:35 Have brand new bolts here, and we're going to use thread sealer.
12:38 This is not going to lock the bolts,
12:40 but it's going to prevent corrosion from happening,
12:42 cuz this is aluminum, and this is a steel bolt.
12:45 I don't have Mercedes bolts, so I'm using BMW ones.
12:48 Here's the original brake shield that the previous owner gave me.
12:55 Nice.
12:56 That's fixed.
12:57 Clean carbonaceous.
13:00 Pinot Grigio.
13:02 This is really, really sticky Pinot Grigio.
13:05 It's not your normal standard axle grease.
13:08 I can tell you that much.
13:10 Okay, that's nice and gooey.
13:17 There we are.
13:18 Do the sugar nut.
13:22 A few turns.
13:24 Get that grease working in there.
13:26 I think I want to put a bit more grease.
13:28 I'm going to see it squeeze out here.
13:30 Just hope I have enough for the other side.
13:34 All right.
13:35 [clears throat] I think that's enough, now.
13:36 All right, now I'm going to jump
13:37 on the other side and do the wheel bearing there.
13:39 I want to make sure I have enough grease and I
13:40 kind of want to split it between these two axles.
13:43 That packaging is 150 g.
13:45 So, if I if I can do half half, that way I know I'm good.
13:47 So, this is the old disc that we need to replace.
13:56 So, yeah, that would be the incorrect grease.
14:00 So, this is a Zimmerman disc.
14:04 This hub was properly rusty and you got
14:06 to make sure that's squeaky clean for the new rotor,
14:09 otherwise it's just not going to work correctly.
14:11 Should be able to turn it by hand.
14:18 [music] Why is this so hard to undo?
14:22 Oh, yeah, you can see some glazing and heat in there.
14:25 Here, specifically in there.
14:27 Want to polish this shaft.
14:29 So, yeah, can't use standard grease there.
14:31 All right, see the condition of the shaft.
14:34 Yeah, you can see some marks.
14:36 Not too bad.
14:38 Here, it almost looks like rust.
14:40 Nothing that's catching my finger.
14:42 A very fine Scotch-Brite, bit of brake cleaner, and that'll clean up easily.
14:51 So, this is thankfully in good condition cuz if this is in bad condition,
14:56 you got to replace the whole spindle and that's a lot more work.
14:59 Try not to use sandpaper here cuz with sandpaper, you're removing material.
15:03 With a fine Scotch-Brite, you're effectively just cleaning the surface.
15:06 All right, I'm going to replace the bearing off
15:08 camera and then we're going to plop it on.
15:10 That's good, there's still more left in this tube
15:12 so I can use it on the other side.
15:13 Added a bit more on the other side and here.
15:16 And that should be it.
15:19 Tube is nearly empty so I think that's evenly distributed.
15:24 Liqui Moly hot paste,
15:25 we're going to apply it here on the lip only, not on the surface.
15:35 Like so.
15:41 Okay, now we need wheel bolts.
15:44 So, as you can see, we have a ton of play here.
15:48 So, we want to turn this nut until Yeah, we don't feel much.
15:54 And now we can put the dial gauge.
15:56 Okay, we have nothing.
16:00 So, that's too tight.
16:02 Let's go back.
16:06 Well, that's about perfect.
16:07 A little bit, .1.
16:10 Pull it strongly, .2.
16:13 And then it sets back to zero.
16:17 So, perfect.
16:18 Starting the nut.
16:20 Okay.
16:20 So, here we have push and pull.
16:23 Pull Push strongly.
16:26 Push a little bit, .1.
16:27 Push strongly, .2.
16:29 So, a little bit, .1.
16:31 That's perfect.
16:40 Okay, let's see this side.
16:42 Push, .1.
16:46 .04, so that's.
16:49 .05 mm of play.
16:53 And that's too much.
16:54 Can we make the nut a little bit tighter?
16:58 What about now?
17:04 That's .03.
17:12 That looks pretty good.
17:14 Let's try to tighten the nut.
17:16 There.
17:19 If I push gently, it's .01.
17:21 If I push hard, .02.
17:24 Pull, we're back on the zero.
17:26 So, that's between .01 and .02, which is perfect.
17:29 And it is absolutely critical that you use this tool
17:32 when setting the end play on the wheel bearing.
17:35 If you eyeball it, I've seen a lot of videos
17:37 where people do that, they make it tight by hand,
17:38 and then they turn a little bit back.
17:40 You might get lucky by doing that, but you really don't know what you're doing.
17:44 And with this tool, you can precisely have a perfect amount of end play,
17:47 and you're 100% sure that the bearing is not going to fail because of that.
17:51 I have a brand new cap here.
17:56 It's a quick break from wrenching to show you a useful product from Fanttik,
18:01 Slim V8 Apex car vacuum cleaner,
18:03 which I showcased a while ago and have been putting more miles on it since.
18:07 Unlike other portable vacuum cleaners I tried in the past,
18:10 I'm happy to report that the performance from this one
18:13 didn't degrade after a few months of active use.
18:16 I've used it around the shop, cars, and even at home,
18:19 and it's still working as strongly as it did on the first day.
18:22 It's fairly light at just 500 g,
18:25 and it feels like a quality product in your hand.
18:33 Tell me that's not impressive from such a small device.
18:35 To empty it, it's quick and dead easy.
18:42 Besides the vacuuming function, you can also use it as a mini leaf
18:46 blower to blow dust away or sand in this case.
18:49 For the price, it's genuinely a great product
18:52 and one I'd happily spend my own money on.
18:54 Otherwise, I wouldn't be recommending or showing you this device.
18:57 It just works well for quickly vacuuming car interiors while
19:00 you wait on your wife to get her claws done.
19:03 Fanttik is currently running a spring sale,
19:05 and using the provided codes, you can grab an additional discount.
19:08 Check it out for yourself.
19:10 Now, you got to retract the pistons cuz we are using new pads.
19:13 A little bit of kung fu fighting.
19:17 I also have the brake fluid reservoir open so we can squeeze the pistons.
19:23 Excellent.
19:25 Cool, now we can clean the caliper, specifically the sliding surface.
19:29 Don't be lazy, get a mask.
19:31 Don't want to be breathing in brake dust.
19:35 Now we can mount the caliper.
19:37 Let's put a little bit of anti-seize on the on the bolt.
19:52 Nice one, Coco.
19:53 Lube up the backing plate a little bit.
19:56 [sighs and gasps] And then the sliding surface here.
19:59 And another sliding surface here, technically.
20:11 Nope.
20:13 Smooth and it doesn't want to go in.
20:14 We have a following ridiculous problem.
20:17 The brake pad won't fit in this part of the caliper and that's
20:19 because there's some corrosion oxidation happening
20:23 below this plate and it lifted
20:24 this plate up by about half a mil and now the pad cannot
20:28 fit and the pad needs to go in smoothly by hand like this.
20:31 Otherwise, it's going to get stuck in the caliper and seize.
20:35 We don't want that.
20:35 So, I tried to undo this nut here, uh screw.
20:39 Absolutely no chance.
20:40 That thing is welded on there.
20:42 That's never coming off.
20:44 And I mean, you can see just how bent this is.
20:47 It's not going to fit.
20:48 So, yeah, that is the stupid problem that we have right now.
20:51 Brake pads, something that takes like 2 minutes to do on this car.
20:54 So, what I'm doing is quite ridiculous.
20:55 I lifted a plate with a screwdriver and then
20:58 cleaning the oxidation below by hammering that stuff up.
21:03 And then I can hammer the plate back back down
21:06 and hopefully that'll do the trick because this is ridiculous.
21:12 Yes, look at that.
21:14 Think of that all work.
21:17 Yes, look at that.
21:19 That's what the patch should do.
21:21 Now I can move freely in there.
21:23 Let's clean this up, lube it up.
21:27 Clean pins.
21:32 And that's the wheel bearing and brake job finito.
21:36 Fetish.
21:36 Next, the oil leak.
21:38 Another thing that I absolutely dread doing
21:41 on this car is removing this diabolical steel cover.
21:46 It is so heavy.
21:47 It is stupid heavy.
21:51 [clears throat] See, it's Why is it so heavy?
21:55 It's not a tank, Mercedes.
21:57 It's a road car.
21:58 As you can see, the rear main seal is good.
22:01 That's not leaking cuz we replaced that and the left side is dry,
22:05 but the right side not so much.
22:08 I cleaned this not long ago cuz I was trying
22:11 to figure out where it's coming from and the oil dipstick grommet,
22:14 you can see that there, that was pretty wet,
22:17 but now looking at it, it looks like the oil pan is leaking.
22:22 That looks quite fresh.
22:24 And there.
22:25 So, yeah, that's great news.
22:27 So, a shop resealed this oil pan.
22:30 This happened right before the accident.
22:32 The previous owner literally drove out of that shop and this is one
22:35 of the work they did on the car and he got hit by a scooter.
22:38 So, looks like they didn't do they didn't do a very good job.
22:41 And this now sucks cuz we need to drop the subframe to reseal this properly.
22:45 Anyway, I think let's replace that grommet anyway cuz it does look wet.
22:49 Maybe try to tighten the bolts a little bit more and see what happens.
22:53 There you can see one bolt holding the dipstick to the engine.
22:56 We shall remove that.
22:58 First, a bit of brake cleaner and compressed air.
23:01 I don't want anything dropping inside of the oil
23:03 pan when we pull the dipstick out.
23:07 Good.
23:07 Now, change gloves.
23:09 Pull it up if you can.
23:12 Good, sir.
23:14 Can't get a good grip.
23:15 Okay, now.
23:16 There you go.
23:17 This is coming out.
23:17 It appears we're stuck a little bit, sir.
23:20 Think it's hitting something on the top.
23:21 I have to go up top and disconnect it.
23:23 Excellent news.
23:24 Another quick job that's not a quick job.
23:28 One needs to remove the throttle body to get the dipstick out because
23:32 it's it's hitting and it kind of swoops around the engine, you know?
23:35 I can't pull it out.
23:42 Okay, I can just put it on the side like that.
23:45 No, it's still being a stubborn bastard.
23:48 I'm not sure if this is doable.
23:50 Confirmed, it is not possible to pull out the dipstick.
23:52 It simply goes way too deep into the oil pan,
23:54 so we need to drop subframe and the oil pan,
23:57 which we can reseal at the same time and replace this stupid grommet.
24:00 But, maybe if I were to remove the supercharger, we'd gain some room,
24:02 but this bracket on the back is hitting the cylinder head,
24:05 so I think that wouldn't help at all.
24:07 So, yeah, that's great news.
24:08 And this is why I have trust issues.
24:11 Alan, the Prius owner, took this car to a workshop to get some work
24:16 done because he didn't have the time to do it himself.
24:18 He told them, "Hey, my rear main seal is leaking.
24:20 Can you fix it?" And they said, "Yes, we can." And then later they told them,
24:25 "Hey, your rear main seal is not leaking.
24:27 It's actually the oil pan." So, they went ahead and resealed the oil pan,
24:31 which probably wasn't leaking in the first place, but now it is,
24:34 and they didn't fix the leak that was coming from the rear main seal,
24:37 which we did fix, but this is now, I think it's still leaking.
24:41 I think it might be just the grommet that's kind of spreading everywhere,
24:44 but I don't know what they did.
24:45 He told me that that shop was really shady,
24:48 and at this point, I'm selling the car.
24:51 I want it to be mechanically 100% perfect for the next owner,
24:54 so we need to redo all of this and just make sure it's done Correctly.
24:57 First order of business, let's drain the oil.
25:02 Smooth, man.
25:03 Smooth.
25:04 Okay, here's the heist plan.
25:06 We're going to remove the caliper,
25:07 secure it to the chassis of the car, then pop that upper ball joint,
25:11 remove the lower shock bolt, and then this entire spindle here with the brake
25:15 disc can come down together with the subframe.
25:17 Then we need to disco the steering rack,
25:20 and I think there's one power steering line that that'll need to be unbolted,
25:23 and then everything can come down and just we can move it away from the car.
25:27 I'm thinking we'll need a lot of space to get both fans out.
25:32 What is happening here?
25:37 Rust loser.
25:39 AHA.
25:41 INCREíBLE.
25:42 WHAT SO, THIS IS STARTING OFF GREAT.
25:48 How can this be the start, man?
25:54 Come on, I've never Come on.
25:59 Yeah.
26:10 I think it's turning or [cough] I think it's coming.
26:19 [clears throat] Totally insane.
26:28 This is already going great.
26:30 It's all great.
26:35 Insane.
26:48 All right, with the caliper again.
26:54 Okay, pop the ball joint.
27:06 There it is.
27:10 Ball joint unharmed.
27:17 Careful now.
27:18 The rubber is still perfect.
27:22 Come on.
27:23 There it is.
27:24 See?
27:26 A very good ball joint.
27:27 Next, we got to disconnect steering rack and steering.
27:33 Disconnecting the rack up top is much easier than
27:35 messing around with the coupling on the steering rack.
27:37 Right, now we need to support the engine from the top
27:41 so it doesn't drop on my head when we remove the subframe.
27:45 Okay, I got all of this figured out.
27:48 Two strong bolts, strong chain.
27:51 And we're going to support the engine like that.
27:53 What we're going to do now is we're going
27:54 to jump underneath and remove the engine mount bolts.
27:56 That looks like a 13 mil.
27:59 And it is.
28:04 Great.
28:04 Now we can raise the engine.
28:07 And just make sure that this can actually support it.
28:14 Can see that the engine is in the air since I can move it like this.
28:17 So, we are good to go.
28:19 Let's disconnect this PS line.
28:23 All right.
28:27 All right.
28:30 There you go.
28:31 Oh, beautiful.
28:33 All right.
28:34 That's why I keep caps from old hoses and stuff
28:37 so we don't make a mess when disconnecting lines.
28:39 And the second line it's easiest to disconnect it here and not at the rack.
28:46 There we go.
28:48 Oh, come on.
28:49 This is too good.
28:50 This is too good.
28:51 We're not going to have any leaks.
28:52 Cool.
28:52 Now we can officially start unbolting the subframe.
28:55 All right.
28:55 First we got to support it.
28:56 The noise that you're hearing in the background,
28:58 that's the new lights being installed.
29:00 Finally.
29:01 How many screws do we have?
29:02 There's one there.
29:03 Six in total.
29:04 Let's go, Mercedes.
29:07 Okay.
29:08 That'll [snorts] do.
29:18 Okay, that's the screws slightly loose.
29:19 Let's see what happens when we start lowering.
29:22 Uh-huh.
29:27 That's all of the bolts removed.
29:29 Uh-huh.
29:31 Will it balance?
29:32 Is the question.
29:35 Uh-huh.
29:35 It won't.
29:36 It wants to tip over.
29:37 Okay.
29:38 Let's balance it this way.
29:41 To be honest with you, this really wasn't that bad.
29:45 Now I'm in a pickle, bro.
29:47 It is a very, very heavy subframe.
29:49 So I'm going to roll this out of the way.
29:53 Let's get this line out of the way.
29:57 All right.
30:03 Okay, that's all of them out and two just
30:06 slightly in cuz we need to crack the seal.
30:09 Crack the seal.
30:11 Crack the seal.
30:18 Another spot to pry here in the back.
30:20 I'm going to get a plastic wedge so we don't score the surface.
30:26 Yeah.
30:30 There we are.
30:36 There we are.
30:37 Yeah, I think they didn't apply applied correctly here.
30:40 That's why it was leaking there, wasn't it?
30:42 And they scratched the other surfaces well.
30:44 And that stupid old dipstick.
30:50 We have four bolts in the back that go through
30:52 the bell housing into the pan and four in the front.
30:57 [snorts] So this is the one that was leaking, full of oil.
31:04 They didn't apply sealant there properly.
31:10 Didn't I?
31:12 Did I already loosen that or it was just barely loose?
31:16 See, this one here wasn't leaking.
31:21 [snorts] Now you got to unbolt the pipe.
31:25 I don't know if necessary, but I'm going to remove this plate here.
31:31 Need an ultra-thin socket for there.
31:33 It's always good to have spare 10 mil sockets.
31:36 This is the one that I found in a peanut.
31:39 From Chicago.
31:41 Let's start.
31:46 [snorts] That was way too loose.
31:48 Completely loose.
31:50 Completely loose.
31:51 I didn't touch that.
31:54 See this one?
31:55 Completely loose [snorts] as well.
31:58 Yep.
31:59 This one, totally loose.
32:02 How can a workshop like this be in business?
32:05 Like this is unbelievable, man.
32:06 They completely forgot to torque the ones in the front.
32:10 Oh, yet another one completely loose.
32:12 Look at that.
32:14 I ended it with my hand.
32:17 There.
32:18 See, yes, I am 100% glad.
32:22 Yet another one.
32:22 This is That one is tight.
32:27 That one isn't.
32:29 [laughter] That is insane.
32:32 They charged them to reseal the upper and lower
32:35 pans and they didn't even tighten the bolts.
32:37 I don't even know what to say.
32:39 Look at Look at this.
32:43 That's why it was leaking there.
32:44 Totally loose.
32:45 I didn't use a ratchet on there.
32:49 No.
32:50 No.
32:53 Look at that.
32:54 All three loose.
32:55 Here.
32:56 Yeah, of course, not one on this side.
33:01 So, half of these bolts are completely loose.
33:03 Look.
33:03 I'm going to do that with my hand.
33:05 I I don't I don't know what to say.
33:07 This would eventually drop out and end up somewhere in the engine up there.
33:11 This is a prime example why I won't let anyone work on my cars.
33:17 See, some of them didn't forget to torque.
33:20 But then, some did it.
33:22 Well, it's like half half.
33:23 Half were tight.
33:24 Half were loose.
33:27 Yeah, another one that was loose.
33:29 And another one.
33:31 I think more than half were loose.
33:33 Look at this stupid old dipstick.
33:35 You still can't remove it.
33:36 There's absolutely no chance to get this out.
33:38 Look at that.
33:38 Without removing the oil pan.
33:43 There you go.
33:46 Dipstick.
33:49 I'm going to remove the oil pump so we can replace the famous O-ring.
33:52 There's an O-ring here on this pipe and this is a feed pipe for the oil
33:56 pump and that O-ring can become really
33:58 brittle and hard and essentially fall apart.
34:01 And when that happens, the oil pump is going to start sucking air.
34:04 It's going to starve the engine of oil and then the engine goes boom boom.
34:07 But the previous owner already replaced that O-ring 3 years ago.
34:10 But since we are already here and it costs like €2, we're going to do it anyway.
34:14 Also, let me show you another thing that I just spotted.
34:17 Yet another loose screw.
34:20 This one was coming out.
34:22 Yeah, not good at all.
34:24 We need to use Loctite on these bolts.
34:28 Oh.
34:29 Also loose.
34:32 That one is not loose.
34:40 [snorts] [sighs] We got to unbolt the piping.
34:50 There we go.
34:50 So, the o-ring is here.
34:55 Yeah.
34:56 That is the updated o-ring, as you can see.
34:59 So, just like the previous owner told me, he did this himself, which is good.
35:03 So, this is not a super common issue,
35:05 but as these cars age, this can become a quite a big issue.
35:09 So, it's just good preventative maintenance.
35:11 Here's a brand new original o-ring from Mercedes.
35:14 Pop that onto the pipe.
35:16 oil a little bit [snorts] of this entire thing here Good.
35:27 Cleaning the holes.
35:32 Ah, before I put the pump back in, I'm going to clean the surface.
35:41 Okay, that's nice and clean.
35:43 So, you got to make sure that the surface is also dry.
35:46 If there's oil on here, the RTV will not seal.
35:50 Oil pump going back in.
35:52 And let's put a bit of Loctite on the bolts.
36:00 Loctite on the small bolts as well.
36:04 Now, you got to get the oil pan ready.
36:06 I have Liqui Moly gasket remover, sealant remover.
36:10 Spritz this on here.
36:13 Let it work for a little bit, and then this will come off easily with a scraper.
36:17 Plastic scraper.
36:18 Don't damage the surface.
36:19 Here we go.
36:21 See?
36:23 How easily that comes off.
36:26 Good stuff, man.
36:27 Genuinely good stuff.
36:28 No need to struggle, just scrape it off.
36:31 Here it is, nice and clean.
36:33 I pop this into the Z Z machine and it came out looking spiffy.
36:37 This is the brand new oil dip tube grommet.
36:40 Can do a tiny bit of oil.
36:44 Okay, so.
36:45 And now we can start applying RTV.
36:47 This engine pretty much doesn't use any gaskets.
36:50 Everything is sealed with RTV, Victor Reinz Renzosil, the good stuff.
36:55 And per Mercedes repair manual,
36:56 you should apply a thin 2 mm wide bead all around.
37:01 And then when you bolt the parts together,
37:03 that's going to spread around and you're going to get a perfect seal.
37:05 I've done this experiment on E31 Project
37:08 Merc where I tried few different methods.
37:10 And the one that I like to use is do exactly that, 2 mm wide bead,
37:14 and then spread it around with my finger like jam.
37:17 That way I remove the excess.
37:18 And when I bolt everything up,
37:20 not a lot is going to squeeze out on the sides, which is what I like.
37:23 And we're also going to get a perfect coverage on the surface.
37:25 So, I'm going to do it like that.
37:26 If you don't want to, you don't have to.
37:35 I'm so skillful.
37:40 Beautiful.
37:41 Plop it in like this and everything is going to seal as it should.
37:44 But, like I said, I like to spread it around.
37:51 The key is not to use too much.
37:53 If you use too much, then it's going to end up in the oil,
37:57 clogged oil pump, and reek havoc.
38:00 Which is why I like to do it this way.
38:01 So, I'm going to apply a little bit on the on the engine side as well,
38:05 just so we are absolutely sure it's perfect coverage all around.
38:08 And then let's bolt this up.
38:11 Oh, tight fit, huh?
38:15 All right.
38:15 So, start them just a little bit.
38:18 And now first we're going to torque
38:19 the the in the back through the transmission bell housing.
38:22 That will pull the pan backwards cuz if we torque
38:25 all of the bolts now and we do that last,
38:26 we can actually snap some stuff here and we don't want to do that.
38:29 You want to make sure that it's sitting perfectly
38:31 flush here and then you can torque up these bolts.
38:44 Next up, this plate.
38:47 No.
38:48 Yes.
38:49 Make sure your socketio is clean as well as the bolts.
38:56 This cover here.
39:00 Same story with the lower oil pan.
39:08 And you can see here how little has squeezed out.
39:10 That's what I want and that's why I do it that way.
39:12 Remove all of the excess that's not needed.
39:14 Oil drain plugs, 30 newton meters.
39:19 Okay.
39:19 Now it's just a matter of putting everything back together.
39:21 I'm still waiting on an o-ring for the oil level sensor,
39:24 so I'll do that tomorrow.
39:25 This is the bracketio.
39:26 Just make sure there's no oil here cuz you got
39:29 to verify that we solved all of the oil leaks.
39:37 Subframe goes back in now.
39:39 We do have locating dowels here in the back
39:42 just like on a certain different German brand.
39:46 And by the way, the engine mounts were replaced
39:48 by the previous owner with black series ones, I believe.
39:51 Memory serves me right.
39:54 I got to say taking out the subframe on this car is pretty, freaking easy.
39:58 I was trying to look it up online, couldn't find anything other than a few
40:01 people that were complaining how difficult it is.
40:04 Well, it's not.
40:05 It's not more complicated than say a subframe on an E46.
40:12 Nice.
40:13 That's the subframe reinstalled.
40:14 This is a good huge Jackman fixed that it was like crazy before.
40:18 It is really slow though.
40:20 Huge Jackman is usually much faster than this.
40:22 Because this here is a rubber bushing.
40:25 Now we're just going to go finger tight and then we're going
40:27 to torque it to spec with the suspension fully loaded and at ride height.
40:35 Leave it loose like that.
40:39 Support bar that is sharp.
40:43 [clears throat] The joint.
40:51 So we'll do a 90° angle from here till there.
40:59 Yep.
41:00 Perfect.
41:09 Got a new o-ring for the oil level sensor.
41:12 Previously this mirror this with RTV like crazy.
41:20 We have fresh oil and filter,
41:21 Liqui Moly goodness, 5W-40, great oil and Mercedes approved.
41:26 New oil filter going in.
41:32 Drink up.
41:38 I bought an oil dipstick to measure the oil level.
41:42 And normally oil dipstick you install it,
41:45 put it in there and it's going to stay there.
41:46 But no, this one is actually used for measuring,
41:50 like I said, and it has millimeters on the dipstick.
41:53 So you push it all the way in, then
41:54 you have this little sheet here and for our engine,
41:57 which is M113.990, minimum level is 137 mm and maximum 168.
42:05 I've put 8 L in, capacity is 8.5, so let's see what it says.
42:10 It says way too low.
42:12 All right, we are at 160 on the dipstick, which is perfect for the first start.
42:17 The oil needs to cycle and then we'll I'll recheck it again.
42:19 Now, I want to remove the belts and inspect the pulleys.
42:22 I feel like I'm hearing some pulley noise,
42:25 even though all of this is relatively newish.
42:28 Previous owner replaced the belts and the pulleys
42:30 with upgraded parts from VRP Performance.
42:33 So, let's just make sure that everything is good there.
42:37 Okay.
42:40 That's meant.
42:42 Compressor is good.
42:44 Zero one is a little bit trickier to get to.
42:46 All right, this one is removed now as well.
42:51 Yep, that's good.
42:52 Alternator is good.
42:53 I think this is the water pump.
42:54 It was also replaced.
42:56 No play, feels good.
42:57 Supper pulley.
42:59 Good as well.
42:59 The one on the bottom, I think that's the one that I'm hearing.
43:03 Yep.
43:04 The bearing's shot.
43:05 It's this one here.
43:10 Hopefully you can hear it.
43:12 But the bearing is not good.
43:14 All right, I'm getting that pulley off.
43:15 Maybe we can just find a replacement bearing and service the pulley.
43:19 I'm going to remove this pulley here.
43:25 Notchy.
43:26 This is a good bearing here on this one.
43:28 See, do I have enough space now?
43:30 Yes, much better.
43:32 See, there's a washer.
43:33 This is notchy as well.
43:35 That is a good bearing.
43:36 Why did it fail so quickly then?
43:41 That is a good bearing.
43:42 Why would it fail?
43:43 Anyway, there's a part number on it, so I'm just going to order a bearing,
43:46 replace it, and that should sure sure solve that issue.
43:50 I placed an order for a replacement bearing.
43:52 For now, I'm going to put everything back together so we can start the engine,
43:55 and once that comes in, we can swap it out.
43:57 We were just about to put all of this back together off camera,
44:00 but I figured out why this one failed.
44:02 So, this is the top pulley,
44:04 and it's the exact same pulley as the one on the bottom that failed.
44:07 And this one has its centering sleeve
44:10 cover thingy that probably came with this pulley.
44:13 And with that pulley, this spins beautifully.
44:16 This one doesn't have that.
44:17 It has this old stock cover.
44:20 And if you try to put that one on this one here, it doesn't work.
44:25 See?
44:27 The pulley cannot turn.
44:28 So, what happened here is someone installed it like that, and then this cover
44:31 cut groove into this pulley until it eventually freed itself, so to speak.
44:37 That's why it's even catching now occasionally.
44:39 The The bearing is still gone, but it cut a groove into the pulley.
44:42 So, I don't have the centering sleeve.
44:44 I don't think I can order it anywhere.
44:46 I'm simply going to cut off the edge here,
44:48 and then once this goes back in, it's not
44:50 going to catch on the pulley when it's spinning.
44:52 But yeah, that's probably why it failed.
44:54 This thing was locked when someone installed it with the stock cover
44:58 like this, and then eventually it freed itself by cutting into the pulley.
45:01 Here, I fixed the issue with this.
45:05 So, I just removed the lip.
45:07 And now when you put the cover on, it does not block the pulley.
45:11 So, I'm going to pop this one on the bottom
45:14 position because it's a bit of a pain to get to.
45:17 And then this one I'm going to put on the top,
45:18 so we can easily replace it when the new bearing arrives in a couple of days.
45:22 I topped off the power steering fluid, so let's hear it run.
45:34 Want to check the PS fluid again and check for any immediate leaks,
45:37 but that fired up rather smoothly.
45:39 All right.
45:40 I think we're good in that department.
45:41 Needs a bit more PS fluid.
45:49 Smooth.
45:49 Real smooth.
45:51 Anyway, I'm going to let it run for a few minutes,
45:53 just making sure we don't have any big leaks right away,
45:56 and then winter wheels time.
45:59 It's been a while since I've driven this car.
46:00 I'm excited, man.
46:02 Say good and talk to winter wheels.
46:07 [snorts] We have Michelin Pilot Sport 5 winter tires,
46:10 and these are brilliant winter tires.
46:11 I have them on every other car that I use in winter.
46:15 M5, M3, M3 I don't really use in winter that much.
46:18 They perform well in snow, in wet, in cold, on the Autobahn, high speeds.
46:25 They're just great tires overall.
46:26 If you're looking for good winter tires, look no further.
46:28 All right.
46:29 Now we need to transfer over this puppy to the four
46:31 post lift so we can torque the rubber bushings.
46:35 I believe I've been a little bit stupid.
46:38 I thought I verified the ET, the offset of these wheels,
46:42 but now that I'm looking at it, it's pretty much in line with the fender.
46:46 I think it's going to rub-a-dub-dub.
46:49 No, they fit.
46:50 They actually fit really good.
46:53 [laughter] Oh, they fit real good.
46:54 We'll see if they're going to rub, but that fits [laughter]
46:57 We don't need spacers, man.
46:59 Oh, that is a good sexy setup.
47:00 I like it.
47:01 Look at that.
47:02 Oh, that's a good fitment.
47:03 That's usually why you get wheel spacers, but this actually looks really good.
47:08 I don't think it'll rub, but we'll see.
47:11 This car, to remind you, has Öhlins coilovers, and I mean, look at these wheels.
47:16 It looks great.
47:18 I like it.
47:19 A lot better than the old ones.
47:21 Man, I really like the style of these wheels.
47:23 Approved.
47:24 Let's get it over.
47:25 No, no, no.
47:26 Torque specifications.
47:27 Squizzy, wheel bolts 130 Nm.
47:33 And I'm also using original Mercedes wheel bolts.
47:35 The aftermarket ones from before used different bolts,
47:38 which you cannot use on these wheels.
47:40 I did not know that.
47:41 Priuson told me about that, but once you try them,
47:44 you can see that the conus of the wheel bolt is different.
47:46 It just doesn't work.
47:48 Anyway, now I can move it over to the four post lift,
47:49 but first I need to shuffle some cars around.
47:52 Down with the M5.
47:55 HIGHER.
47:58 MY PRECIOUS.
48:03 LIFTERS BECAME really tappy after the car has been sitting for a while.
48:07 These cars do not like to sit.
48:09 They like to be driven.
48:11 But, it is winter in Germany and there's so much salt
48:15 on the road that this car simply will never be driven in winter again.
48:19 Turn of the Mercedes now.
48:28 I really like the fitment of the wheels.
48:30 It's really good.
48:32 Lower shock bolt, 165.
48:39 Nice.
48:40 Happy to report that thus far no immediate leaks.
48:43 So, I'm going to put the covers back on, start driving the car,
48:46 and then we're going to revisit this in a few
48:48 days and see if you finally fixed all the oil leaks.
48:51 Just look how good it looks.
48:54 I really like these wheels.
48:56 The fitment is spot-on as well,
48:59 and I might even prefer these wheels over the summer wheels.
49:02 I don't know.
49:02 What do you think?
49:03 They don't require spacers, aggressive stance, but it's just perfect all around.
49:10 We are underneath of the E55, and what a mistake I have to make.
49:15 Yep, I did something dumb.
49:17 I made a mistake-y.
49:19 When I was prepping the surface for the oil pan,
49:21 I accidentally spritzed a little bit
49:23 of that sealant remover onto the rear main seal.
49:26 I immediately tried to clean it with a bit of oil,
49:28 and I thought, "Hm, it's not going to hurt it." Well, it did.
49:31 It really didn't like it.
49:32 It's a Teflon seal, and whatever is in that remover, it just damaged the seal.
49:37 Because after the first test drive, I could smell some burning oil,
49:40 so I knew something was up and put it on the lift.
49:43 I could see oil pouring out from this area here.
49:47 I have everything now cleaned up with brake clean and air to see if I can see
49:50 where it's actually leaking from, but it's been leaking
49:52 dripping on the lift for the last 3 days,
49:54 and I think it's all out of drips.
49:55 It's not a big deal.
49:57 I have a new cover in order, because if you remember,
49:59 I didn't like the condition of this one,
50:00 and then I have a brand new seal from the previous owner.
50:04 So, I'm just going to remove this, clean up the surface,
50:06 reseal it, and then it better not leak anymore, because I've had it.
50:10 I I can't chase oil leaks anymore.
50:12 That's all nice and clean,
50:14 and in the video where I replaced the rear main seal for the first time,
50:17 eagle-eyed viewers noticed that I forgot to put
50:19 RTV on this spot right over there.
50:22 But, I tend to put a thin layer of RTV on both sealing surfaces,
50:27 and that's what I did here.
50:28 I applied RTV here, so that spot did seal correctly.
50:31 That was not the issue.
50:32 The issue is, like I said,
50:34 I can't believe that it ate the seal to the point that it started leaking there.
50:37 It's just crazy.
50:38 It does feel a bit different here than it does, for example, here.
50:42 Here's a new cover from Mercedes, original,
50:47 and then a new original seal, as well.
50:49 We are back in action.
50:51 Everything is bolted up.
50:53 Now, I'm going to let it run in the spot for about 20 minutes or so,
50:56 and just make sure that there are no leaks before I go for a test drive,
50:58 because outside it is snowing.
51:00 It's wet and miserable, so everything is going to get wet underneath,
51:03 but if it's not leaking on the lift,
51:05 that's a very good sign, because it was leaking before on the lift, as well.
51:09 It was actively dripping.
51:10 I mean, the leak was massive.
51:13 Look at that.
51:15 Huge.
51:16 And I know for a fact that the rear main
51:17 seal didn't leak before I did the oil pan gasket.
51:20 Well, reseal the oil pans, because I looked inside with the endoscope.
51:23 Like, it was dry, bone dry.
51:25 And after I did that, I put the endoscope inside,
51:28 and it was just really, really wet.
51:30 So far, the knock and rod bearings, no leaks.
51:35 It is dry.
51:36 So, at this point, I'm going to reinstall the covers,
51:39 drive it home tonight, and then tomorrow,
51:40 once I come back, we'll put some kilometers on it, we can check it again.
51:44 If it's still leaking oil, I'm going to I'm going to fix it.
51:50 That's what I'm going to do.
51:51 I'm still going to fix it.
51:52 No matter what it is.
51:53 It would be nice if it's not leaking oil.
51:55 I really don't have time any more time to do this over and over again.
51:59 Okay, the cover is dry.
52:00 I can have a quick look inside.
52:03 Yeah, still leaking oil.
52:06 Still leaking oil.
52:07 Right, I am baffled.
52:09 I don't understand this.
52:10 It's no longer coming from the top.
52:12 So, let's inspect the rear main seal.
52:15 Oh, no.
52:17 Is that oil?
52:18 The rear main looked oily again, but I'm thinking maybe it's residual oil.
52:22 So, I cleaned up the area and decided to drive the car some more.
52:26 I'll be honest with you.
52:27 I don't think I have emotional strength for this anymore.
52:30 I just I want it to be over.
52:31 Please, no more leaks.
52:33 Still going to leak.
52:35 It just will.
52:38 Oh, yeah.
52:39 That That's not residual.
52:41 That's an active leak there.
52:43 Yep, that's still leaking.
52:45 Yep, rear main seal yet again.
52:48 Oil was pooling right at the bottom of the crank
52:50 and leaking down the cover as you can see here.
52:55 One of the things that I hate the most is doing the same job twice.
52:59 Same repair two times.
53:01 And that's why I always read instructions,
53:03 repair manuals, torque everything to spec,
53:05 go slow and methodical, so I don't have to do it again.
53:09 But, stuff happens.
53:10 Parts fail.
53:11 You make mistakes.
53:13 I've done plenty of stuff twice.
53:15 You You live and you learn.
53:16 So, how about when you have to do things thrice?
53:21 The transmission is out for the third time.
53:24 I just want to be clear.
53:25 I am calm.
53:27 The rear main seal is leaking again.
53:29 So, let's talk about stupid Teflon seals, for which I have a newly found hatred.
53:41 I've installed a brand new cover, a brand new seal,
53:44 and as you can see the thing is still leaking, particularly here on this end.
53:49 I don't know if it's leaking from the rubber sealing
53:52 up against the cover or the seal up against the crank.
53:55 Let's get this off and then we'll talk about
53:57 the installation procedure and how this thing is supposed to seal.
54:01 [snorts] First of all, you have your traditional rubber radial shaft seals,
54:10 and that's a rubber seal with a spring on the inside that kind
54:13 of clamps up against the shaft or the crankshaft in this case,
54:16 and that's what makes the seal.
54:17 Then they introduced this, a Teflon PTFE seal.
54:21 And this is supposedly an upgrade over a rubber
54:24 one because it can withstand more speeds, more RPMs,
54:27 it's more chemically resistant, even though it doesn't look like it,
54:30 and it should last longer as well.
54:33 Debatable, if you ask me.
54:34 The downside is that this Teflon seal is far
54:37 more sensitive and prone to damage or errors during installation.
54:41 If you touch this lip like this, you're going to damage the seal.
54:45 At least that's what the repair manual says.
54:47 Do not touch this lip or you're going to damage it.
54:49 The way this thing is installed, first of all,
54:51 you have to make sure that the shaft,
54:53 the surface on which it's going to ride, is perfect without any imperfections.
54:57 It cannot have any grooves, pitting, or rust.
54:59 That's number one.
54:59 Number two, it needs to go in dry.
55:01 Absolutely no oil should be used, according to the instructions.
55:05 That being said, I've done loads of these seals in BMW engines,
55:08 and there were instances where I used some oil,
55:11 like a little bit of oil on the crankshaft,
55:13 and I never ever had one leak after, never.
55:16 To do things correctly, we are going to install it dry.
55:19 That's what I did with this one.
55:20 I can't remember what I did with the first one.
55:22 Second, third, there is a breaking or like bedding in period for this seal,
55:27 and according to the instructions, for the first 15-30 minutes,
55:31 it can actually leak some oil until it
55:33 transfers a layer of PTFE onto the crankshaft, and that's what makes the seal.
55:38 So, I believe when I sprayed that cylinder remover,
55:40 and then I followed up with oil,
55:41 I broke that seal, and that's why it started leaking like crazy.
55:45 This one, I don't I don't know why
55:46 this one failed because I installed it correctly.
55:49 So, it went in dry.
55:50 I also moved it a couple of millimeters back,
55:53 so it doesn't ride on the same spot that the old
55:55 one did in case there's some like grooves and stuff.
55:58 I mean, there isn't, but to be on the safe side,
56:00 you want to install it in a different position.
56:01 So, it went in dry.
56:02 I also left it overnight cuz the stretch say you have to leave it on there
56:06 for 4 hours before starting the engine so
56:08 you can form the shape around the crankshaft.
56:10 So, I've done all of that correctly.
56:11 Now, looking at it, you can see some black stuff on the on the surface here.
56:15 I think we're going to try and polish the crankshaft before
56:18 we install a new one cuz that might be the issue.
56:21 This time around, I have a Corteco seal.
56:23 This is OE for Mercedes, and that's what we have here.
56:26 These two are Corteco, but I also bought Victor Reinz one,
56:30 and we're going to go with this cuz I like it better.
56:32 This is thicker metal, which means you can't damage it as easily.
56:36 This looks more beefy, if you will, this rubber seal,
56:39 and then this inner Teflon seal is wider.
56:42 So, I like this better.
56:43 We're going to use this one.
56:44 So, let's knock out this one and install this one.
56:48 So, knock out the old one.
56:54 Oh, I see.
56:55 So, this one is plastic, this inner surface, while Victor Reinz is metal, man.
57:00 Yeah, definitely like this better.
57:02 Okay, got it out in a jiffy on the five-speed.
57:05 So, Corteco has a little bit of metal only here on the side,
57:09 but then this inner lip is plastic, while Reinz's seal is all all metal,
57:13 so you can't damage it or anything like that.
57:15 I'm not saying Corteco seals are bad.
57:17 They aren't.
57:18 Just in this case, like comparing the two, I prefer the Victor Reinz.
57:30 It's about two two and a half mils below the lip here, and it is evenly seated.
57:34 I just measured with my measuring device.
57:36 So, this is good to go.
57:37 The surface on the inside is spotless.
57:40 So, for all intents and purposes, this should not leak if installed correctly.
57:44 All right, I've cleaned up and prepped the sealing surface.
57:46 Now, I'm going to use a fine Scotch-Brite and just clean up the crank.
57:51 I've applied some oil on the Scotch-Brite,
57:54 so this doesn't go all over the place.
57:56 Now, let's just carefully clean.
57:59 Yes.
58:00 See, there are were some impurities, like a varnish.
58:05 Yeah.
58:06 Much cleaner surface now.
58:07 Okay, I've applied RTV wherever it needs to be applied.
58:10 Going to wipe the crank off again.
58:12 The dowels, the locating dowels are there as well.
58:15 This really shouldn't leak if I install it correctly.
58:19 So, no oil on the crank.
58:21 Cup goes there.
58:27 So, yeah.
58:28 Start it like that.
58:30 And then lean it a bit downwards.
58:36 There you go.
58:37 It went in.
58:42 Brilliant.
58:43 Now, I got to go home and pick up the flywheel bolts in the morning.
58:46 Need new ones cuz they're a stretch bolts.
58:47 And then this needs to set for 4 hours.
58:49 So, by tomorrow it should take its shape.
58:52 Another point for Victor Reinz.
58:54 This is the installation sleeve that comes with Corteco seal,
58:57 and this lines up with the crank.
58:59 And that means that if you're not holding
59:00 steady on this cup while installing the seal,
59:03 you can catch the lip of the seal on the crank and damage it.
59:07 Well, here, this goes over the crank.
59:10 So, this is the same diameter as the crank.
59:12 Look at that.
59:13 Goes in.
59:14 So, there is absolutely no chance you can damage the seal.
59:17 It just slips over the seal and directly onto the crank.
59:20 Nothing to catch to damage it.
59:21 So, yeah.
59:22 I say in this situation, Victor Reinz wins.
59:25 It's been running on the lift for about 30 minutes now and let's see.
59:30 It would appear no immediate leaks.
59:35 It looks dry.
59:37 Let's turn it off.
59:39 I'm going to reset the trip computer.
59:41 There you go, 0 km.
59:42 So, let's start driving and monitor the situation.
59:45 We covered 54 km, so let's have a quick looky-loo.
59:51 Okay.
59:55 Still leaking oil.
59:56 Oh, yes.
59:59 [sighs] Yep, that is oil.
1:00:06 It's coming above above the upper upper oil pan.
1:00:10 Let me get my endoscope.
1:00:11 Everything is hot and the camera will
1:00:13 overheat because it has a temperature sensor.
1:00:15 The rear main seal is dry.
1:00:18 So, this is normally where it was.
1:00:20 Yeah, no, that's dry.
1:00:22 So, that must mean that the oil pan is leaking.
1:00:26 I got to let it cool off a little bit and then have another look,
1:00:29 but it's possible that the upper oil pan is
1:00:31 not sealing and that I need to redo that again.
1:00:33 I don't quite understand it cuz I was
1:00:34 quite careful with how I was applying the RTV.
1:00:37 I guess this video is just do some jobs once or twice or thrice or four times.
1:00:42 I don't know.
1:00:43 Anyway, besides that, a new issue has arisen.
1:00:46 Today, the car left me stranded in the city.
1:00:49 I was running some errands, came back to the car,
1:00:51 tried to start it, and it wouldn't.
1:00:53 Dead battery.
1:00:54 It's been acting up for about a week or so now.
1:00:57 I would drive it back home, which is 25 km,
1:00:59 and that's enough to charge the battery,
1:01:01 but then the next morning I tried to start it,
1:01:03 it's throwing some errors on the dash saying
1:01:05 that the battery performance is degraded and some functions are disabled.
1:01:08 And I thought, okay, maybe it has a battery drain issue,
1:01:10 parasitic drain, and we can diagnose that.
1:01:13 But today I was driving it around and then ended up with a dead battery.
1:01:16 So, maybe the alternator is not charging correctly.
1:01:19 So, let's check that first.
1:01:20 Start the car, grab the multimeter, and check the voltage on the battery.
1:01:23 That will tell us if the alternator is charging correctly.
1:01:25 So, this is the original Mercedes battery.
1:01:28 Don't know how old it is.
1:01:29 Does it say anywhere?
1:01:31 Okay, let's check the voltage.
1:01:34 It's 12.3.
1:01:35 Given that I just parked the car,
1:01:37 it should be more closer to fully charged, 12.5 or 12.6.
1:01:46 Hear that?
1:01:47 Really, really slow to crank.
1:01:50 14 volts.
1:01:51 That's one healthy, healthy alternator.
1:01:53 So, let's check the battery.
1:01:54 I have a battery tester here.
1:01:56 It's a battery test.
1:01:59 Replace.
1:02:00 The battery is bad.
1:02:01 Life 28%.
1:02:04 The battery is bad.
1:02:05 I mean, I'm not surprised if I'm being honest.
1:02:07 When the car came from the auction, the battery was kind of weak and flat.
1:02:10 Let's replace it.
1:02:11 I have another one, and then we'll see if it fixes the situation.
1:02:14 And hopefully, we don't have a parasitic drain somewhere.
1:02:16 But, I can check for that later.
1:02:22 This is the old battery from the Bentley.
1:02:24 And this was a new battery from I think it said somewhere 2025.
1:02:29 And I revived it.
1:02:30 So, let's see if it's if it's good.
1:02:34 Good.
1:02:35 Life 100%.
1:02:36 Haha.
1:02:37 12.3 volts.
1:02:38 So, this one is going to go in the Mercedes cuz this is a good battery.
1:02:41 All right, Mercedes, let's give you some Bentley reliability.
1:02:45 Oh, wow.
1:02:47 There's also a tiny battery in the front.
1:02:49 Do we need to double check?
1:02:50 For now, this is A-OK, and then double check a bit later when I
1:02:54 find some time if there's a drain or not.
1:02:57 The small battery should be here underneath of the cabin air filter.
1:03:02 Mhm.
1:03:03 FIAMM Italia Replace.
1:03:08 So, this one is bad as well.
1:03:09 So, I need to order that new.
1:03:11 I shall order a new one.
1:03:12 All right, the engine is now cold, so let's take a closer look.
1:03:16 So, that's the bottom of the rear main seal.
1:03:18 That looks pretty dry.
1:03:20 Yeah, the rear main looks dry.
1:03:22 So, the previous one had oil there and quite a bit on the bottom.
1:03:28 This one is dry.
1:03:29 That's just dust.
1:03:30 And then it was running here.
1:03:33 That was the part it was leaking before.
1:03:35 That's now dry.
1:03:36 So, the rear main seal is no longer sealing or leaking.
1:03:39 I was really careful when resealing the oil pans
1:03:42 because I didn't want it one to do that again.
1:03:44 But, if it is leaking and it's possible that it's
1:03:46 something in this corner and that's where the lower oil pan,
1:03:50 the rear main seal cover, and the block all connect.
1:03:53 So, maybe when I was removing the rear cover two times,
1:03:56 the seal got messed up there.
1:03:57 I don't know.
1:03:58 It's not a huge deal to do the the oil pan again.
1:04:00 I can do it really quickly.
1:04:02 It's not as bad as taking the transmission out.
1:04:04 I'm just happy that the rear main seal is not leaking anymore.
1:04:07 Wanted to show you something.
1:04:08 Here's why I think the second rear main seal didn't work out.
1:04:11 This is the first seal that I installed that didn't leak until I ruined it.
1:04:15 And notice how the lip is clean.
1:04:19 There's no dirt on it.
1:04:20 I mean, this was in the trash, but there is no dirt on it.
1:04:23 This is the second one that I installed
1:04:26 and this one I installed a bit differently in the sense
1:04:28 that I moved it millimeter or 2 mm back
1:04:31 backwards in comparison to where this one was installed initially.
1:04:34 I cleaned the crank with a clean carbon fiber towel
1:04:37 and a bit of brake cleaner and it was clean.
1:04:39 But, if you look at this seal right about there,
1:04:43 you can see some black stuff on there.
1:04:46 So, I believe what happened is there was some varnish
1:04:48 on the crank and instead of forming a nice seal,
1:04:51 this lip kind of took that varnish away and it never formed that seal,
1:04:56 that nice tight PTFE seal.
1:04:58 So, that's why it was leaking.
1:04:59 The crank was not clean enough.
1:05:01 So, top tip there, something that I'm going
1:05:02 to practice from now on with stupid Teflon seals,
1:05:05 make sure you clean the crank thoroughly,
1:05:06 not just with brake cleaner and and a carbon fiber towel.
1:05:09 In my case, I grabbed the finest Scotch-Brite that I have that you can buy,
1:05:13 bit of oil, and it cleaned up the crank beautifully.
1:05:15 And now the new rear main seal is not leaking, not even a lick of oil.
1:05:19 Here where I messed it up while removing it, you can see how black it is.
1:05:23 So, yeah, pretty sure [clears throat] that was the cause.
1:05:25 Had this been a rubber seal, that wouldn't be an issue.
1:05:28 Less than an hour into this, things are moving very quickly,
1:05:30 especially since engineering to do this, it's it's very good.
1:05:33 The only thing that I found so far, there was one bolt on the inside here,
1:05:37 the upper oil pan, that was full with oil on the inside.
1:05:40 So, I think that's where the leak was coming from.
1:05:43 The RTV didn't set there, or I don't know,
1:05:45 maybe the surface wasn't clean enough,
1:05:46 maybe there was some oil, I didn't put enough RTV.
1:05:48 Let's get this thing off and then see what's what.
1:05:51 Let's get it on.
1:05:54 Yeah, luckily it didn't get squished properly.
1:05:57 Now, this time around I'm going to be very
1:05:58 careful and not spritz anything on the rear main.
1:06:03 See the puddle here?
1:06:04 That's where it was leaking from.
1:06:05 And this part didn't seal with the block on the top for some reason.
1:06:10 I don't know if I didn't use enough RTV, but you can see that it's not flat.
1:06:14 It's like rough, which means it didn't it didn't do that.
1:06:16 Like, here on the back you can see a nice flat surface here as well,
1:06:19 but here not so much.
1:06:20 And the previous shop, looks like they sanded the sealing surface,
1:06:24 which is a completely wrong thing to do because you're removing material.
1:06:28 I found the issue.
1:06:29 First issue is that oil appears here really quickly.
1:06:33 It's coming from above,
1:06:34 so I'm going to have to use a carbon fiber towel and clean all around,
1:06:37 so it doesn't drip down.
1:06:38 And this is a problem because if this is an oily surface and you put RTV on it,
1:06:43 it's never going to seal.
1:06:44 Second problem, on this side you can see that the rear
1:06:47 cover is perfectly flat with the block here, it's not.
1:06:51 And it shouldn't be like that because you have
1:06:53 two dowel pins here to line up the cover.
1:06:55 So, that's all dandy, but I can see quite a lot of sanding marks here.
1:06:59 So, I don't know why they did what they used to clean up the block,
1:07:02 maybe they removed some material.
1:07:03 And now that doesn't line up,
1:07:05 so the gap is going to be a little bit bigger here,
1:07:06 which is why you need to use a bit more sealant
1:07:09 than normal and why I didn't seal the first time around.
1:07:12 You can see just sanding marks everywhere.
1:07:14 We're back in business.
1:07:15 We're running on the lift for about 30 minutes
1:07:17 and thus far bone dry, which is good news.
1:07:20 So, at this point I can start test driving the car and monitor for leaks.
1:07:24 I received the new bearing, so let's service this pulley here.
1:07:28 First, circlip.
1:07:32 Here you go.
1:07:33 So, let's press out the old bearing.
1:07:39 Oh, yeah.
1:07:39 That was nice and easy.
1:07:40 So, that's the shot bearing.
1:07:42 This is all nice and clean and here's a brand new bearing, SKF, made in Italy.
1:07:49 [music] Yeah, it's not It's not good.
1:07:57 Yeah, the whole thing is spinning on the inside.
1:07:59 Even the old one has play and I just measured them.
1:08:02 They're the exact same diameter.
1:08:03 So, this pulley is actually ruined.
1:08:05 Probably from heat here being grinded and whatnot,
1:08:09 it expanded and now the bearing no longer fits tightly.
1:08:11 I placed an order for a new pulley.
1:08:13 In the meantime, Liqui Moly saves the day.
1:08:16 This company has absolutely everything that you need for a workshop.
1:08:21 They are the biggest sponsor supporter of the channel since
1:08:24 pretty much the very beginning and it is the best
1:08:26 supporter to have when you restore cars because I
1:08:29 don't have to buy a single product for this workshop.
1:08:32 They have everything in their lineup.
1:08:34 And this liquid is specifically made for bushings and bearings.
1:08:38 And I've used this product before on pilot bearings.
1:08:41 It actually works beautifully.
1:08:42 You just dab that on the inside,
1:08:44 press the bearing in, leave it for minimum 3 hours and it's going to Yeah.
1:08:49 Keep the bearing in place.
1:08:50 So, this might as well be a permanent solution,
1:08:53 but since I'm going to be selling a car, I'm going to replace the entire pulley.
1:08:56 But, I've used this on a pilot bearing that felt kind
1:08:59 of a bit loose and I did inspect it after like 5,000 km,
1:09:02 it's still holding up absolutely perfect.
1:09:04 So, great product this.
1:09:05 Just wanted to make sure that the car doesn't have a parasitic drain,
1:09:08 so I hooked up the multimeter, the car went to sleep, and look at that.
1:09:12 That is a draw of 20 milliamps, that's nothing.
1:09:15 I found some information online that on W211, S211,
1:09:19 a draw of below 65 milliamps is acceptable, so that is splendid.
1:09:24 I got a new small battery,
1:09:26 which I'll chuck in the front, and then this issue is resolved.
1:09:29 Covered 117 hard kilometers, was cruising at high speed constantly.
1:09:34 Let's see if the oil leaks are finally resolved.
1:09:36 Seriously this.
1:09:37 I'm actually scared to look.
1:09:39 Straight for that spot.
1:09:41 Dry.
1:09:42 Yes.
1:09:42 This one as well.
1:09:43 Let me get the covers off, but it is dry.
1:09:46 Finally.
1:09:48 Finally, this thing is leak-free.
1:09:51 This corner, bone dry.
1:09:53 Here, dry.
1:09:54 Here, dry.
1:09:56 And I can also see up front that both oil pans are sealing tight.
1:10:01 No wetness or traces of leaks anywhere on this car anymore,
1:10:04 and I'm really really happy about this development because it's
1:10:08 been a battle to get it to stop to leak.
1:10:10 That cover, dry.
1:10:11 That cover, reinforcing plate, dry.
1:10:14 Oil leaks have finally been defeated.
1:10:19 Good car.
1:10:20 Sign, AMG.
1:10:25 Traction control light at 150.
1:10:31 It's a rocket this car.
1:10:32 But before I forget, I keep on them pads, they're fine.
1:10:35 They work great on this car because it has that SBC braking system.
1:10:40 The brake pedal is weird to begin with, so I'm not feeling much of a difference.
1:10:43 It feels about the same as before.
1:10:45 And then you have the added advantage of less dust, so approved on this car.
1:10:49 Anyway, why am I selling this car?
1:10:51 There actually two reasons.
1:10:54 Number one, and I've already complained about this.
1:10:57 The clunkomatic, listen.
1:11:00 As an automatic, an everyday car in the city,
1:11:02 on the highway, for a normal person, it works fine.
1:11:05 It's a fine automatic, but it is a very,
1:11:08 very old clunkomatic, and the whole experience is just very uninspiring.
1:11:12 You have this beautiful engine, this beautiful interior.
1:11:14 It handles amazing thanks to Öhlins suspension.
1:11:17 But then you have this damn thing.
1:11:19 It's just when you shift fast, it feels like this.
1:11:26 That's how the gear changes feel,
1:11:28 and I know there's nothing wrong with the transmission itself.
1:11:30 It's just the way it is.
1:11:32 It's an old clunkomatic.
1:11:33 And there are solutions to that problem.
1:11:36 You can manually swap it.
1:11:37 You can put the more modern 7-speed Mercedes automatic gearbox.
1:11:41 That brings us to reason number two, fuel consumption.
1:11:44 This thing uses about the same amount of fuel as my E60 M5,
1:11:49 which is a manual 6-speed transmission naturally aspirated 5-liter V10.
1:11:55 And that's around 18 liters per 100 kilometers,
1:11:58 and my daily commute now is 50 to 100 kilometers,
1:12:01 and it's just I'm spending too much on fuel.
1:12:04 And if I have to choose between the two,
1:12:06 the E60 M5 and this, I'd rather daily drive
1:12:09 my V10 manual M5 than this, if I'm being honest.
1:12:13 Also, for daily driving,
1:12:15 and I know this goes against the norm and every other person out there,
1:12:18 I prefer to daily drive a manual car.
1:12:21 Why?
1:12:22 It just keeps me more focused, more on my toes, more concentrated.
1:12:25 This, it's too easy.
1:12:27 You have automatic transmission, you have to think about gear changes.
1:12:30 It's just like a video game.
1:12:31 You put your foot down, and off you go.
1:12:33 Well, with the manual, you're just you have to think about gear changes.
1:12:36 You have to use your right hand, your left foot,
1:12:38 maybe a little bit of rev-matching, little bit of heel-and-toe.
1:12:41 It's just more fun for daily driving, at least to me.
1:12:44 And I don't mind it.
1:12:44 I grew up with a manual, and I can daily drive it even in LA traffic.
1:12:48 So, there's that.
1:12:49 My time with the E55 AMG has come to an end and the car is up for sale.
1:12:54 Mechanically, the car is perfect.
1:12:57 It leaks no oil or any other kinds of fluid.
1:13:00 It is absolutely leak-free.
1:13:03 It also doesn't consume oil and mechanically and generally doesn't need a thing.
1:13:06 It's just good to go.
1:13:08 Interior as well is in really, really nice condition.
1:13:11 Doesn't need anything here.
1:13:12 Cosmetically, however, it does need a bit of paint.
1:13:15 We have some mismatched panels.
1:13:17 There's a scratch on the rear quarter panel.
1:13:19 The side skirt is still a little bit broken.
1:13:21 I can't find one in in the same color.
1:13:23 The bumper as well has some stuff.
1:13:25 It just needs paint here and there to make it cosmetically perfect.
1:13:29 But as a usable car that you just want to drive and use, it's good to go.
1:13:34 It needs nothing.
1:13:35 The price is 23,900 European shillings.
1:13:39 Why such a specific price?
1:13:41 Well, I want I need 20 grand for this car
1:13:44 cuz that's more or less what I have in it.
1:13:46 But because I bought this car through my company with VAT,
1:13:50 by German law, I have to add VAT when I'm selling the car.
1:13:53 So, that's why 23,900 and that's including 19% VAT.
1:13:58 If you have a valid VAT number or you have a way to deduct it,
1:14:02 then the price for you is 20k.
1:14:03 But for a private person, I have to do that.
1:14:06 Just the way it is.
1:14:06 I don't make up the rules.
1:14:08 Anyway, this is not going to be my last adventure with a Mercedes.
1:14:11 I really want to experience the mighty M156 naturally aspirated V8.
1:14:16 Either in the successor to this car, the W212.
1:14:20 I don't really like the look of it though.
1:14:21 Or maybe in the S-Class.
1:14:23 You never know.
1:14:23 We'll see.
1:14:24 But it's not my last rodeo with a Mercedes.
1:14:26 It's engineering is great.
1:14:28 Everything is just designed with servicing in mind.
1:14:31 The only thing I don't like is that it's sealed with RTV, but it is what it is.
1:14:34 Once you get used to it, it's it's not a problem at all.
1:14:36 Other than that, working on this car it's pretty much the same as on a BMW.
1:14:39 It just makes sense.
1:14:40 It's not VW or a Maserati, you know.
1:14:42 Beautiful day today.
1:14:43 If you're interested in the car, please email me.
1:14:46 The email is in the description of the video.
1:14:48 Oh, before before we close out the car, it still needs wheel alignment.
1:14:52 I haven't been able to do that because
1:14:54 there is no good wheel alignment shop in Frankfurt.
1:14:56 Most likely I'll have to go to the Nürburgring to do
1:14:58 that, but before the car goes up for sale, that will be done.
1:15:02 Circling back to fuel consumption,
1:15:03 I know some of you are screaming at the screen right now, "Get a diesel!
1:15:07 Get a diesel!" No.
1:15:10 Life is too short to drive a diesel.
1:15:12 I could drop dead tomorrow and I'll die driving a diesel.
1:15:17 That.
1:15:18 Not doing that.
1:15:19 I already have a replacement for this car and it
1:15:21 has a beautiful inline-six cylinder with a manual transmission.
1:15:26 A perfect recipe for daily driver and it's not going to be terrible on fuel.
1:15:30 Since filming the last video on this car,
1:15:32 I realized I've been driving this Mercedes improperly.
1:15:36 I've been driving it like a BMW and clearly it's not one.
1:15:41 You don't chase the revs.
1:15:43 You don't stab the throttle.
1:15:44 You don't cut corners.
1:15:45 You just drive this relaxed because it has so much torque.
1:15:49 You don't jab the throttle.
1:15:51 You just ease into it and wait for the transmission to ask you, "Oh,
1:15:58 you want to go fast?" "Okay, now we go fast." And then you go fast.
1:16:05 It's just relaxed driving experience with plenty of torque.
1:16:08 It's a missile.
1:16:09 We're doing 220 right now and it's effortless.
1:16:13 Effortless.
1:16:15 And then you get cut off by a crappy VW, but that is fine.
1:16:20 Transmission will transmission and off we go again.
1:16:25 So, yeah, it's it's an amazing car.
1:16:27 I can totally understand why this car has such
1:16:29 a following and this M113K is such a good engine.
1:16:33 It has so much power and torque, it's ridiculous.
1:16:36 Just I wish they paired it with a better transmission,
1:16:38 but like I said, there are solutions to that problem.
1:16:40 And this being the wagon touring, even better.
1:16:44 It just makes it even better.
1:16:47 See this?
1:16:47 It didn't even downshift, but there's so much torque.
1:16:49 It just pulls you.
1:16:53 Man, great car this.
1:16:55 I'm really glad I managed to put it back
1:16:57 on the road and experience it for a few months.
1:17:00 And as I said, mechanically this car is
1:17:02 going to be trouble-free for the next owner.
1:17:04 That's my goal with every project, with every car that I sell and that I finish.
1:17:08 Thank you so much for watching.
1:17:10 I hope that you enjoyed this video and I'll see you in the next one,
1:17:12 which will be on Oh, frankly, I don't know.
1:17:16 I'm doing a special project in the US at BimmerWorld HQ.
1:17:20 So, probably that.
1:17:21 But there's more stuff cooking in the background.
1:17:23 Alpina, I still didn't finish that.
1:17:25 Quite a lot I don't know.
1:17:27 Okay?
1:17:27 I don't know.
1:17:28 We'll see.
1:17:29 Till next one.
1:17:30 Now, I need to go to Bauhaus to buy
1:17:32 a big pole because I need to remove a vibration damper
1:17:35 on my E46 cuz I removed the cylinder head
1:17:38 and in the process the timing chain got No, it's good.
1:17:42 It's great.
1:17:43 I have time to do that.
1:17:44 It's not like I'm going to the US in a couple of days.