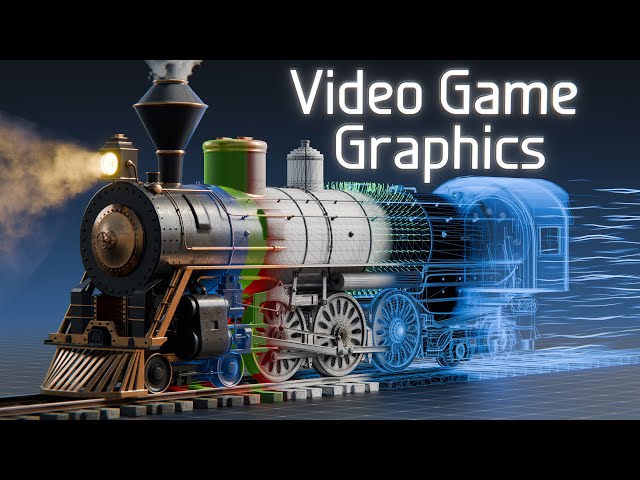
How do Video Game Graphics Work?
Branch Education
0:00 Video games have spectacular graphics,
0:02 capable of transporting you to incredibly detailed cities,
0:06 heart-racing battlegrounds, magical worlds, and breathtaking environments.
0:12 While this may look like an old western
0:15 train station and locomotive from Red Dead Redemption 2,
0:18 it’s actually composed of 2.1 million vertices assembled into 3.5 million
0:25 triangles with 976 colors and textures assigned to the various surfaces,
0:31 all with a virtual sun illuminating the scene below.
0:35 But perhaps the most impressive fact is that these vertices, textures,
0:40 and lights are entirely composed of ones and zeroes that’s continuously
0:46 being processed inside your computer’s graphics card or a video game console.
0:51 So then, how does your computer take billions of ones
0:56 and zeroes and turn it into realistic 3D graphics?
1:01 Well, let’s jump right in.
1:06 The video game graphics rendering pipeline has three key steps:
1:15 Vertex Shading, Rasterization, and Fragment Shading.
1:18 While additional steps are used in many modern video games,
1:22 these three core steps have been used for decades
1:26 in thousands of video games for both computers and consoles
1:29 and are still the backbone of the video game
1:32 graphics algorithm for pretty much every game you play.
1:36 Let’s begin with the first step called vertex shading.
1:39 The basic idea in this step is to take all
1:43 the objects’ geometries and meshes in a 3D space and use
1:47 the field of view of the camera to calculate where
1:51 each object falls in a 2D window called the view screen,
1:54 which is the 2D image that’s sent to the display.
1:58 In this train station scene, there are 1,100 different models and the camera’s
2:04 field of view sections off what the player sees,
2:07 reducing the number of objects that need to be rendered to 600.
2:12 Let’s focus on the locomotive as an example.
2:15 Although this engine has rounded surfaces and some rather complex shapes,
2:20 it’s actually assembled from 762 thousand
2:23 flat triangles using 382 thousand vertices
2:27 and 9 different materials or colors applied to the surfaces of the triangles.
2:34 Conceptually, the entire train is moved
2:37 as one piece onto the viewscreen, but actually,
2:40 each of the train’s hundreds of thousands of vertices are moved one at a time.
2:46 So, let’s focus on a single vertex.
2:48 The process of moving a vertex, and by extension, the triangles and the train,
2:54 from a 3D world onto a 2D view screen is done using 3 transformations.
2:59 First moving a vertex from model space to world space,
3:04 then from world space to camera space,
3:07 and finally from the perspective field of view onto the view screen.
3:13 To perform this transformation we use the X,Y,
3:16 and Z coordinates of that vertex in modeling space, then the position, scale,
3:21 and rotation of the model in world space,
3:24 and finally the coordinates and rotation of the camera and its field of view.
3:30 We plug all these numbers into different transformation
3:33 matrices and multiply them together resulting in the X
3:36 and Y values of the vertex on the view screen as well as a Z value or depth,
3:43 which we’ll use later to determine object blocking.
3:46 After three vertices of the train are transformed using similar matrix math,
3:50 we get a single triangle moved onto the view screen.
3:54 Then the rest of the 382 thousand vertices
3:58 of the train and the 2.1 million vertices of all the 600 objects in the camera’s
4:04 field of view undergo a similar set of transformations,
4:09 thereby moving all 3.5 million triangles onto a 2D viewscreen.
4:15 This is an incredible amount of matrix math,
4:18 but GPUs in graphics cards and video
4:20 game consoles are designed to be triangle mesh
4:24 rendering monsters and thus have evolved over decades
4:28 to handle millions of triangles every few milliseconds.
4:32 For example, this GPU has 10,000ish cores designed to efficiently execute
4:39 up to 35 trillion operations of 32-bit multiplication and addition every second,
4:46 and, by distributing the vertex co-ordinates
4:49 and transformation data among each of the cores,
4:53 the GPU can easily render the scene resulting in 120 or more frames a second.
5:01 Now that we have all the vertices moved onto a 2D plane,
5:05 the next step is to use the 3 vertices of a single triangle
5:09 and figure out which specific pixels
5:11 on your display are covered by that triangle.
5:15 This process is called rasterization.
5:17 A 4K monitor or TV has a resolution of thirty-eight forty by twenty-one sixty,
5:26 yielding around 8.3 million pixels.
5:29 Using the X and Y coordinates of the vertices
5:32 of a given triangle on the view screen,
5:35 your GPU calculates where it falls within this massive grid
5:39 and which of the pixels are covered by that particular triangle.
5:43 Next, those pixels are shaded using
5:46 the texture or color assigned to that triangle.
5:50 Thus, with rasterization,
5:51 we turn triangles into fragments which are groups of pixels that come
5:57 from the same triangle and share the same texture or color.
6:01 Then we move on to the next triangle
6:04 and shade in the pixels that are covered by it
6:07 and continue to do this for each of the 3.5
6:10 million triangles that were previously moved onto the viewscreen.
6:14 By applying the Red Blue and Green color
6:17 values of each triangle to the appropriate pixels,
6:20 a 4K image is formed in the frame buffer and sent to the display.
6:26 You’re probably wondering how we account
6:28 for triangles that overlap or block other triangles.
6:31 For example, the train is blocking the view of much of the train station.
6:37 Additionally, the train has hundreds of thousands of triangles
6:40 on its backside that are sent through the rendering pipeline,
6:43 but obviously don’t appear in the final image.
6:47 Determining which triangles are in front is called the visibility
6:51 problem and is solved by using a Z-buffer or Depth Buffer.
6:56 A Z-Buffer adds an extra value to each of the 8.3 million pixels
7:01 corresponding to the distance or depth that each pixel is from the camera.
7:05 In the previous step, when we did the vertex transformations,
7:09 we ended up with X and Y coordinates,
7:12 but then also got a Z value that corresponds
7:16 to the distance from the transformed vertex to the camera.
7:20 When a triangle is rasterized,
7:22 it covers a set of pixels and the Z value or depth
7:27 of the triangle is compared with the values stored in the Z-Buffer.
7:31 If the triangle’s depth values are lower than those in the Z-buffer,
7:36 meaning the triangle is closer to the camera,
7:38 then we paint in those pixels using the triangle’s
7:42 color and re-place the Z-buffer’s values using that triangle’s Z-values.
7:48 However, let’s say a second triangle comes along with Z
7:51 values that are higher than those in the Z-buffer,
7:54 meaning the triangle is further away.
7:56 We just throw it out and keep the pixels
8:00 from the triangle that was previously painted with lower Z-values.
8:04 Using this method, only the closest triangles to the camera
8:08 with the lowest Z-values will be displayed on the screen.
8:12 By the way, here’s the image of the Z or Depth buffer,
8:17 wherein black is close and white is far.
8:20 Note that because these triangles are in 3D space,
8:24 the vertices often have 3 different Z values,
8:27 and thus each individual pixel of the triangle
8:31 needs its Z value computed using the vertex coordinates.
8:35 This allows intersecting triangles to properly
8:38 render out their intersections pixel by pixel.
8:42 One issue with rasterization and these pixels is that if the triangle
8:46 cuts at an angle and passes through the center of the pixel,
8:50 then the entire pixel is painted with that triangle’s
8:53 color resulting in jagged and pixelated edges.
8:55 To reduce the appearance of these jagged edges,
8:59 graphics processors implement a technique called Super Sampling Anti-Aliasing.
9:06 With SSAA, 16 sampling points are distributed across a single pixel,
9:11 and when a triangle cuts through a pixel,
9:14 depending on how many of the 16 sampling points the triangle covers,
9:19 a corresponding fractional shade of that color is applied to the pixel,
9:24 resulting in faded edges in the image
9:26 and significantly less noticeable pixelization.
9:28 One thing to remember is that when you’re playing a video game,
9:33 your character’s camera view as well as the objects
9:37 in the scene are continuously moving around.
9:40 As a result, the process and calculations within vertex shading, rasterization,
9:47 and fragment shading are recalculated for every single frame once every
9:52 8.3 milliseconds for a game running at 120 frames a second.
9:57 Let’s move onto the next step which is Fragment Shading.
10:01 Now that we have a set of pixels corresponding to each triangle,
10:06 it’s not enough to simply paint by number to color the pixels.
10:10 Rather, to make the scene realistic,
10:12 we have to account for the direction and strength of the light or illumination,
10:17 the position of the camera, reflections, and shadows cast by other objects.
10:22 Fragment shading is therefore used to shade in each
10:26 pixel with accurate illumination to make the scene realistic.
10:29 As a reminder, fragments are groups
10:32 of pixels formed from a single rasterized triangle.
10:36 Let’s see the fragment shader in action.
10:39 This train engine is mostly made of black metal,
10:42 and if we apply the same color to each of its pixel fragments,
10:46 we get a horribly inaccurate train.
10:48 But once we apply proper shading,
10:51 such as making the bottom darker and the top lighter,
10:55 and by adding in specular highlights or shininess
10:57 where the light bounces off the surface, we get a realistic black metal train.
11:03 Additionally, as the sun moves in the sky,
11:06 the shading on the train reflects the passage of time throughout the day,
11:11 and, if it’s night, the materials and colors of all
11:15 the objects are darker and illuminated from the light of the fire.
11:19 Even video games such as Super Mario 64 which is almost 30 years old have some
11:25 simple shading where the colors of surfaces are
11:28 changed by the lighting and shadows in the scene.
11:32 So, let’s see how fragment shading works.
11:34 The basic idea is that if a surface is
11:37 pointing directly at a light source such as the sun,
11:40 it’s shaded brighter whereas if a surface is facing
11:44 perpendicular to, or away from the light, it’s shaded darker.
11:48 In order to calculate a triangle’s shading,
11:51 there are two key details we need to know.
11:54 First, the direction of the light and second,
11:57 the direction the triangle’s surface is facing.
12:00 Let’s continue to use the locomotive as an example
12:03 and paint it bright red instead of black.
12:07 As you already know, this train is made of 762 thou-sand flat triangles,
12:12 many of which face in different directions.
12:16 The direction that an individual triangle
12:18 is facing is called its surface normal,
12:21 which is simply the direction perpendicular to the plane of the triangle,
12:25 kind of like a flagpole sticking out of the ground.
12:29 To calculate a triangle’s shading,
12:31 we take the cosine of the angle or theta between the two directions.
12:36 The cosine theta value is 1 when the surface is facing
12:40 the light and when the surface is perpendicular to the light it’s 0.
12:45 Next, we multiply cosine theta by the intensity of the light and then
12:50 by the color of the material to get the properly shaded color of that triangle.
12:55 This process adjusts the triangles’ RGB values and as a result,
12:59 we get a range of lightness to darkness of a surface
13:04 depending on how its individual triangles are facing the light.
13:08 However, if the surface is perpendicular or facing away,
13:11 we don’t want a cosine theta value of 0
13:15 or a negative number because this would result in a pitch-black surface.
13:20 Therefore, we set the minimum to 0 and add
13:24 in an ambient light intensity times the surface color,
13:27 and adjust this ambient light so that it’s higher in daytime scenes,
13:32 and closer to 0 at night.
13:34 Finally, when there are multiple light sources in a scene,
13:38 we perform this calculation multiple times with different light directions,
13:43 and intensities and then add the individual contributions together.
13:47 Having more than a few light sources is computationally intense for your GPU,
13:53 and thus scenes limit the number of individual light sources and sometimes limit
13:58 the range of influence for the lights
14:01 so that triangles will ignore distant lights.
14:05 The vector and matrix math used
14:07 in rendering video game graphics is rather complicated,
14:11 but luckily there’s a free and easy
14:13 way to learn it and that’s with Brilliant.org.
14:16 Brilliant is a multidisciplinary online interactive education platform
14:19 and is the best way to learn math,
14:23 computer science, and many other fields of science and engineering.
14:27 Thus far we’ve been simplifying
14:30 the math behind video game graphics considerably.
14:32 For example, vectors are used to find the value of cosine
14:36 theta between the direction of the light and the surface normal,
14:39 and the GPU uses the dot product divided
14:42 by the norm of the two vectors to calculate it.
14:46 Additionally, we skipped a lot of detail when it came to 3D
14:50 shapes and transformations from one coordinate system to another using matrices.
14:55 Rather fittingly, Brilliant.org has entire
14:58 courses on vector calculus, trigonometry,
15:01 and 3D geometry, as well as courses on linear algebra and matrix math.
15:06 All of which have direct applications to this video
15:09 and are needed for you to fully understand graphics algorithms.
15:13 Alternatively, if you’re all set with math,
15:17 we recommend their course on Thinking in Code which will
15:20 help you build a solid foundation on computational problem solving.
15:24 Brilliant is offering a free 30-day trial
15:27 with full access to their thousands of lessons.
15:30 It’s incredibly easy to sign up,
15:32 try out some of their lessons for free and, if you like them,
15:36 which we’re sure you will, you can sign up for an annual subscription.
15:40 To the viewers of this channel,
15:42 Brilliant is offering 20% off an annual subscription
15:45 to the first 200 people who sign up.
15:48 Just go to brilliant.org/brancheducation.
15:52 The link is in the description below.
15:55 Let’s get back to exploring fragment shading.
15:57 One key problem with it is that the triangles
16:01 within an object each have only a single normal,
16:04 and thus each triangle will share
16:06 the same color throughout the triangle’s surface.
16:09 This is called flat shading and is rather unrealistic when viewed
16:13 on curved surfaces such as the body of this steam engine.
16:17 So, in order to produce smooth shading, instead of using surface normals,
16:22 we use one normal for each vertex calculated using
16:26 the average of the normals of the adjacent triangles.
16:30 Next, we use a method called barycentric coordinates to produce
16:34 a smooth gradient of normals across the surface of a triangle.
16:38 Visually it’s like mixing 3 different colors across a triangle,
16:42 but instead we’re using the three vertex normal directions.
16:46 For a given fragment we take the center of each pixel and use the vertex
16:52 normals and coordinates of the pre-rasterized triangle
16:55 to calculate the barycentric normal of that particular pixel.
16:59 Just like mixing the three colors across a triangle this pixel’s normal
17:04 will be a proportional mix of the three vertex normals of the triangle.
17:08 As a result, when a set of triangles is used to form a curved surface,
17:13 each pixel will be part of a gradient of normals resulting in a gradient
17:18 of angles facing the light with pixel-by-pixel
17:22 coloring and smooth shad-ing across the surface.
17:25 We want to say that this has been one
17:28 of the most enjoyable videos to make simply because
17:31 we love playing video games and seeing the algorithm
17:34 that makes these incredible graphics has been a joy.
17:38 We spent over 540 hours researching, writing,
17:42 modelling this scene from RDR2, and animating.
17:46 If you could take a few seconds to hit that like button,
17:50 subscribe, share this video with a friend,
17:53 and write a comment below it would help us more than you think, so thank you.
17:58 Thus far we’ve covered the core steps for the graphics rendering pipeline,
18:03 however, there are many more steps and advanced topics.
18:06 For example, you might be wondering where ray tracing
18:09 and DLSS or deep learning super sampling fits into this pipeline.
18:15 Ray tracing is predominately used to create highly
18:19 detailed scenes with accurate lighting and reflections typically found
18:23 in TV and movies and a single frame
18:26 can take dozens of minutes or more to render.
18:29 For video games, the primary visibility and shading of the objects
18:34 are calculated using the graphics rendering pipeline we discussed,
18:37 but in certain video games ray tracing is used to calculate shadows,
18:43 reflections, and improved lighting.
18:44 On the other hand, DLSS is an algorithm for taking a low resolution
18:50 frame and upscaling it to a 4K frame using a convolution neural network.
18:57 Therefore DLSS is executed after ray tracing
19:00 and the graphics pipeline generates a low-resolution frame.
19:04 One interesting note is that the latest generation of GPUs
19:09 has 3 entirely separate architectures of computational resources or cores.
19:14 CUDA or Shading cores execute the graphics rendering pipeline.
19:19 Ray tracing cores are self-explanatory.
19:21 And then DLSS is run on the Tensor cores.
19:26 Therefore, when you’re playing a high-end video game with Ray Tracing and DLSS,
19:31 your GPU utilizes all of its computational resources at the same time,
19:36 allowing you to play 4K games and render
19:40 frames in less than 10 milliseconds each.
19:42 Whereas if you were to solely rely on the CUDA or shading cores,
19:47 then a single frame would take around 50 milliseconds.
19:51 With that in mind, Ray Tracing and DLSS are
19:55 entirely different topics with their own equally complicated algorithms,
20:00 and therefore we’re planning separate videos that will
20:03 explore each of these topics in detail.
20:05 Furthermore, when it comes to video game graphics,
20:08 there are advanced topics such as Shadows,
20:11 Reflections, UVs, Normal Maps and more.
20:14 Therefore, we’re considering making an additional
20:17 video on these advanced topics.
20:19 If you’re interested in such a video let us know in the comments.
20:23 We believe the future will require
20:26 a strong emphasis on engineering education and we’re
20:29 thankful to all our Patreon and YouTube
20:31 Membership Sponsors for supporting this dream.
20:33 If you want to support us on YouTube Memberships,
20:37 or Patreon, you can find the links in the description.
20:41 This is Branch Education, and we create 3D animations that dive deeply
20:46 into the technology that drives our modern world.
20:49 Watch another Branch video by clicking one
20:52 of these cards or click here to subscribe.
20:55 Thanks for watching to the end!