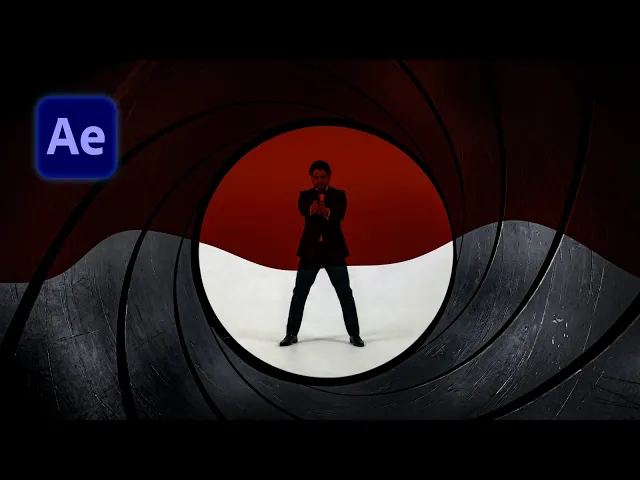
James Bond 007 Intro - After Effects Tutorial (Full Breakdown)
Ignace Aleya
0:10 In this video, I will show you how I created this James [music]
0:14 Bond intro title in Adobe After Effects without the use of any external plugins.
0:19 I will also show you how I got access to copyright
0:22 free James Bond styled music [music] thanks to today's video sponsor.
0:26 I'm always happy when Artlist reaches out to sponsor one
0:29 of my videos because I have been using their service for many years,
0:32 especially for their music, sound effects, stock footage, and so on.
0:36 They actually just released AI music.
0:39 This allows you to generate music just
0:41 by typing some text or even uploading reference images.
0:45 Apart from that, they also introduced Kling motion control,
0:48 which allows you to generate video to video
0:50 instead of just generating video from text or images,
0:53 [music] you can now generate videos from reference videos.
0:57 If you are interested in trying out their AI functionalities,
1:00 you can find the link in the description below
1:03 and get 2 months completely for free by using my link.
1:06 All right, so let's get started with the tutorial.
1:08 If you want to use the exact same footage as me,
1:11 you can find those for free with the link in the description below.
1:14 It also includes my filmmaking checklist,
1:16 so you capture the right shot every single time without missing anything.
1:21 All right, so in Adobe After Effects,
1:23 I imported the two files needed for this video.
1:27 One, I have my shot here that I generated with Artlist
1:30 where I'm walking on this white studio in a nice expensive suit,
1:35 just like James Bond would.
1:37 And then next, I have this texture.
1:39 This is the interior of a gun barrel
1:41 that we will need in order to create this effect,
1:43 and I generated this also using Artlist.
1:46 Hey, it's me, editor.
1:48 I just want to say that the following section isn't needed for the tutorial.
1:52 In the next few minutes,
1:53 Inyas will explain how he generated the video clips of him in a tuxedo.
1:56 If you don't want to follow along, or you have your own recorded footage,
1:59 you can skip to this part in the video.
2:01 Quick reminder that you can download the files generated in this following
2:04 section with the link in the description below totally for free.
2:07 All right, let's continue.
2:08 So, if you want to create this for yourself,
2:11 I will briefly show you how you can get started on this.
2:14 So, on Artlist, you can go over to AI image.
2:17 What I need is the start image and then the end image.
2:20 And after that, I will generate between these frames.
2:23 So, I will use a first and last frame video model.
2:26 So, in this case, I will upload my image.
2:29 I have this image of mine, which I will upload.
2:32 I will choose a model, which will be Nano Banana Pro,
2:37 to give me the best results possible using a aspect ratio of 16 by 9,
2:42 and then describe what you want.
2:44 So, AI generation is always a conversation that you're having with AI.
2:48 You're not always going to get the perfect result from your first generation.
2:52 After going back and forth a little bit,
2:54 you will end up with an image like this.
2:57 You can download that from Artlist,
2:59 or you can just simply go over your image and go over here to edit this image.
3:04 And because I'm walking to the side, I'm going to upload my image again,
3:08 so it knows what I look like from the front.
3:10 And then I will describe it to be in a final pose.
3:17 Again, go back and forth until you find the perfect result,
3:20 and this is something you should end up with.
3:23 Once you have your two images, we can continue using the video model.
3:27 So, you can now go over here to the video tab.
3:30 And in the video tab,
3:31 I want to import this first frame where I'm at the side of the frame,
3:36 and then upload me in the center.
3:40 And then you want to describe what happens in between.
3:44 I'm going to choose Kling 3.0 in order to make this effect happen.
3:49 I'm going to uncheck audio because this is
3:51 not necessary for what we are trying to create, and we're going for 5 seconds.
3:55 And then you can click generate.
3:57 That should give you something like this.
4:00 So, once you have everything set up, we can go back to Adobe After Effects.
4:04 And I'm going to create a new composition.
4:06 I'm going to turn this into a In this case,
4:09 just full HD, so we work a little bit faster.
4:12 I'm going to call this main comp.
4:14 I'm going to make sure it's around 15 seconds long and click okay.
4:18 Then I'm going to import my video footage that I created with Artlist.
4:22 It is at 4K, so I'm going to just scale it down,
4:25 or right click, transform, and fit to comp width.
4:30 So, now we have my footage of me walking in here.
4:33 I'm going to offset this a little bit because first we want the intro.
4:37 And the intro is very iconic where you
4:39 see these white dots appearing on the screen,
4:42 then one white dot grows into that gun
4:44 barrel interior look showing me walking to the center,
4:49 shooting towards the camera, and then a bleeding overlay over our entire shot.
4:53 So, how do we create this?
4:55 I'm going to right click and create a new solid layer and call this background,
5:00 and turn this black.
5:02 Click okay and okay.
5:04 We're going to place this all the way at the bottom,
5:06 and then next we want to click here on the ellipse tool.
5:09 I'm going to make a perfect circle, just like that.
5:12 Make it a little bit smaller, and then we can just move this over to the left.
5:17 You can also click here, so it centers our circle from top to bottom.
5:21 So, in the align tab, we can click this button to align it vertically.
5:25 Once you have that, we can go over
5:28 to 1 second and split our layer by holding control,
5:31 shift, and pressing D, and then deleting the last part here.
5:35 So, now we just have a white dot for 1 second.
5:38 I'm going to press T on the keyboard
5:39 and click on the stopwatch for opacity at the beginning,
5:42 and then towards the end, I'm going to set it to zero.
5:45 So, now we just have an animation of the circle fading out.
5:48 I quickly want to give you something that will instantly upgrade your videos.
5:52 I created the free Hollywood VFX bundle with over 100 high-quality assets,
5:58 and this all completely for free that you can use in your own projects,
6:02 even commercially, as much as you want.
6:04 Link to that is in the description.
6:06 If you want to modernize it a little bit, but in the original they didn't do it,
6:11 I just preferred it a little bit more that way.
6:13 I'm going over to the effects and presets and apply a fast
6:16 box blur to my circle and click on the stopwatch for blur radius.
6:20 Go to the end and set your blur radius to something like 35.
6:24 Now we're going to have a soft fade out of our circle.
6:28 If you want, you can also click on these first layers.
6:31 You can press U on the keyboard to reveal all the keyframes,
6:34 then right click, keyframe assistance, easy ease.
6:37 So, in the beginning, everything stays longer the same.
6:40 You can even go to the graph label right here,
6:43 select these, and just drag these out a little bit.
6:45 And actually, I need to zoom in and make sure I actually pull a handle here.
6:51 Okay, that's cool.
6:53 So, that's completely up to you if you want to add the blur or not.
6:56 In the original, they didn't do that.
6:58 Now, I'm going to duplicate it,
7:00 and I'm going to move it over a little bit to the side,
7:03 duplicate it again, move it over more,
7:06 and then duplicate it once more and move it here.
7:08 But here, I'm going to press U
7:09 on the keyboard and delete both of these keyframes.
7:13 So, this is going to be our end position.
7:16 I'm also going to make sure it's kind of in the same spot as the first one.
7:20 Then select all of these and go again to the align.
7:23 We're going to distribute layers horizontally, so they're nicely evened out.
7:27 If you still feel like it's not perfect,
7:29 you can move them a little bit more to the right,
7:32 and the end one a little bit more to the left.
7:34 Select them again and go again to distribute, and there we have it.
7:39 Now, I want to select all of these except the first one,
7:44 and then offset them like this.
7:46 Control click on this one, offset them again,
7:49 control click on this one, and offset once again.
7:54 So, now we have something like this, exactly like James Bond.
7:58 Now, here we want to do something else.
8:00 And I'm also going to use my pen behind
8:02 tool and move my pen right here to the center.
8:06 Holding control will snap it in the middle.
8:11 Then from here, I want to press S on the keyboard and hold shift to press P,
8:15 and we are going to create keyframes for scale and position.
8:19 Then right here, we go to 1 second,
8:21 and we're just going to scale it up quite a bit.
8:28 We can also move it over a little bit more to the left.
8:34 It could be that we want to extend
8:35 it a little bit longer and extend these keyframes,
8:38 but we're going to fine-tune that later.
8:40 Basically, in here, we want to reveal myself.
8:43 So, I'm going to move over this clip, and I'm going to drag this right here.
8:50 I'm going to use the track mat to that circle.
8:53 One thing that you need to do is enable it again,
8:56 but because once you use the track mat,
8:58 it's automatically going to disable it, but in this case, we don't want that.
9:02 So, now we have our video here.
9:03 The only problem here is that we can see myself standing here.
9:06 So, I'm going to move myself over a little bit more to the right,
9:10 and then press uh P on the keyboard,
9:12 create a keyframe by clicking on the stopwatch, and let it grow.
9:16 And while it's growing to the center, we want to right click, transform, reset.
9:22 And actually, we just want to move the position,
9:24 so we can just reset the position.
9:27 Right click, reset.
9:29 Otherwise, it's also going to reset our scale.
9:32 And so, we're going to look We can extend this a little bit longer.
9:36 Look until we're at the center here of our clip.
9:40 That's around right here, and we can move this position over here.
9:49 Then go to your shape here of the circle, press U on the keyboard.
9:52 We're just going to offset the position a little bit later.
9:55 So, first it scales up.
9:58 It shows us until we are centered to the circle.
10:02 And then we want to start animating the position.
10:08 Until I'm at the center, and we can offset this also towards the end.
10:14 And that way it feels a little bit
10:16 more like I'm following myself with that circle.
10:25 Okay?
10:26 A little bit more towards the end, we can also use a blur.
10:29 So, I'm going to effects and presets,
10:31 search for the fast box blur, and apply that to our circle.
10:35 Click on the keyframe for a blur radius,
10:38 and towards the end we want to blur our edges
10:41 of our circle a little bit, just like that.
10:48 Okay?
10:49 Next, I'm going to import this gun barrel.
10:52 I'm also going to right click, transform, and fit the comp width.
10:57 Scale it up just a little bit because I can see the bottom lines a little bit,
11:02 and then use the Keylight effect to remove the green screen.
11:06 So, apply that to this layer,
11:08 and go over here to the screen color, and click on the green.
11:12 So, right here the position is actually perfect.
11:18 So, I'm going to press P on the keyboard, and click on the position.
11:21 Press S on the keyboard,
11:22 and click on the stopwatch as well to create the keyframe for that.
11:25 Then you can press U on the keyboard
11:27 to reveal both keyframes so we can just see them.
11:30 Go back a little bit, and we can move this over.
11:34 But we also need to scale it down.
11:41 And so now what we will do is
11:43 duplicate our shape layer here with the blurred circle.
11:47 We're going to duplicate this, and call it mask gun barrel,
11:52 and place this on top.
11:54 We're going to use a gun barrel, and track mat it to the mask.
11:59 And so now we have something like this growing out.
12:04 [music] If you see something like that right here,
12:06 we can just scale it up a little bit more.
12:09 Do you find these tutorials helpful,
12:10 but you still feel like you're missing the bigger picture?
12:13 I created the next level editing university to give you the exact blueprint you
12:18 need in order to create awesome videos
12:20 from start to finish without feeling overwhelmed.
12:23 Link [music] to that in the description below.
12:26 Next, we can also add a curves to this gun barrel interior,
12:31 and just darken it up a little bit.
12:40 And while it's growing here, we do want to make this mask a little bit bigger.
12:45 So, for the mask, press U on the keyboard.
12:51 Go to the scale here, the end position,
12:53 and just scale it up until we can see the entire gun barrel.
13:01 And there we have it.
13:03 That's looking great.
13:04 Now, I did generate this gun barrel without any kind of light reflections.
13:08 You could either do this in 3D,
13:10 but I just like to fake it in Adobe After Effects.
13:13 I'm going to create a new solid layer, and I'm going to call this fractal noise,
13:17 and I'm going to apply a fractal noise effect here.
13:21 In here, I'm going to the transform, and just scale it up quite a bit.
13:25 I'm going to change the complexity to three so we have a little bit less,
13:28 and increase the contrast.
13:30 [music] We can also clip the result,
13:33 and then change the blending mode to let's say a classic color burn.
13:37 I'm also going to track mat it to our actual gun barrel.
13:41 I'm going to re-enable the gun barrel.
13:43 Press T on the keyboard, and you can lower the opacity here.
13:47 You can even scale up more so we have a little bit less of complexity,
13:51 and then duplicate this once more.
13:54 Go over to the evolution options, and go to the random seed.
13:59 And here we want to change this to let's say a classic color dodge.
14:03 Press T on the keyboard, play with the opacity here until you're satisfied,
14:07 but this will add some complexities to our gun barrel,
14:10 and it will give some kind of reflection, and make it feel more like a 3D scene.
14:15 So, now we have poop poop poop and grow.
14:19 Perfect.
14:20 And we also want to trim these two layers just to start [music] right here.
14:33 And then boom, we're going to shoot here.
14:36 So, what we can do is click on our original footage,
14:38 right click, and go to time, enable time remapping.
14:42 And we're just going to extend this a little bit longer
14:44 so we can just have a freeze frame at the end.
14:48 And we can also extend these two.
14:52 So, it just continues.
14:54 So, once we shoot right here, we now want the blood dripping from the screen.
14:58 I'm going to new solids, and generate a kind of darker red layer.
15:04 Click okay, or rename it blood.
15:07 Okay, there we go.
15:08 And now what we want to do is place this on top of our screen holding shift.
15:15 Press P on the keyboard, create a new keyframe, go further into time,
15:20 and then just make it cover the entire screen here.
15:26 Now we can click on our blood, hold control shift, and press C,
15:30 and then move all your attributes, and call this blood comp.
15:34 And then here I'm going to add the turbulence displace
15:37 effect to this composition that will give us this blood look.
15:42 [music] We can increase the amount,
15:43 and we can also increase the size a little bit until you
15:46 feel like you have something that represents blood in its best way possible.
15:50 You can then change the blending mode to let's say um classic color dodge.
15:56 Nope.
15:57 Multiply.
15:59 Multiply is doing a great job here.
16:01 Okay.
16:02 So, now we have this blood dripping over our screen, and we have our final look.
16:07 So, to finalize this a little bit more,
16:09 what you can do is create a new adjustment layer, and call this vignette.
16:14 Here I'm going to add the curves, and I'm going to make it darker.
16:18 Then double click on the ellipse, go to, and change it to subtract.
16:21 Press F on the keyboard,
16:23 increase the feather so we have a little bit of darker edges,
16:26 and then just creates a little bit more depth to our scene.
16:29 Boom, and we have our final James Bond intro.
16:34 [music] [music] All right, so that's it for this video.
16:47 I hope you enjoyed it.
16:48 If you did, give this video a like.
16:50 [music] Also, be sure to subscribe to the channel,
16:52 and hit the notification bell to stay notified when I upload new videos.
16:55 [music] Apart from that, if you want to continue your After Effects journey,
16:59 maybe you would like to check out another video of mine.
17:02 I will leave you with this one right [music] here.
17:05 All right, I'll see you in the next one.
17:06 Until then, create epic videos.
17:08 Bye.