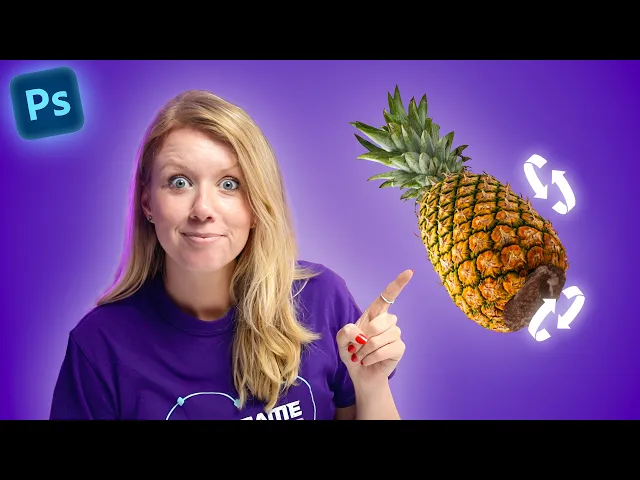
Photoshop's New Rotate Feature is Insane
Premiere Gal
0:00 So, check this out.
0:01 I have this pineapple and it's just a 2D image,
0:04 but now I can use the rotate object tool to rotate
0:07 it entirely into a new angle treating it like a 3D object.
0:11 And I can place it in a new photo background
0:14 and then harmonize it all together to create this new photo image.
0:19 So, let's show you how this works, when it doesn't work,
0:22 and how generative credits work inside of Photoshop.
0:26 Let's jump on in.
0:30 Right now, the rotate object tool is in the Photoshop beta.
0:33 From your Creative Cloud desktop app, you can go to apps and then click on beta.
0:38 And here you can see I have Photoshop beta and go ahead and open that up.
0:43 Okay, so here is my 2D photo of the pineapple.
0:45 The first thing we need to do is remove the background.
0:48 So, let's go ahead and double click on this, first of all,
0:50 just to turn it into an unlocked layer.
0:53 And then with this handy contextual bar,
0:56 all we need to do now is just click on remove background.
1:00 And AI gets rid of the background for us now.
1:03 I mean, it's pretty seamless, right?
1:05 And so now we have our new layer.
1:08 And by the way, I do recommend duplicating this before we actually rotate.
1:13 So, let's go ahead and let's drag this down into this new
1:16 image icon here just to duplicate it and then we can,
1:20 of course, turn off our duplicate layer.
1:23 Now, before we rotate this, I want to put in the new background,
1:26 which is going to establish the new angle we
1:29 need to rotate this object to to match the scene.
1:33 So, I have this photo of the desert that I want to place the pineapple on.
1:37 So, let's go ahead and drag and drop it in here and then we can
1:40 resize it to fill our frame like so and then move it down beneath our pineapple.
1:47 And by the way, if you want to use these same assets,
1:49 I shared a link down below to my Envato workspace
1:52 that includes the assets we're going to be using in this tutorial.
1:55 So, we have our pineapple cutout and we have our background layer behind it.
1:59 Two things need to happen.
2:01 The first thing is we need to rotate the pineapple so it
2:04 looks like it was shot in the same angle as the background.
2:07 The second thing is we need to harmonize it to match the color of the background
2:13 cuz right now it clearly looks photoshopped
2:15 just this random pineapple with sand behind it.
2:18 So, how do we first rotate our object?
2:21 With this selected, press command T on a Mac or control T on a PC.
2:27 And now you can see we have this little
2:29 new contextual bar here that says rotate object.
2:33 Now, when I click on this, it's going to prepare the object to be rotatable.
2:39 And that's going to make it a little bit low-res in the beginning
2:42 and that's okay because it's then going to enhance it after.
2:45 So, this is still preparing.
2:47 It doesn't take too long.
2:48 As you can see, it's done now.
2:50 So, there are three controls here.
2:51 There's the tilt that lets you tilt up and down
2:55 so to see the bottom of the pineapple or the top.
2:58 So, this is the bottom and the top.
3:00 How cool is that?
3:01 So, you can see it's lower-res and you can also adjust the perspective.
3:05 So, do you want it to be a macro lens or a more wide lens kind of look?
3:10 And then you can also rotate it around to see a different side view,
3:15 which is pretty neat.
3:16 So, in this case, our background is kind of a bit of a high angle, right?
3:20 So, I want to tilt using the tilt controls.
3:23 You can also tilt here in the bar itself.
3:26 So, you can click on this and then you can
3:28 tilt it down by moving to the left to see under.
3:32 And then we can tilt it up to see on top,
3:34 almost like we're looking down at the pineapple.
3:38 So, we don't need to look down too far,
3:42 but enough to make a little bit of a change
3:45 here so it looks like it matches the scene.
3:48 Let's say we like this angle.
3:49 Let's hit done.
3:51 And what's going to happen here is it's going to enhance
3:53 the rotated image so it doesn't look so low res.
3:57 And there we go.
3:58 So, just to show you the difference, this is the original one, right?
4:01 Completely different angle.
4:03 And let's turn that off, and this is our new rotated pineapple.
4:07 Now that it's been rotated,
4:08 the next step is we need to make it match our background layer to make
4:13 it look like it was shot in the same sort of lighting and the same scene.
4:16 Now, this is called compositing,
4:18 but there's actually a new tool inside of Photoshop,
4:21 which isn't just in the beta, by the way.
4:22 It's in the main app.
4:24 It's called harmonize.
4:25 And here, on this layer, next to edit rotation,
4:28 which you can totally edit, again, by the way, is the harmonize.
4:32 So, let's select harmonize, and literally, it's just generating.
4:37 It's saying, "Okay, I see the background.
4:40 I see what needs to happen." AI is working its magic
4:44 here to essentially give us three different results to choose from.
4:48 Okay.
4:49 So, you can see that it created a new harmonize layer.
4:52 If I turn off the background layer, you can see it just basically applied
4:57 this new magic color and some shadow, as well.
5:00 So, let's turn back on the background.
5:02 And up here, underneath properties,
5:04 you can see we have three different variations that we can take a look at.
5:08 So, this one has slightly different coloring here.
5:12 I think I like the second one the best.
5:14 That looks great.
5:15 Also, you can cycle through the different generations here.
5:18 And if you don't like any of them, you can always hit generate again.
5:22 But, I think that these are three awesome generations to choose from.
5:26 So, this is great if you want to send these different variations to a client,
5:29 or the client's like, "You know what?
5:31 I wish the pineapple was a little bit more
5:33 rotated." You can actually go back to this layer,
5:37 and you can edit the rotation, and then re-harmonize again.
5:41 So, it's a pretty neat non-destructive workflow when you can
5:43 go back to the rotate object layer and make further rotations.
5:48 All right, so this is great and all, but the real power of this, I think,
5:52 comes with making your own product mock-up designs and then being
5:57 able to rotate that object in a variety of different scenes,
6:01 harmonize it to have different variations for like a marketing campaign, right?
6:06 So, I'm going to use Envato to create my own mock-up to illustrate this.
6:10 So, Envato has over 26 million assets.
6:14 You can find stock assets from photos
6:17 to video templates to sound effects, music,
6:21 and then design stuff like graphics, graphics templates,
6:25 which are perfect for creating product mock-ups, by the way.
6:29 You can find things like fonts as well, which I use all the time in my designs.
6:33 But, rather than using a graphics template to create a product
6:37 mock-up to then use the rotate object inside of Photoshop,
6:41 I'm going to actually use their new GenAI tools.
6:44 So, you can see that there's a bunch of different tools from image gen
6:48 all the way down to video gen down to This is the one, mock-up gen.
6:52 So, I'm going to use mock-up gen to create a product mock-up that I
6:57 can then rotate and place into an existing thumbnail design that I have.
7:01 So, I have my logo here.
7:03 Let's drag and drop it in this area.
7:05 And over here, I can choose an empty
7:07 mock-up from what Envato comes built inside of.
7:11 So, I can choose this coffee mug.
7:14 I can choose different apparel, packaging, posters, digital devices, merch.
7:23 Let's try this coffee mug.
7:26 Let's go ahead and select this.
7:27 And by the way, if you don't want to use their predetermined products here,
7:31 you can upload your own product image here as well.
7:35 So, let's go ahead and select this, and then you can see it's here,
7:38 our logo and the mug that it's going to be on.
7:42 And here we can type in a prompt, which is optional.
7:45 So, I just said, "Please add the logo to the mug.
7:48 Do not make the logo too big on the mug." Let's go ahead and try this out.
7:52 All right.
7:53 I think it's okay.
7:54 The logo is a little big, but I think I actually kind of like it big.
7:58 So, let's stick with this.
8:00 Let's go ahead and download this.
8:02 And now, let's go back to our Photoshop beta,
8:05 and let's open up this final design that I have here of this thumbnail.
8:11 I'm going to open this up inside of the Photoshop beta.
8:15 And here we go.
8:15 I'm going to double-click on the background to make this a layer.
8:19 And now, from my downloads,
8:22 I'm going to take this mug and drag and drop it here.
8:26 First of all, I'm going to press done and then remove background.
8:31 Just like we did before.
8:33 And now, I'm just going to make this a bit smaller here.
8:37 And place this here.
8:40 That looks about the right size.
8:42 And then, we just need to make some subtle adjustments.
8:45 So, let's go ahead and press command T or control
8:48 T on a PC to bring the rotate object up.
8:51 Click on rotate object, and now it's going to prepare it to be rotatable.
8:56 So, first off, I just want to show you that it actually
8:59 put coffee in the mug when we rotate this, which is pretty awesome.
9:03 Didn't even ask it to do that.
9:04 It just did this.
9:05 I imagine in the future,
9:07 you're going to be able to text prompt with rotate and say like
9:10 things specific that you want inside of objects when you do rotate it.
9:14 I think that would be pretty cool.
9:15 So, if Adobe are watching this, I'm sure
9:17 you're coming up with something related to that.
9:19 Let's go ahead and return to the beginning.
9:22 I first want to rotate this slightly cuz I don't
9:24 want it to be directly at us like in the original.
9:27 I want it to be slightly rotated like so.
9:30 And then, I want to tilt it a bit.
9:32 Not too much, but just a little bit here
9:36 based on the other objects that in the scene,
9:39 and then make this a little bit smaller,
9:42 and let's adjust the perspective slightly.
9:45 I think that looks good.
9:46 So, let's press done.
9:48 And now it's going to enhance the rotated image,
9:51 and after that we can harmonize it.
9:53 So, now that it's rotated, let's go ahead and harmonize.
9:56 Cuz right now, although the perspective is pretty good,
9:59 it doesn't match the colors of the scene.
10:02 All right, that's looking good.
10:05 Yeah, cuz there's not a lot over there, and look at the reflections it added.
10:09 Great.
10:10 So, now we have our new harmonized layer here,
10:12 and we have a coffee mug that looks like it was part of the scene.
10:16 Like, if I showed this to you, would you be like, "Oh,
10:18 that's a cool mug that you have on your desk?" And I could be like,
10:21 "Well, it's not actually there.
10:23 I just used rotate object and harmonize." But, back to Envato,
10:27 who is the sponsor of today's video,
10:29 me and my team have been using it since 2017,
10:32 and it's been so cool to see it evolve into this massive
10:36 creative assets library that has over 26 million assets in the stock realm.
10:42 So, from stock videos to graphics and more,
10:45 to also developing these new gen AI tools as well.
10:49 So, in addition to the mock-up gen,
10:51 you can also generate music tracks from text prompts.
10:55 You can edit existing photos with text prompts.
10:59 You can generate sound effects and graphics as well.
11:03 And Envato has different plans for different needs.
11:05 So, if you need generations, there's a plan for that.
11:11 You can check it out by using my affiliate link down below.
11:14 Thanks to Envato for sponsoring,
11:16 and now let's show you some not-so-good use cases of the rotate object tool.
11:22 All right, a use case where this doesn't work is if
11:24 you have an image of somebody with their back to the camera,
11:27 and you don't see their face.
11:29 So, if I'm going to remove this background right now,
11:31 and then press command T to rotate our object.
11:36 If I go to rotate this, and let's say I wanted to show part of their face.
11:41 Let's say this is the angle I wanted.
11:42 If I press done, you can see how it just doesn't really work with faces.
11:47 But, I feel like AI's always struggled with faces anyway, and you know,
11:51 this probably wouldn't be a use case I would use this for.
11:54 It's mainly meant for product design, right?
11:57 Because look at the rendered image here.
11:59 I mean, that is That looks like, you know,
12:02 video game from like the early 2000s, right?
12:06 And it's not consistent, either.
12:08 So, if I'm going to edit the rotation even more,
12:11 like this, you will see that once I'm done, the face looks completely different.
12:17 Maybe in the future you'll be able to attach a photo reference of the model,
12:21 so that way it will work with people better.
12:24 But, you can see, you know, now we have a different looking person.
12:28 But, it does work when you can like see the person's face.
12:32 So, now I have another example.
12:33 Let's go ahead and let's duplicate this, and let's remove the background,
12:39 and let's press command T to rotate our object.
12:43 Let me just go ahead and turn off this layer.
12:45 This looks really scary right now,
12:47 but if I rotate this to show more of his uh left shoulder,
12:52 if I wanted to make an adjustment, and press done,
12:56 it actually does a pretty good job at keeping his image and likeness the same.
13:01 When you see the person's face, right?
13:04 Here we go.
13:05 Let's go ahead and show the original side by side here.
13:08 So, this was just the rotated version.
13:11 The only thing that was a little off here is the hair.
13:14 You know, it obviously didn't know what to do with the hair,
13:17 but it kept the likeness pretty well here.
13:20 So, like you'd probably have to do some more work,
13:23 but it does do a good job keeping the likeness.
13:26 One more thing you can do is because this is a cutout,
13:29 if you wanted this to be a clone here,
13:32 we could go ahead and harmonize this layer,
13:35 so that way the shadows look correct.
13:36 So, this could be actually a cool way to have this clone effect.
13:39 So, now we have two twins just kind of slightly rotated.
13:43 And now we have our new harmonize version.
13:46 Before, after.
13:48 Before, after.
13:50 Okay, so now let's talk about generative credits
13:51 and how they work with your Creative Cloud plan.
13:54 You can see here that if you have the Creative Cloud Pro plan,
13:58 you get 4,000 credits for premium
14:01 generation and unlimited access to standard generations.
14:05 That if you subscribed after, it's the same, right?
14:08 And then down here, if you just have Creative Cloud standard,
14:11 you only get 25 generative credits, which is not a lot.
14:15 And then for the single app, if you subscribed before June 17,
14:19 2025, you still get those 500 credits.
14:23 So, if you just have a Photoshop plan that you subscribed before this date,
14:28 you still get 500 per month.
14:29 If you did it after, you only get 25, which isn't a whole lot.
14:34 So, that's why if you're using these tools,
14:36 you want to make sure once you rotate it,
14:39 you want to get it in the correct spot before
14:41 you go ahead and hit done to generate in that case.
14:44 And you can purchase additional add-ons to add to your plan if you run out,
14:50 if you're one of those people that just has 25 credits.
14:53 I really hope that they provide more unlimited access to users who
14:57 maybe just get the one app plans or at least more because 25,
15:01 I mean, it's kind of a joke, you know, that's not a lot to work with.
15:04 But that's what the current status is of generative credits.
15:08 So, what do you think about the rotating object tool?
15:10 How do you plan to use it?
15:12 Let me know in a comment below.
15:14 And by the way, I'm in the middle of launching my first Premiere course,
15:18 which had a limited enrollment window, so it's currently closed.
15:21 If you would like to enroll for a future version of the course,
15:26 you can just join the wait list using the link down below.
15:29 And so far, it's been fantastic.
15:31 The feedback has been great.
15:32 So, definitely join the wait list if you're
15:34 interested in a future version of my premier course,
15:37 for example, that we'll do in the fall this year.
15:41 That's all for today's video.
15:43 Thank you so much for watching.
15:44 And as always, keep creating better video and photo with Gal.
15:50 See you next time.
15:51 Bye.