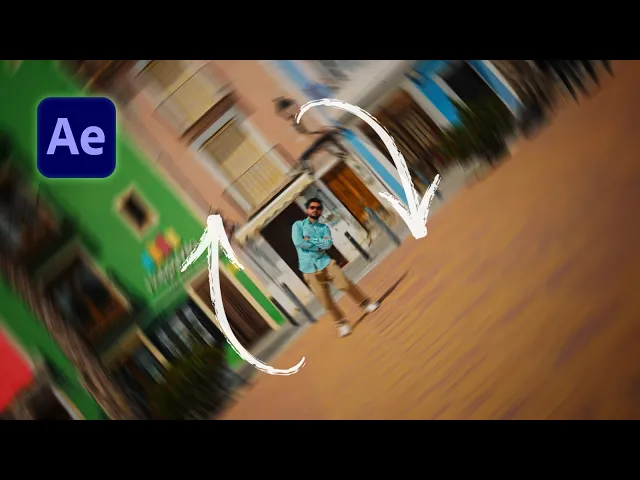
'Viral' Camera Rotation Effect - Full After Effects Tutorial
Ignace Aleya
0:00 Hola, chosas.
0:01 In today's video, I will show you how to create this really cool,
0:04 crazy dizzy rotation effect in Adobe After Effects.
0:08 And I must say that this video has been inspired by Alex Bak.
0:12 I will link you his page up here.
0:15 I found his video really creative that I had to recreate it.
0:18 Now that I'm living here in Spain,
0:20 I thought it would be a really cool opportunity to show
0:23 off a few different locations in the same similar style.
0:27 And as I'm in Spain now,
0:29 I thought I would blend in a little bit better with the stash.
0:32 Do let me know what you think of it in the comments below.
0:34 Oh, and by the way, do you find these tutorials helpful,
0:37 but you still feel like you're missing the big picture?
0:40 I created the Next Level Editing University to give you the exact blueprint
0:44 you need to create awesome videos
0:46 from start to finish without feeling overwhelmed.
0:50 If that sounds like something you might be interested in, do
0:52 check it out with the link in the description below.
0:54 All right, without further ado,
0:56 let's open up Adobe After Effects and get started.
0:59 So, if you want to follow along
1:00 with this tutorial using the exact same footage as me,
1:03 you can do so by downloading that for free
1:05 with the link in the description below.
1:08 I also have an audio track which is from artlist.io.
1:12 If you want to check out their library,
1:14 I will also link you that in the description below,
1:17 but I cannot share that with you in this project file.
1:20 So, we're going to be using this music track to apply our effect to.
1:24 So, we have a few recordings, and as you can see,
1:27 all of the recordings are recorded on a full-frame camera,
1:31 which means that it has a lot of space around it.
1:34 And in the end, we only want to end with a vertical version of the shot.
1:38 The reason that we have recorded this is because we need a lot
1:40 of rotations to be done and we want to have more information on the sides.
1:47 So, I will click and drag one of the clips into a new composition.
1:51 And so, for each clip, I essentially want to stabilize the motion to my body.
1:56 As you can see, if we play through this clip,
1:58 we'll just quickly change this to quarter.
2:00 So, we can play this back a little bit faster.
2:03 You can see that I'm doing a little dance like this.
2:06 I'm doing this pretty slow so everything stays sharp
2:10 and we don't have too much motion blur in our shot.
2:12 So once you have your shot imported in a new composition,
2:15 we want to go over to effects and presets and search for Mocha AE.
2:20 Apply this to your footage and change your resolution back to full.
2:25 Go to the beginning of your clip and then click on the logo for the Mocha AE.
2:29 In Mocha, we're going to click this Xline tool and we're
2:33 going to select and scroll up to zoom in a little bit.
2:37 We're just going to select my upper body like this.
2:41 and then right click to finish the selection.
2:44 And I'm also going to uncheck two here.
2:46 So we only have position, scale, and rotation enabled.
2:49 And we're at the beginning of our timeline.
2:51 Now we can click on the track forward button.
2:53 Let it do its thing in the background and come back once this is done.
2:57 Once that has been done, and you see that the track went well,
3:01 we can close Mocha AE and save this.
3:04 And then go over to the tracking data and click the button create track data.
3:09 invert it and apply this to the transform export option transform and apply
3:14 it to the layer that we have right here and just click apply export.
3:22 And now you should see something like this.
3:26 One thing that we want to do is press R on the keyboard,
3:29 click on the rotation so all of the key frames are
3:32 selected and then we're going to lower this value to zero.
3:36 You can hold control to do small adjustments like this.
3:41 So now we zeroed everything out and we have our stance in the beginning
3:47 and then as I move the background will follow my track position.
3:53 So basically we stabilized our upper body here.
3:57 Now we can click on this footage, go to the beginning.
4:02 Also press P on the keyboard and click on the position here.
4:06 We can also center this out completely.
4:14 And now we move on to the next one.
4:16 We're going to bring this into a new composition as well.
4:20 And again, open up Mocha AE with full resolution here.
4:23 Mocha AE.
4:24 Apply this.
4:26 Click on the logo.
4:28 Click on the Xline tool.
4:29 Zoom in here.
4:32 Make a selection.
4:37 Something like this.
4:39 Remove skew.
4:40 D track forward.
4:42 Once this track is done, we can again close Mocha here.
4:48 Go into track data.
4:49 Create track data.
4:51 Invert it.
4:53 Select transform.
4:55 Select the layer and go to the first part or go
4:58 to the beginning of your timeline and apply the export.
5:01 Press R on the keyboard.
5:03 Click on the rotation.
5:04 Hold control and shift this over to zero.
5:12 And there we go.
5:14 And so now we have two video clips done.
5:17 We have two more to do.
5:18 So I will import the pool here and do
5:21 the same thing for the pool shot and the Cshot.
5:24 I'll see you once that is done.
5:29 [Music] So now I've done all of the four shots and what I want to do
5:35 now is go through all of the shots and press S on the keyboard on the footage.
5:40 Make sure it's set to 100 and click on the stopwatch
5:43 to remove all the key frames for the scale.
5:46 Go to the other shots, press S and disable it each time.
5:53 You can also manually set it back to 100.
5:56 Press S on the keyboard.
5:59 And there we go.
6:00 So now we have all the shots prepared.
6:03 Once you've done that, we can create a new composition right here.
6:07 Create new.
6:08 And we're going for a width of 1080 and a height of 1920.
6:14 This is going to be my real main.
6:18 And we're going to set the frame rate
6:19 to 25 seconds and a length uh of 30 seconds,
6:24 which we will probably end up using a shorter video.
6:27 Click okay.
6:29 Now we can import each composition in here.
6:36 And there we go.
6:38 We're also going to click on our audio track and import that as well.
6:42 Press L twice on the keyboard rapidly.
6:45 and that will show you the waveform of your song.
6:49 Can trim it until this part, for example, and do a preview.
6:55 I'm also going to set my resolution here to quarter so
6:58 we can preview everything quicker and fit everything to the composition here.
7:04 So, we can disable all of the other ones.
7:06 We're just going to focus on the first one, which is the colored houses.
7:10 So, I disabled it all the eyes here.
7:12 I just have one eye enabled for the shot.
7:15 We can also move these over to the right.
7:18 We can right click, go to time, and enable time remapping.
7:22 We can also check the title action action save by clicking and hovering here,
7:27 title action save, and center myself to that position.
7:30 Now, we can also see why we recorded this in a full frame.
7:35 We scale this down.
7:36 We have a lot of information here, but the rotation will cut off the corners.
7:39 So make sure that it's covered at all times and this looks good.
7:48 So we need to create a key frame at ourselves standing straight.
7:53 Then we need to move forward to this part here.
7:58 And actually I will move myself up a little bit.
8:01 Just like this.
8:08 About right here.
8:08 We're going to create another key frame.
8:13 And about right here, another key frame.
8:18 Can delete this key frame and just shorten our clip until this part.
8:23 Now we have ourselves standing up, moving to the right, and moving to the left.
8:29 Sometimes it might be that you're not perfectly centered.
8:32 In that case, you can go back to your footage,
8:34 press U on the keyboard, and remove the position and rotation.
8:37 Right click and go for transform reset.
8:42 And instead of using Mocha, we can delete this.
8:45 We can try to use the tracker here and go for stabilize motion.
8:53 That will open up a new layer right here.
8:56 We can choose my face here.
9:00 And then and then also enable rotation in the stabilize motion and select
9:14 a part of my shirt and then simply track it forward through here.
9:22 And there we go.
9:23 Go to the beginning of your clip.
9:24 Simply click apply and okay.
9:27 And check how this looks.
9:30 and go to quarter.
9:33 And this time the center it's a lot more centered.
9:37 So these are just two techniques that you can use to stabilize your footage.
9:41 Let's go back to our main composition here.
9:44 Now we can see that we're at all times centered.
9:49 Perfect.
9:51 So now I want to be standing.
9:54 Let's say I want to stand here at the drop
9:57 and right here I want to be at the right.
10:01 So we just move over the key frames.
10:08 Right here we stand.
10:09 And then right here we are going to rotate to the left.
10:15 Copy this key frame.
10:16 Ctrl C.
10:18 And now on each beat we are going to paste this.
10:21 So now we can copy the last two key frames.
10:24 One where I'm bend over to the right, one where I'm bend over to the left.
10:30 And then on each beat,
10:31 we're just going to paste this until we are done with our clip.
10:39 [Music] I'm just going to move these over.
10:46 And instead of going to the left here, I'm just going to copy the right here
10:52 in this position because that will give it more fluent.
10:57 And now on these little kind of glitches in this track,
11:00 we can also create key frames just on the moment and maybe right here.
11:08 And then we can select all of these key frames except for the first one.
11:13 We're going to right click, key frame assistance, easy ease.
11:17 And that's just going to give it a slow
11:19 stop and start each time that we have this animation.
11:22 And it should make it a little bit more fluid.
11:26 [Music] And right here, the song changes a bit.
11:32 So, what I want to do is give it a rotation to the right.
11:38 So, I'll take a new clip, maybe the pool, enable it, and bring it over here.
11:46 And essentially, we want to do the same thing here.
11:50 So, we're going to right click, time, enable time remapping,
11:53 create a key frame on where I'm standing.
12:04 Create a key frame where I'm completely bent over
12:06 to the right [Music] around here completely to the left.
12:26 And so we're going to do the same thing.
12:28 Move these over like so.
12:40 Copy these last two key frames and paste them each time like this.
12:48 Select all of these key frames.
12:50 Right click key uh key frame assistance.
12:52 Easy ease.
12:54 And then on the moment that we want to do this switch to the new clip,
12:58 let's do a little preview here.
13:05 We of course also want to scale this down.
13:10 And if you want, you can go back to your first clip.
13:13 And wherever you are standing, you can hold control, press R on the keyboard.
13:17 And then click from this and drag down to the top of your head.
13:21 From here to the bottom of your feet.
13:24 And then from the left here, we're also going to make a little box just like
13:28 so to get an idea where I'm supposed to be.
13:31 On this new clip, we can just reposition myself.
13:34 Press S, scale it down.
13:36 Place yourself an average in the same location.
13:39 And then you can hold control, press R again to remove this.
13:43 And hold control.
13:44 And then also press the uh dot comma here.
13:47 That's going to remove uh the guidelines that you can now see your clip clearly.
13:53 And you're kind of in the same place.
13:56 Now on this shot, I'm bend over to the right.
13:58 So what I'll do is offset myself here.
14:01 Bend over to the right as well.
14:03 So that way it's a lot more fluid, a lot more organic.
14:10 And so the motion goes from the camera this kind of way.
14:17 So it goes to the right clockwise.
14:20 What we'll do is then right click um go to layer,
14:22 new, and create an adjustment layer.
14:24 Rename it rotation.
14:27 And then we're going to search in the effects
14:29 and presets here for the transform effect.
14:34 and apply the transform to this adjustment layer.
14:38 And right here on this position,
14:39 we're going to create a key frame for the stopwatch.
14:43 And right here as well, we're going for one full rotation.
14:51 Press U on the keyboard.
14:55 Right here, we have zero.
14:59 And we do a full rotation here.
15:02 Going to select both of these key frames.
15:04 Right click, key frame assistance, easy ease.
15:07 We're also going to jump into the graph editor for this.
15:10 Select these two points and then bring this to the left
15:14 or to the right and this one to the left.
15:17 And that should give you a nice transition.
15:24 And if it doesn't feel like it's vibing, try the other way.
15:26 Minus 360.
15:32 We can also disable use composition shutter angle and go
15:36 for 180 in the shutter angle to create some motion blur.
15:40 Just play around a little bit until you find something that you like.
15:43 And you can also offset these a little bit.
15:47 Okay, so this looks smooth.
15:49 And then right here again,
15:50 we're going to click uh and rotate it as well to a new one.
15:54 So now we have the palm trees.
15:55 Move these in and enable it.
15:59 And again, we can hold Ctrl+ and comma, press S on the keyboard, scale it,
16:05 position it in the same location here, so it looks kind of the same.
16:11 There we go.
16:13 And let's disable it.
16:14 Right here, we are bent over to the right.
16:21 So here, we're going to do the same thing.
16:22 Bend over to the well to the left.
16:29 We're also going to right click time, enable time remapping.
16:32 We have one on standing.
16:37 I'm also going to solo this clip real quick so it goes a little bit faster.
16:43 And that will be right here.
16:44 Create a key frame.
16:51 And right here, create a key frame.
16:56 and move these over.
16:58 And so in this case, we need to begin with this point.
17:04 And then we're going to copy and paste this one over here.
17:09 Copy both of these and paste them just a few times.
17:17 Select all of these.
17:18 Right click.
17:19 Easy ease.
17:21 There we go.
17:21 You can also do that with F9 on the keyboard.
17:24 and we're just going to trim it up until here.
17:27 Okay, so this looks great as well, but as you can see, it goes up and down.
17:31 So, what we'll do is jump into this layer as well.
17:33 Go to the beginning and press U on the keyboard.
17:37 Delete all of these points.
17:38 Delete Mocha here and right click, transform, reset.
17:43 And we need to re stabilize it.
17:46 So click on stabilize motion [Music] like this and then
17:53 move it over here a little bit bigger and click rotation.
18:01 Let's take let's say this part here.
18:05 Make it a little bit bigger, smaller.
18:08 Set it to full resolution so we have a high quality video.
18:13 And we're going to drag this forward.
18:15 So drag down, click here on analyze forward.
18:20 And that should stabilize it better this time.
18:23 And then once that is done,
18:24 we can simply go to the beginning here and scroll down.
18:28 Apply.
18:29 Click okay.
18:31 And that should do the trick.
18:42 And close this layer.
18:47 and reposition it how we like.
18:51 And this is more like it.
18:52 Okay.
18:58 And all I want to do here is extend it a little bit more until here.
19:09 And we are going this time again clockwise.
19:14 So what I will do is go here to the beginning and this goes counterclockwise.
19:21 So click here and let's go for zero.
19:35 Looks kind of okay.
19:39 Let's try.
19:46 That looks great.
19:47 And now we have one more to do.
19:49 That's the Cshot here.
19:51 Enable this as well.
19:53 Right click time.
19:54 Enable time remapping.
19:57 Go to the moment where I'm bend over fully to the right here.
20:06 Create a key frame.
20:09 And now fully to the left, right here.
20:11 And create a key frame.
20:14 Go to the moment where I'm standing.
20:16 Press S on the keyboard.
20:18 Scale it down and reposition.
20:26 That's great.
20:27 Okay.
20:28 Now, we're going to look again at the other clip.
20:31 Disable it.
20:31 This is to the right.
20:32 So, we need to go to the right here.
20:37 And then on this beat, we want to be on the left.
20:42 Select both of these key frames.
20:43 Ctrl C.
20:45 Paste.
20:46 Paste.
20:48 Paste.
20:49 And there we go.
20:51 And select all of these key frames.
20:53 Right click key frame.
20:54 Easy ease.
20:56 And again do a rotation here.
20:57 Copy these key frames.
20:58 Paste them over here.
21:00 And go from this value.
21:03 So actually we need to right click key
21:04 frame assistance try and reverse these key frames.
21:08 And now they should rotate the other way.
21:13 And if you feel like the rotation still isn't perfect,
21:16 you can also right click and just reverse these parts to see how that goes.
21:22 So after playing around with time remapping and the rotation transition,
21:26 you should end up with something like this.
21:31 the [Music] All right, so that's it for this video.
21:43 I hope you enjoyed it, and if you did,
21:45 you might be interested in watching my other videos like the one right here.
21:49 Apart from that, be sure to like this video, subscribe to the channel,
21:52 and hit the notification bell to stay notified when I upload new videos.
21:55 I'll catch you in the next one.
21:57 Until then, create epic