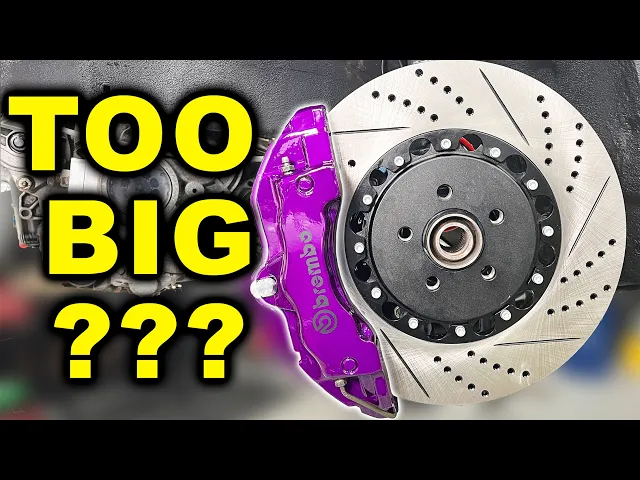
Huge Brake Upgrade on My Turbo MK4 R32
HumbleMechanic
0:00 This is going to be a huge moment because we
0:02 are about to embark on a journey of valve cover.
0:10 I guess the good thing is it's probably not coming out.
0:16 So in the last video we were installing this part and one of the bolts broke.
0:20 Is it my fault?
0:21 Yes.
0:22 Did I overtighten it?
0:23 I don't think I did actually, but clearly I did.
0:27 I figure if it's so stuck that I can't get it out, probably not coming out.
0:32 Or we just gambled our entire build, our turbo,
0:36 everything on a stupid little bolt like that.
0:41 This is where it starts to get a little squirrely.
0:43 Okay, I'm stopping there.
0:45 I don't even think I tightened that other one that tight.
0:47 You imagine how many I would have broke if I would
0:49 have got the big ratchet that I was using at first?
0:51 That leg of our journey is over.
0:53 I'm actually feeling okay about this.
0:54 So we're we're not going to sweat it too terribly much.
0:57 Our valve cover still looks fresh.
0:59 Now we have a place where we're going to make some decisions.
1:02 So this is all the hardware for our valve cover.
1:05 And what's interesting is this hardware on the bottom
1:07 side actually holds the gasket in place.
1:10 So the gasket would live like right there.
1:12 This kind of drops in like that.
1:14 On these two, the studs come up out of the head, so just regular bolts are fine.
1:18 On the rest of them, this is the right hardware.
1:21 Black bolt with kind of a decorative-ish washer, a little rubber grommet,
1:25 and then this is where the gasket is held in.
1:29 But I don't like that.
1:30 Now we could have got some more of those, but I don't like that either.
1:33 So we're going to make ours look like that.
1:34 Now in order to do that, we need to separate the bolt,
1:37 which is captive, from this little seal piece.
1:40 I don't know what you'd actually call that.
1:41 So I have a 14 mil impact socket.
1:44 I'm going to take this, drop it upside down, and separate them.
1:49 So now I have this piece.
1:51 I have our black beauty washer since we're going up against purple.
1:54 I do remember like testing out a bunch of different ways to mount this up.
1:58 Uh like I bought these little rubber grommets
1:59 that would live in this little well right here.
2:02 And this was the best way I could find
2:04 that kind of gave me what I was looking for.
2:06 And it seems that I did all but two of these.
2:08 So, now I think you can buy these new if you wanted
2:11 to, which honestly just buying new
2:13 ones probably would have been completely acceptable.
2:15 Let's flip our valve cover over again.
2:17 We got our gasket here.
2:19 Now, this is a multi-piece situation cuz
2:22 you have these spark plug well gaskets, too.
2:25 And if you want, you can put a little bit of um JB Weld.
2:29 Not JB Weld.
2:30 Don't put JB I mean, there's probably a JB Weld that would work cuz
2:33 much like Kleenex and Xerox, JB Weld is a brand.
2:37 Um silicone.
2:38 Like oil pan gasket material.
2:39 Why can't I think of what it's called?
2:41 It's called RTV.
2:42 That's what I was trying to think of.
2:45 Uh I have a little one here that I'm going to open
2:48 cuz I don't know when we're going to need the next little bit.
2:50 God, by the way, if you didn't know,
2:51 when you have these tubes that are sealed like
2:53 that, a lot of times there's a little pin in the cap.
2:57 So, you can just take the cap, puncture it like that.
2:59 We'll do a little bit on the head side, too, but you don't need much.
3:02 Gasket's so powdery.
3:04 Why is it so powdery?
3:05 Probably cuz it's 5 years old.
3:07 So mad about that bolt breaking, by the way.
3:09 I don't remember the last time I broke a bolt installing one.
3:14 See how you can see that metal piece right there inside the gasket?
3:18 So, watch.
3:19 When I take this, I'm going through the hole, it sticks up,
3:23 and then you got to take the gasket and kind of lock it into place.
3:26 What's cool about that, though,
3:27 is that does make installing this a bit easier cuz you don't
3:31 have to like hold the gasket to make sure it doesn't fall off.
3:34 All right.
3:35 There we go.
3:35 We got our gasket.
3:37 Good job, us.
3:38 We'll put our spark plug well gaskets.
3:41 These are keyed, by the way.
3:42 Can see the little notch right there.
3:44 These you do have to pay attention to, though, cuz I have had these fall out.
3:47 If you are doing this and you're not using like beauty washers like we're doing,
3:51 you're going to see the bolt stick through like that.
3:54 It'll hang low cuz they move, but they're also captive,
3:56 so it'll kind of live like that.
3:57 We are doing this, which means it's time to put
4:01 this bad boy on the car hopefully once and for all.
4:18 Yeah, buddy.
4:19 I bought that.
4:22 Okay, not an ideal scenario of that bolt breaking.
4:25 And as you can see, I have the valve cover on the car.
4:28 I had another valve cover.
4:30 I sent it to powder coat.
4:31 Do I think we could have ran this valve cover with no issues?
4:34 Yes, yes I do, and I think it would have always been fine.
4:36 Some of you had a really good suggestion of like
4:39 tapping around the screw to kind of lock it in place,
4:42 which was an awesome thing.
4:43 But, since I had another valve cover, we're going to run with that one.
4:47 Now, I also installed this one because I wanted to test
4:50 fit how our beauty washers would go on and look and everything.
4:53 Once the new valve cover comes, we'll swap it out,
4:56 and then we can all rest a little
4:57 easier that we don't potentially have a problem.
5:00 But again, I think it would have been fine.
5:02 Now, here's the fun part of this job.
5:04 So, when you buy something like
5:06 this, it's not like buying IKEA furniture, right?
5:08 There's no instructions of step one, do this.
5:11 Step two, do this.
5:12 Assemble your pooply and then you're good to go.
5:15 You get a whole bunch of parts, and some of it's a little bit of figuring out,
5:19 which is why I had said very early on in this project,
5:23 I'm not torquing many things down cuz I might have to take some things back off.
5:26 The first thing we're taking back off today is going to be our turbo charger.
5:30 A couple of reasons.
5:31 One, there's some brackets that have to go on on the manifold.
5:34 One of my studs was too long.
5:36 We got to put our coolant fittings on.
5:38 So, we're just going to take this off.
5:40 All right, tighten that one more tighter than I had anticipated.
5:43 Another thing we're going to do while we're right here is we're going
5:46 to put a gasket on this between the exhaust manifold and the turbocharger.
5:50 That is probably not super necessary to put
5:53 that gasket on cuz I think I'd mentioned it before.
5:55 Those two surfaces, the mating surfaces,
5:58 are very likely machined flat so that a gasket isn't 100% necessary,
6:03 but listen, it's going to make me feel better.
6:05 We got a lot of taking of parts off to actually do.
6:08 We got this, we got our rear brakes, and the wheel bearing and all that.
6:13 This is heavy.
6:14 Now, the real question is where the hell am I going to put it?
6:17 So, you'll notice everything's a little cozy tight because right here,
6:20 we got a B5S4 that I was mid doing the heater core
6:24 on, and then I'm going to just not even BS you or sugarcoat anything.
6:28 I got sick of doing it.
6:29 I know it's not a hard job,
6:31 but the main problem was every piece of plastic I touched.
6:34 It's like I touched it, crumble.
6:35 Touch it, crumble.
6:36 Here's a good example.
6:38 This is the center console.
6:39 It's gross cuz I'd never clean the car since I've owned it.
6:42 This is where the rear center console mounts,
6:45 and look at all this is just gone, just crumbled away.
6:48 This is where it mounts to a bracket, broken.
6:50 And it looked fine.
6:51 Just the second you touch it, it crumbles.
6:53 And much much much like Volkswagen, Audi's support for older cars is terrible.
6:59 Hey, Volkswagen Audi customers, we know you love our cars.
7:03 We know that you want to keep your cool nice car on the road,
7:07 but we also don't care.
7:08 I want to say bad word, but I'm not going to.
7:11 What [snorts] I am going to do is take this manifold off.
7:13 There were a couple of brackets that needed to go on right here
7:16 that I didn't put on because I found them after I had gotten it on.
7:19 So, we're going to do that now and try and just get kind
7:22 of this area together enough where we don't have to come back to it.
7:26 All right, wrestle those little wrenchy boys.
7:30 So, I'm standing here ratcheting, and I glance over to my right here and think,
7:35 "Huh, have you noticed what's missing on this side?"
7:38 Let me know if you've noticed it.
7:39 I'll show you in a minute what happened.
7:41 Here's your hint.
7:42 If we refer to a fire as a thermal event,
7:46 then we can refer to that one as like a gravitational impact.
7:51 By the way, I'm sure these nuts are technically one-time use.
7:55 Too bad, we're using them more than once.
7:57 I'd probably have spent more than I spent on the car if
8:00 I replaced every single bolt that was one-time use in this car.
8:03 We're going to take this off and take it to the bench.
8:07 We're going to do a couple of things.
8:08 One, we're going to properly install the right studs.
8:11 These studs work just fine,
8:12 but I actually found the studs that came with the kit.
8:15 So, we're going to use those.
8:16 They're a little bit shorter.
8:18 We have a couple of pipes to put on.
8:19 Then when we go back together with this, we
8:22 have some brackets that need to go on.
8:24 So, these guys go like here to hold on the heat shield.
8:28 So, we got those guys on the bottom, those guys on the top.
8:31 We had one of these hitting the body of the turbo.
8:34 The overall length is about the same,
8:36 but this will sit in the manifold a little further.
8:40 Because it goes in further, we have less sticking out of the manifold,
8:44 then effectively our stud is shorter.
8:46 So, we shouldn't have to worry about hitting the turbo.
8:49 Before we get too crazy under the hood, I am so excited about this.
8:53 So excited that I have to show you.
8:56 This is what we're going with for the brakes.
8:59 So, these are 18Z's for the front.
9:01 We got install kits.
9:02 We got install kits for the rear and lines.
9:04 I'll give you all the specs on these in a little bit.
9:06 I just Would you just look at it?
9:08 Jeff, our powder coater near Poly D, rebuilt these.
9:12 I think in the last video I showed you that he text me and said,
9:15 "I had to do a lot of work." Um and they came out great.
9:17 These are incredible cuz they were nasty.
9:20 Color match looks great.
9:21 This is uh prismatic violet, I think.
9:24 A great question always comes up, "What are you going to do about the master
9:28 cylinder?" Cuz we're going from two pot front,
9:30 one pot rear each side to six pot and four pot.
9:34 The 18Z's and the 17Z's are a really common upgrade.
9:37 Half the people say, "My brake pedal is awesome." Half the people say,
9:41 "My brake pedal is terrible." I don't know the answer,
9:45 but we're going to find out at some point.
9:46 All I know is we got a lot of brake going on this car, which should be premo.
9:51 And these are actually the factory ones.
9:53 The only thing we're doing with these is we're using these for a parking brake.
9:57 So, we get to undo the thing that I did out of order last time.
10:00 Listen, this whole video [laughter] This whole video is basically me installing
10:06 a part and then taking something else apart
10:08 that didn't go on in the right order or I found another thing that, you know,
10:11 it's easier to to install with another part off.
10:15 So, this should be a lot of fun.
10:17 Parts come off, new parts go on, part I already installed probably goes back on.
10:22 But, look, this is how it goes.
10:24 Here's the gasket that we're running.
10:25 It's nothing fancy, nothing crazy,
10:27 but I'm going to run one just to be on the safe side.
10:30 If this surface was machined perfectly flat and the surface where
10:35 it mounts up to on the exhaust manifold was machined perfectly flat,
10:38 these two surfaces would very likely seal.
10:40 However, [sighs and gasps] look, it's probably going to be okay,
10:44 but once all that stuff gets put on, are we really going to want
10:48 to risk having to take everything back apart over like a $4 gasket?
10:53 I don't.
10:54 So, we're going to drop that bad boy on there
10:56 just like that and we're going to send it.
10:58 Something that I did not install was this coolant pipe.
11:01 So, this goes on the back below the turbocharger.
11:04 So, it's actually good that we have all this out of the way.
11:06 I'm just going to take these two bolts out
11:07 and then this is going to go like that.
11:10 So, because we're adding this turbocharger,
11:12 we're now putting a ton more heat right here.
11:16 We have our AC lines that are here.
11:18 We have our shifter cables that are here.
11:20 So, I bought some heat wrap and my goal
11:22 is to just kind of wrap the shift cables up.
11:25 And we'll get these shift cables in this bracket here.
11:28 I still want to make sure these plasticky bits
11:30 or moving bits or anything like that are pretty well protected.
11:33 For you keen-eyed observers that have noticed we have
11:35 a fender here and we have no fender on this side.
11:40 Let me regale you with the tale of what happened.
11:43 So, I was here and I was like,
11:46 you know what I need is I need the hood a little bit lower.
11:49 And so I loosened the I had vise grips on it, so judge if you want.
11:54 Uh I loosened it a little bit, lowered the hood,
11:57 squeezed the vise grip up so that it was holding
12:00 and then like a second later the vise grip popped forward.
12:04 I was still standing here.
12:06 I caught the hood but only after jamming the vise grip into the fender.
12:12 Into the freshly painted swear word swear word swear word fender.
12:18 Thankfully, our man Tom at Everything Euro who they did
12:20 the real body work of this car took the fender.
12:23 So, he's fixing my boo-boo, but still what a kick in the pants.
12:27 This is what I got for the shifter cables
12:30 and for a couple of other things and basically it's a heat wrap,
12:34 but instead of having to wrap it around or like
12:37 as a tube slide it on, it has Velcro.
12:40 So, we can just fold it over and then
12:42 it has these friction clamps that go around it.
12:45 So, I measured off the exposed area of those lines.
12:48 We're taking 15 bucks and 10 minutes right now.
12:52 Would it have been a problem?
12:53 Like I said, I don't know,
12:55 but I'm hopeful that now we just don't even have to worry about it.
12:59 I think we can put our manifold back on.
13:03 [music] Before we get our turbo charger put back
13:10 on, we need to put our coolant fittings on.
13:13 These are our two lines that we're going to be installing.
13:15 That is a dog hair from probably a white Boston Terrier.
13:20 This I feel like we could have easily done in the car as well,
13:23 but since we're right here, I think we should do it.
13:25 I'm trying to evaluate, okay, when this goes in the car,
13:28 it's going to sit like this.
13:30 Will I be able to get access not only to start the fitting,
13:33 but to actually tighten it?
13:34 Yeah, I'm pretty confident of that.
13:36 Bottom side is a little trickier,
13:38 but I'm still feeling like we could probably get to it.
13:40 The bevel box being on may prevent that.
13:42 So, we'll probably get these lines queued up before the bevel box goes on.
13:47 Boy, that is right up on that coolant line, isn't it?
13:51 That's hitting that coolant line.
13:53 So, what I'm going to do is I'm going to loosen this one,
13:55 and hopefully this is the last time we have any on and off of this turbski.
14:07 We are golden.
14:09 That should be it.
14:10 We shouldn't have to take this back off again.
14:12 Remember, our whole engine is actually going to sit more like here,
14:15 so we should have plenty of space around this.
14:18 And everything we do, we're reducing the amount of room we have left,
14:21 and that's good cuz that means parts are going on.
14:23 So, you know what we're going to do next?
14:24 We're going to put some spark plugs in so we don't have open engine hole.
14:27 We're going to squirt a little down in the cylinder just to have some lubricity.
14:31 We're relying on HPA here fully on this, but it
14:34 just seems a little strange to me.
14:35 They recommended factory R32 spark plugs gapped to 0.28 in.
14:42 To me, running a colder spark plug is usually the better,
14:46 like kind of the thing that you do, I guess, but I'm trusting HPA here.
14:50 Look, they've built a lot of turbo charged R32s,
14:53 so I'm hopeful that that's going to be just fine.
14:56 Especially new, every spark plug gets torqued.
14:59 "What do you do that for, Chuck?" That's a great question.
15:01 I'm glad you asked, audience, because when I was a very new technician,
15:05 the guy working next to me, his name was John, his name probably still is John.
15:09 He did plugs on like a AEG 2-liter, and later that day,
15:14 car gets towed in misfiring with the plug
15:17 just dangling out of the spark plug well.
15:19 Had to to the head, get the machine shop to fix it,
15:22 and I remember that vividly enough that I still torque spark plugs.
15:26 Remember, the manifold kind of goes up and over,
15:28 but you still see the end tanks, but I still wanted to use these beauty washers.
15:33 And so, I used the factory like retainers that hold
15:36 the gasket in, and then a beauty washer and an Allen.
15:39 And I think it looks real nice.
15:41 When I was putting the valve cover on, I
15:43 had this weird feeling about a piece of the gasket, like a little divot.
15:48 So, it's flat, dips down, and then comes up.
15:50 I got another gasket, and if you look on this gasket right here,
15:54 you can see that tiny little drop-down.
15:56 I'm almost 100% sure that gasket didn't have it.
16:00 Is that a big deal?
16:01 Yeah, it's probably going to be an oil leak if we don't fix it.
16:04 So, when we get our other valve cover, I'm going to put a new gasket on it,
16:08 and then I got a supercharger for the red car,
16:10 so we'll probably save that for that car.
16:12 We are possibly going to have to figure out a different oil return solution.
16:17 The one that comes in the kit comes out of this and goes
16:20 around to the full passenger side of our oil pan,
16:23 and we have a fitting right here,
16:25 which doesn't seem like it's that big of a deal,
16:27 but the hose is kind of getting bunched up if you try and mount it here.
16:31 Probably have to make a pipe.
16:32 Not a big deal, just one more thing.
16:34 This is why, no matter what, every freaking project is always different.
16:43 Before we can install those absolutely beautiful brakes,
16:47 we need to undo a thing that I did a quite a while ago,
16:52 and that's we have to remove the wheel hub
16:56 because all those brackets for the kit go behind it.
16:59 I knew this was going to end up happening.
17:00 I have another wheel bearing cuz we destroy the wheel
17:03 bearing when we take the uh the hub out.
17:06 Unfortunately, here is our slide hammer kit.
17:09 There's other ways to do this.
17:10 If we had a cone big enough to fit over the hub,
17:13 we wouldn't have to slide hammer,
17:15 but I don't even remember when the last time I used this was.
17:17 Shall we take bets on how many pumps it's
17:20 going to take to get this thing off of here?
17:24 One.
17:25 Two.
17:27 Three.
17:28 Three pump chump.
17:30 Four.
17:31 Five.
17:32 This is the one that's going to come off.
17:35 Let me show you why we have to replace the wheel bearing.
17:37 So, this piece with all the grease on it right here,
17:40 this is part of the wheel bearing.
17:41 You can see it left the wheel bearing in there, but it's separated.
17:44 Now, could we reuse it in some twisted crazy world?
17:48 Probably.
17:49 Is it worth it?
17:50 No, cuz wheel bearings are like $20.
17:52 And at this point, what's another $20?
17:55 So, we can switch to our wheel bearing kit.
17:58 So, I'm going to put a piece at the back.
18:00 Cone goes here.
18:01 We use the bolt and it'll just pull
18:03 the bearing away right out of the trailing arm.
18:06 And we'll do the same thing going back together with it, just the opposite.
18:09 Oh, it's close.
18:11 Oh, it's there.
18:12 Oh.
18:14 It's broken.
18:15 Just like our table.
18:18 All right, there we go.
18:19 So, here's our old {slash} new bearing.
18:21 No miles.
18:22 These are nice because they don't have a inside and an outside.
18:26 The Touaregs have the wheel speed pick up here,
18:30 and so you have to put it in the right way.
18:32 The B5 Passat, the inner race one side was wider than the other,
18:37 so you had to put it in the right way.
18:39 This one doesn't matter.
18:40 All right, so this is mostly in.
18:42 So, we can leave the back side, but we need a different piece for the front.
18:46 Uh the amount of times I have forgotten that snap ring is it is.
18:49 We'll just leave it at that.
18:50 Our rear rotors, which these are actually the same rotors
18:54 that the 337 and the 20th use in the front.
18:58 We have our Ris Pas kit.
19:00 We installed it on the other side just to kind of test it out and see.
19:03 This allows us to use the rear Touareg
19:05 brakes and retain the factory brakes for parking brake.
19:09 I got to tell you, for parking brake, I think there's probably better solutions.
19:13 In fact, the guys that make this has an adapter bracket for R8 brakes,
19:18 but then I started looking at how much the R8 parking brake caliper was,
19:22 and then I was like, "Not on my watch." This is also high temp threadlocker,
19:26 the same stuff that they tell you to use when you do wheel studs.
19:29 No torque spec, so we're just going to go snugtastic.
19:32 You need to support the backside of the bearing,
19:35 what I have with this piece right here.
19:36 It has to sit up against the inner race.
19:39 If you don't do this, all you're going to do
19:41 is rip the inner part of the bearing out.
19:43 This bad boy.
19:51 Ah, damn it.
19:53 Don't worry about that.
19:54 You know what else works really well to hold a rotor on like this?
19:57 It's an old drain plug, cuz they're the same thread pitch.
20:00 Outstanding.
20:04 For the carriers, I had to grind out
20:07 the middle because we're using a bigger rotor.
20:09 You'll notice where I'm putting this is the front side,
20:12 where the R32 normally has the caliper on the rear side.
20:16 You have to swap the left caliper and the right caliper.
20:18 We got to put some brake pad on that bad boy,
20:20 but I got some almost brand new factory brake pads that I'm going to put on.
20:25 If you're doing this setup and you don't
20:27 have five sets of brake pads sitting around,
20:30 I would buy the absolute cheapest brake pads I could find.
20:33 They're only parking brake.
20:35 Still leaving it in gear, so you don't have to go crazy,
20:37 but the cool thing about these calipers,
20:40 when we get pads for them, we can just drop the pads right in.
20:42 We don't have to worry about like pulling the caliper off or anything like that.
20:46 This is huge.
20:47 This is one of those big moments.
20:49 I know you guys have a ton of questions about these brakes, right?
20:52 What wheel can I run with those brakes?
20:54 Will I need a spacer?
20:55 I got to tell you, these are questions I don't have answers to right now.
20:58 I really don't know.
20:59 But what I do know is that looks good.
21:01 We should have no problem stopping this car.
21:05 I'm going to go hunting cuz I'm pretty sure I have a spacer and I
21:08 don't want to damage the caliper before we even get to drive the car.
21:11 Then, I know I have an Aristo.
21:13 We'll test it and see what happens.
21:15 So, this is a 13 mil no-name [snorts] spacer.
21:19 Depending on what spacer we need,
21:21 I'll probably talk to H&R and get like a really good high-end set of spacers.
21:25 God, I wish this wheel wasn't disgusting looking.
21:28 [laughter] That's probably about where we want to be.
21:30 Maybe we'll go 15.
21:31 It's going to really depend on this fitment here
21:34 cuz we're at like full droop of the suspension.
21:37 But, yo, when these wheels are so like bright
21:41 and shiny and the tire looks good and clean.
21:44 Oh, I'm so excited about this.
21:48 So, I'm not going to finish this brake job yet.
21:51 But, we have the parking brake cables and then we have the brake lines.
21:54 So, these are rear lines from USP Motorsports.
21:56 We'll have to figure out the routing once we get all the rest of the stuff on.
22:00 And this is nice, too, cuz we're not losing a bunch of brake fluid cuz this car
22:03 hasn't had brake fluid in it for like 5 years, so.
22:08 The back came out so good.
22:10 We're going to do the front next.
22:11 Now, I have brand new knuckles with hubs with wheel bearings.
22:16 It even has a speed sensor on it, a ball joint on it.
22:20 I think I got these from One Love who has been a huge part of this.
22:24 Like, that's where our transmission came from.
22:26 We got a killer dust shield.
22:27 So, these are 18 Zs out of a V10 TDI Touareg.
22:30 They're six-piston compared to the two-piston
22:33 that the car came with from the factory.
22:35 What I'll tell you is I have driven several R32s on stock
22:38 brakes at Tail of the Dragon in auto crosses and they've been great.
22:43 Would a brake setup like this been better?
22:44 Probably.
22:45 The only time I've ever ran into a brake issue
22:48 with stock-size brakes was I bought some G-Loc street pads.
22:51 They were awful.
22:52 I had brake fade on an auto cross.
22:55 That ain't it.
22:56 Let's get this old brake line out of here.
23:01 There we go.
23:02 Bye-bye, yucky piece.
23:03 So, this kit came from ECS Tuning.
23:05 I already had the calipers, so I did not buy the calipers from them,
23:09 but we have the two-piece rotors, we have the mounting bracket,
23:13 we have all the hardware, it came with brake lines.
23:16 I got to say, they had a pretty thorough setup for what we're trying to do.
23:20 Now, before I put the rotor on, even though this hub is new,
23:23 I'm going to just clean some of the surface rust off of it.
23:25 For us, that really wasn't that bad, but if you have a setup where there's a ton
23:29 of rust or oxidation or grime or grit or dirt,
23:32 whatever, when you go to mount the rotor to it,
23:34 it's not going to sit flush, and so your torque's not going to be right,
23:37 you run the risk of having noise or brake parts loosening up on you.
23:41 Is that insanely extreme?
23:43 Yes.
23:44 Is it real and it could happen?
23:45 Yes.
23:46 But, in a like, let's do our brake job the right way, kind of way.
23:50 Someone was talking to me about bleeding these calipers
23:53 on this setup and how it can be a bit challenging.
23:56 We have no brake fluid, which means we have to do the ABS bleed on it anyway,
24:00 so this may not apply for us.
24:01 They said, if you take a rubber mallet while you're bleeding,
24:04 so pressure on the system while you're bleeding,
24:05 and just tap along like where the pistons are,
24:08 if there's any air pockets, it usually jars them loose.
24:11 Another question you might be having is,
24:13 Charles, what pads are you going to run?
24:15 I'm not sure yet.
24:16 My favorite brake pads that I've ever had were on my yellow car,
24:19 and they were the Ferodo DS 2500s.
24:22 They were incredible.
24:23 They stopped the car so well.
24:24 So, if they make those for this setup, that's probably what I'm going to do.
24:28 If you have this brake setup, and you have any pad suggestions, let me know.
24:32 I showed you step-by-step on the driver side,
24:34 and shockingly enough, the passenger side is exactly the same.
24:38 Really, the only caution I'll tell you is if you get this exact kit from ECS,
24:41 make sure you put the left rotor on the left
24:43 side and the right rotor on the right side.
24:45 Be sure your calipers have the bleeders facing up,
24:49 and then make sure you tighten everything down properly.
25:03 In a previous video, I tried to put the serpentine belt on and I struggled and I
25:07 struggled and then I might have thrown the serpentine belt across the shop.
25:14 [laughter] I heard back from HPA and they said they use
25:16 the stock Mark 4 R32 serpentine belt even though we have,
25:20 you know, that much more distance now that we need in the belt.
25:23 So, I'm going to try again.
25:26 Perhaps I was just having the dumb.
25:28 There's that.
25:29 That is on correctly.
25:31 This just feels wrong, but Jesus.
25:38 [sighs] Unless this is the wrong belt in the package.
25:41 Okay, I have put on Lord knows how many VR and other VW Audi serpentine belts.
25:47 Tried and struggled then I reached out to HPA and they're like,
25:50 use the factory belt.
25:51 I was like, "Dude, I struggled.
25:53 You guys you saw me seconds ago struggling.
25:56 So, 6DPK1320 is the belt they told me to use.
26:01 I don't know if you can read what that says.
26:03 That says 6DPK1285, which means it's 35 mm too short,
26:09 WHICH EXPLAINS WHY IT DIDN'T FIT.
26:12 LAST VIDEO I I ranted so much about VW's terrible support for their older cars.
26:18 Uh now I'm going to rant about the absolute
26:22 garbage way so many aftermarket companies present their parts.
26:25 Here's the lesson, double check the parts that you put
26:28 on your car before you try and put them on your car,
26:30 otherwise you might end up with a 35 mm too short serpentine belt.
26:36 Plenty of people on the Tik Tok were like, "Oh,
26:38 you should have checked the parts." Yeah, I should have.
26:41 So, here is our new serpentine belt made made by Mitsubishi apparently.
26:46 6DPK1320, so this belt should go on.
26:49 You got to hold your mouth right a little bit, but it shouldn't be hard.
26:53 The nice thing about these is there's a bolt
26:55 in the tensioner that holds the tensioner open,
26:58 so you don't have to hold the tensioner
27:00 open while you're trying to get the belt on.
27:02 Oh yeah, this is This is like a hundred times better already.
27:05 And oh, look at that, it went right on.
27:08 No problem.
27:09 Here is a little tip though when it comes to serpentine belts,
27:12 make sure you look at every single pulley.
27:16 Make sure it's on the ribs all the way.
27:18 That way when you start your car up it doesn't rip the belt
27:20 in half and now you got to get another belt and Listen,
27:23 I don't want to fear-monger or anything,
27:25 but I've seen serpentine belts come apart and cost engines.
27:29 It'll get sucked behind the timing cover,
27:31 it'll get in the oil pan, it'll make a car jump time.
27:35 A serpentine belt is kind of like an oil change.
27:37 For most cars, very easy, but just like with oil changes,
27:41 those are the jobs that people snooze on and then you end
27:43 up making a mistake and it costs you a ton of money.
27:46 And yeah, make sure you get the right belt.
27:49 In a prior video, we were talking about tools and I
27:52 had mentioned there was a tool that sounded out there,
27:55 but everybody at some point is going to want one on their toolbox.
27:58 And that was a 3D printer.
27:59 So we have our Haldex controller wires.
28:02 I tried to get it through the factory grommet and it just it it's not.
28:07 It ain't doing it.
28:08 So I printed this grommet.
28:10 Look at it, it's squishy.
28:11 This is printed from TPU.
28:13 There's people printing bushings for their car out of similar material,
28:17 different hardness, but same material.
28:18 And so we'll run our wires right through.
28:20 It'll sit just like the factory grommet was.
28:22 But the reason I did this is because I could split it in half in the slicer.
28:26 We can put half of it up and then we can
28:28 put the other half up and I'll just glue it together.
28:31 OH MY GOSH, IT WORKED.
28:33 I'm so happy about this.
28:34 Here's the deal, we've put a lot of parts on this car
28:37 that were made or designed or whatever by someone else.
28:40 Trying to not like oversell it, but this is a part that I made.
28:44 And I think that's really neat.
28:46 When I rehabed our power steering rack,
28:49 what I found was in some spots on these two hard lines, it looks okay.
28:53 Like right there, not worried about that.
28:55 Then there's some places like this area here where it looks really un-okay.
29:00 Pretty much only a matter of time before that becomes a problem.
29:04 So, I tried to find the right tool to make the ends,
29:08 cuz they're kind of a weird end.
29:09 I couldn't find the right deal.
29:10 Then I found there's some places in Canada that you can just buy the lines.
29:14 Easy, right?
29:15 Except all of them are out of stock or not shipping to US.
29:18 The real kick in the area is that I had a body and these lines from a Mark 3,
29:25 which I'm pretty sure they're all the same, sitting in the shed.
29:28 And what did I do with it?
29:29 I said, "I'm never going to need this." Right in the bin.
29:32 Outback, I have a Beetle and we're just going to rob
29:35 these two lines off of that Beetle cuz it should be the same.
29:37 So, once I get the Audi out of here,
29:39 we'll bring the Beetle in and we'll swap these lines over.
29:42 What is a job for right now is the fact that I
29:44 found the tool that I was talking about in the last video.
29:46 So, this is a tie rod tool.
29:48 You put the tie rod through here, that's why it's super like a long tube.
29:52 Then you can tighten and we should be able to crack this baby loose.
29:58 I I won't say struggled,
30:00 but I worked pretty hard at it on the last video with just a pair of pliers.
30:03 That's normally how I do it when they're in the car,
30:05 but this tool works really, really well.
30:07 Watch.
30:09 All flop.
30:10 Come over to this side, it's fully standing at attention.
30:14 So, that's looseness in this ball joint right here
30:17 or lack of grease in this ball joint right here.
30:19 For how easy of a thing this is to change,
30:21 especially right now, there is no reason not to put one on.
30:26 And bevel box.
30:29 Oop, it's it's leaking.
30:31 It's juicing.
30:33 That's all right, we got to drain the fluid out anyway.
30:35 This is our bevel box.
30:36 So, this is the piece that mounts up to the transmission and look at the seals.
30:41 Look at how yuck those seals are.
30:43 Luckily, I got new seals.
30:46 Now, nice and easy, right?
30:48 We have the seals.
30:49 Easy, good, fun.
30:50 Unfortunately, this other seal, right here, is obsolete.
30:55 Shall I say it?
30:57 Thanks, Volkswagen and Audi for terrible part support on your older cars.
31:00 The most enthusiast cars that are on the road for your brand,
31:04 and you're just like, "Nah, dog.
31:05 We don't want to help you out." Luckily, I have one.
31:08 I ordered this.
31:09 Check this out.
31:10 August 21st of 2020.
31:13 What I wish this told you was the size of the seal,
31:16 but I think I have the part number.
31:18 So, maybe we can figure out what size the seal actually was.
31:21 Try and find the seal.
31:22 Cuz like, ultimately, it's just a small seal.
31:24 Putting on the bevel box is pretty easy.
31:26 It's four bolts that bolt it to the transmission,
31:28 two bolts that bolt it to the engine,
31:30 one bolt that goes through the whole housing
31:33 and comes out here that bolts to the diff.
31:35 These are specialty bolts that are for the bevel box specifically.
31:40 It's a wider bolt near where the head is.
31:43 That's to keep the bevel box in place.
31:45 Otherwise, it can wiggle around.
31:46 If you use the wrong bolt, you're probably nuking your bevel box.
31:49 So, we're just going to use this to support
31:50 our prop shaft so it's not hanging on the joint.
31:53 The reason I'm doing the bevel box now, the oil return line I showed you guys
31:57 comes out of the bottom of the turbocharger, right?
31:59 And the line from HPA goes down, and you're supposed to drill a hole right here.
32:03 We went with this pan from EuroWise.
32:05 I don't think I'm going to be able to use
32:07 the HPA line because instead of going to here,
32:11 I'm going like right here on the backside of the pan.
32:14 So, we're probably going to have to make a new line.
32:16 Before I can do that, I need to get the bevel
32:18 box on, the axle in, and make sure that we're not going
32:21 to have any interference with either one of those two parts
32:23 because if we have a rotating part hitting our oil return line,
32:27 I'll give you one guess what's going to happen.
32:29 You know what's going to happen.
32:30 Sadness.
32:41 What the hell?
32:45 I was struggling to get it lined up.
32:46 There's two pieces that you need to get lined up.
32:49 There's this splined piece right here.
32:52 And then inside of here is also a splined piece.
32:55 So, I just rotated around till it lined up,
32:59 I think, and hopefully lift this guy right up there.
33:04 There we go.
33:05 I just got to put those special tie bolts
33:07 in, tighten the one that goes through the housing,
33:09 prop shaft on, we're good to go.
33:12 All right, we'll come back and torque these just cuz these are brand new.
33:14 I don't know what the torque spec is.
33:16 We've had some victories though.
33:17 We got our brakes on, we got our bevel box on.
33:20 I'm about to drop the axle in just as a test fit.
33:23 This is really good.
33:24 I'm feeling really good.
33:25 I need this because the next bit that we got happening is
33:29 going to be so much little minutia and like where does this go?
33:33 Where does this go?
33:33 What is this?
33:34 When you buy a kit like this, they don't give you like step one, do this.
33:37 Step two, do this.
33:38 This is not IKEA.
33:39 That's kind of where our axle's going to be.
33:42 So, that's not too bad.
33:43 We won't know the exact spot until we get the subframe
33:46 in, but we can kind of plan for that to be about right there.
33:51 I think we're going to have a nice path to get to here,
33:55 which means we may need to change what kind of fitting is here.
33:58 That's not a big deal.
33:59 And cuz even though this line shouldn't have any movement,
34:02 our axle's going to have movement up and down,
34:05 side to side a little bit, forward and backward.
34:07 We really have to make sure we pay attention to where this goes.
34:10 Not that it doesn't rub it or touch it, that it doesn't come close.
34:13 Let's do a quick test fit of our down pipe.
34:16 And it's going to be somewhere in this ballpark right here.
34:19 We should be all right with getting this oil drain in here.
34:23 This is a kit of dash 10 fittings that I'm likely going to use.
34:27 So, look at how close it is to the axle.
34:29 So, any up and down movement, this is going to hit.
34:32 And if we go here, that oil probably isn't going to drain the way it should,
34:36 which means none of those are really the right thing.
34:39 This is just for demonstration.
34:41 This is our power steering line.
34:42 So, this has a banjo fitting on it.
34:44 And what I'm thinking is if we get a banjo bolt,
34:47 we can kind of go right like that and maybe even make
34:51 a little like a bracket or something right here to hold everybody in place.
34:55 Checkbox for problem solved, and I'm really happy about that.
34:57 There's one other thing I want to do.
34:59 So, this is the template that I made to fill in this big gap.
35:02 I think that's going to fit real nice.
35:04 We'll make a metal one.
35:05 We'll have this bad baby bolted up, ready to go.
35:09 Big day.
35:09 This is awesome.
35:10 Now, I'll see you on the next one.