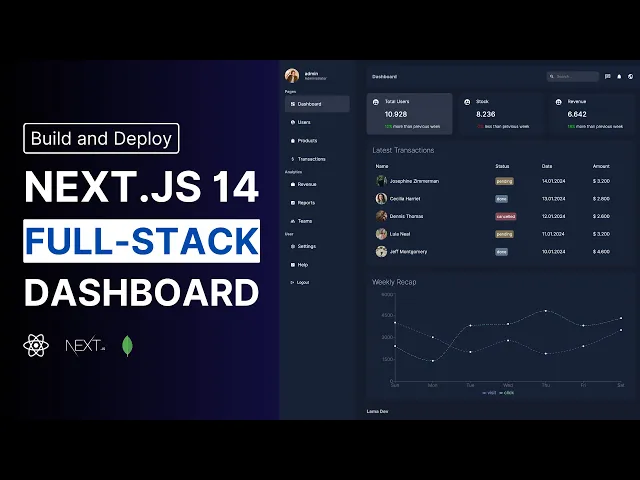
Next.js 14 Admin Dashboard Tutorial | Fullstack Next.js 14 Project with Server Actions
Lama Dev
0:00 Hello friends today we are going
0:01 to create this beautiful dashboard application using
0:05 nextjs 14 we'll Design This homepage and after that you will learn how
0:10 to fatch data using the new version of nextjs this is important because we
0:16 will not use an API route anymore we will patch and update our data
0:21 on the server components you will learn how to use pagination how
0:26 to search for any item and you will see how how easy to create
0:31 all these functionalities without using any use State and use effect hooks we
0:36 will fetch the data using the nextjs
0:39 navigation and it improves the user experience
0:42 and the search engine optimization and after that you will learn the most
0:47 exciting part nextjs server actions as soon as you click here it's going
0:52 to revalidate your data and here you can add a new user with server
0:58 actions let's see the user it will display the user detail and we can
1:09 update the data and we will do the same things for the products
1:16 and finally we will build the authentication
1:19 and protect our routes using a middleware
1:24 let's log out as you can see it redirects me to the login
1:28 page and now I can cannot reach the dashboard let's write the wrong credentials
1:34 and to show this error we'll be using the new use form State
1:39 hook this hook allows us to get the response from a server action if
1:44 there's an error we are going to update the form State and if
1:49 I write the correct credentials I will be redirected to the dashboard and now
1:55 I cannot see the login page it's a great project to learn the new
1:59 new features of nextjs 14 and in the next video I will create
2:04 a complete nextjs tutorial if you don't want to miss that you can
2:09 open your notifications and after completing
2:12 this tutorial we'll deploy our project using hostinger
2:16 as you know it's the hosting sponsor of the channel and I create
2:20 different projects using hostinger every month
2:23 and for this project I'm going to choose
2:25 a VPS hosting if you choose the most popular VPS you will get
2:30 a really generous RAM storage and bandwidth so you can deploy all your projects
2:36 on a single server and these servers are super fast because they use
2:41 mvme ssds and one of the most powerful AMD processors and now there is
2:48 the biggest discount of the year only for Black Friday and if you want
2:53 to get an extra discount use the link in the description choose your time
2:58 period and and apply the lamad dev coupon code here after purchasing you
3:04 are ready to set up your server choose any location we are going
3:09 to install a panel and it's going to be Cloud panel let's create
3:14 a password and finish the setup after this process it will be ready to deploy
3:22 your apps so let's create our application and deploy it to our server
3:31 okay let's open up vscode and create here a new folder and inside
3:36 this folder we will create our next application to do that you can open
3:41 up your terminal and say MPX create next app and latest if you do
3:49 that it's going to install the latest version of nextjs but I recommend
3:54 you to use my GitHub repository and this starter Branch because if you watch
3:58 this video after the release date some
4:01 dependency versions might be different to prevent
4:04 any possible errors you can use
4:06 this repository I also removed all the unnecessary
4:10 files and styles so we are going to create everything from scratch without
4:15 wasting time so I'm going to come back and make sure you choose
4:21 this starter Branch because at the end of the video I'm going to create
4:24 another Branch here and it's going
4:26 to be the completed version of the application
4:30 and after choosing starter Fork this branch and it's going to create a new
4:35 repository on your account so it will be easier for you to follow
4:38 your steps during the development after forking you can come here and copy
4:44 your URL and come here let's remove this I will say get clone paste
4:52 your url Dot and enter as you can see they are here but we
4:59 don't have our libraries let's install I will say mpm install and not
5:06 modules folder is here right now it's ready to run let's run I
5:11 will say mpm run down let's open up Local Host 3000 okay it's here
5:21 so let's decide what we are going to create this is going to be
5:24 our homepage and everybody will be able to reach this page but after
5:29 that we are going to create this dashboard and we will be able
5:32 to see this page only when we are logged in basically we are going
5:37 to have three main Pages the homepage the login page and the dashboard
5:43 let me log in okay let's create them and after we will start designing
5:52 our dashboard if you check the app directory you going to see the page
5:59 file here this is our homepage let's create dashboard and login pages page.
6:10 jsx and another folder and it's going
6:13 to be login let's create our functions I will
6:20 say login page and dashboard page if you
6:30 don't know how I'm using this shortcut you
6:33 can watch my vscode video and you can learn how to create these react cipit okay
6:42 let's see this is the homepage dashboard
6:49 and login okay perfect let's start with this dashboard
6:55 I'm going to open up my example as you can see we have a sidebar
6:59 here and a na bar and if you check other Pages like users you will see
7:05 that the sidebar and nbar is still here or if you open up any other
7:11 Pages they are still here basically they are going to be a part of our dashboard
7:16 layout so instead of creating sidebar and nailbar
7:20 components and use them for every single
7:23 page we can add them into our layout and we are not going to waste
7:27 our time let's do that firstly I'm
7:31 going to create my nbar and sidebar components
7:34 to do that you can create here components
7:36 folder or UI folder let's say UI because
7:40 in the documentation of nextjs they are using
7:43 UI and inside I will say dashboard components
7:53 login page components and we can create homepage
7:56 components inside directly this UI folder but remember
8:00 the nabar and sidebar belongs to dashboard we are not going to use it
8:04 in the homepage or login page this is
8:07 why I created this folder and inside let's say
8:12 nowbar oops nowbar and sidebar let's create
8:21 our components and my component I will do the same thing for the nbar and let's
8:35 use them inside our dashboard to do that I'm
8:38 going to create my layout jsx and as you realize we have the main layout
8:49 here let me shrink this and whatever I add here let's say test and this H1
9:01 tag is going to appear everywhere in dashboard
9:05 in homepage and login page by the way
9:10 there's an error because I used it before body tag it should be inside
9:15 but anyway this is how we are using layouts so I can do the same thing
9:20 for the dashboard page I'm going to remove this and as you can see we are
9:27 going to need a children and this children
9:29 will be our main content basically this ad
9:35 page users page or these contents so let's take this children I'm going to close
9:45 here and I will say children and inside my layout I will say menu de
9:54 and it's going to contain our sidebar
9:58 and after this div I'm going to create another
10:00 one and it's going to contain our nebar and this children so first one will
10:07 be nowar and our children let's save this by the way and perfect so if I
10:20 create any other page inside this dashboard
10:23 we are going to keep seeing this sidebar
10:25 and N let's create inside dashboard I will
10:29 say users and products let's create our Pages page.
10:40 jsx let's say products page and users Page by the way the name has to be page
10:50 if you create any other name here it's not
10:53 going to work the extension can be JS jsx or TSX let's say users page let's see
11:10 as you can see perfect and product okay this is
11:15 how we are using nextjs layouts so let's give
11:19 some style as you can see there's a space
11:22 here but in our application we don't have
11:25 any space it starts from here as you can
11:28 see the color is different so let's give
11:32 a global style if you install a next application you're
11:36 going to see that your Global CS is inside the app directory but I want to move
11:41 this into UI folder like that let's open up
11:50 layout and change here it's going to be UI
11:55 and Global CSS and this is the recommended
11:58 folder structure in the nextjs documentation by the way
12:02 I'm going to create a complete nextjs course
12:05 and in this course I'm going to share my thoughts
12:08 about this structure or generally about next Jaz
12:13 but for now for this tutorial let's stick to official
12:16 documentation and use it like that inside UI
12:20 we are going to create our components and we
12:23 are going to Define our CSS files okay
12:27 let's actually close everything and open up Global CSS
12:32 first say I want to give a background
12:34 and text color for my application to do that I'm
12:37 going to create some variables I will say root
12:41 let's say background color and it's going to be
12:44 these dark color and I'm going to create
12:47 the soft version of this color BJ soft and it's
12:51 going to be this color and the text color
12:54 will be white but also I'm going to create
12:58 the software version text soft and I'm going
13:02 to paste my color here it's going to be
13:05 this gray color okay let's use this inside
13:09 our application to do that I'm going to be
13:11 using body and I will say background color is
13:16 BG and the default color is text color is
13:22 text and let's remove the default margin and padding
13:26 using Universal selector and I will say box
13:31 sizing and Border box if you don't know fundamentals
13:36 if you don't know what's the universal selector why
13:39 we are using our background color inside body what's
13:43 HTML you can just check my previous tutorial you're
13:46 going to find awesome CSS tricks and that video
13:50 will be in the cart on the top right you can check that video and come back okay
13:57 and what else if you create any link it's going to have a default color to prent
14:04 this I'm going to choose all the links and I
14:07 will say color will be inherited from the parent
14:11 so we are not going to Define any color here and I'm going to delete the text
14:15 decoration it's going to be num because by default
14:18 there is an underline I'm going to remove
14:21 that and that's all this is our Global Styles
14:26 I can close here and let's give a style
14:30 for our dashboard in our example as you can
14:36 see we have two main sections this sidebar container
14:40 and our content basically we are going to be
14:42 using flexbox so inside dashboard I'm going to create
14:47 a CSS file and it's going to be dashboard.
14:51 module.
14:52 CSS there's a typo here okay and each component is
14:58 is going to have its own CSS file so I will
15:01 say nowar module let's copy this and paste for sidebar
15:13 oops inside sidebar component okay let's close them and this is
15:20 our main CSS file and what I'm going to do
15:24 is create a container and make that container display Flex let's
15:30 open up our page I'm going to close everything here
15:34 this is our layout and I will say class name styles.
15:42 container let's import our CSS by the way I'll say
15:47 import styles from UI dashboard CSS okay there's a warning
15:55 here because I forgot the dashboard folder and I'm
16:01 going to give class name for this sidebar container styles.
16:07 let's say menu and it's going to be content okay and in our example
16:18 as you can see this menu is smaller than our content so we can
16:22 give some sizes firstly let's open up our CSS file here and I'm going
16:27 to close this menu menu and I will say container display flex and for menu
16:34 container I'm going to give Flex one and for Content container Flex will be
16:41 four times bigger than menu like that let's give our background for the menu
16:50 I'll say background color we can use our variable here and it's going to be
16:56 PG soft it's here if it's not visible enough it's because of the video
17:05 If you create your own application you are going to see that this color
17:08 is much softer and let's give some padding okay and I will do the same
17:20 thing for my content before this content container let's take care of our site
17:28 bar I'm going to open up my sidebar container here and sidebar CSS here
17:37 and let's give class name styles do
17:42 container let's import styles from sidebar module
17:51 CSS before giving any style let's create our items those links I'm just going
17:59 to copy and paste my data as you can see we have some categories
18:07 and each category has some links inside which
18:11 includes icon the link URL and the title
18:16 and for those icons we are going to be using react icon Library let's
18:22 do that I'm going to open up my terminal and I will say m
18:28 PM install react icons and I'm going to write the version as I said
18:34 if you don't want to see any conflict any error you should install exactly
18:39 the same versions after that you can update I will enter let's close again
18:46 and I'm going to import my icons like that if you want to you can
18:52 visit this website and search for any
18:55 icon for example let's choose material icons
19:01 and here if you want to use this icon just click on that and it's
19:06 going to copy this component and you can import this here okay right now
19:13 we can show our items in our sidebar to do that I'm going to be
19:18 using map I will say menu items map and for each item let's say
19:24 each category we are going to create a do actually let's say a list
19:32 here and I'm going to WRA my map here and I'm going to call
19:39 a list item let's check what we have as you can see each category has
19:44 a title and list let's use this title cat do title of course there
19:52 is a warning because we didn't use key value let's say key and again cat.
19:59 tile because it's Unique let's see I'm going to close
20:05 here I'm going to open up dashboard oops I
20:10 didn't use curly brackets and perfect and I can do
20:18 the same thing for our links this list to do
20:23 that I'm going to create another component let me make
20:28 this bigger and inside sidebar I'm going to create let's
20:33 a menual link I'm going to copy this and create
20:36 my component and CSS let's create our function and using
20:50 this component I can show my links let's take
20:53 our item here first first here I'm going to show
20:59 my icons and item do title let's make this a link
21:09 and the path will be item do path let's check
21:15 [Music] again as you can see title path and icon
21:23 okay let's use this component here I'm going to wrap
21:26 my category title let's say span and I'm going
21:31 to give a class name and it's going to be styles.
21:35 category and after that again a map because we are using our lists
21:44 cat and I will say item and for each item I'm going
21:48 to call my component menu link component and I can pass this here
21:55 we need a unique key and it's going to be item do
22:01 title let's see okay perfect right now I can give my style
22:09 I'm going to use this container firstly I'm going to make this position
22:14 sticky that because in our example when I scroll down as you
22:18 can see it stays here so I will say position sticky and I
22:25 can give any position here let's say forly we can't see anything
22:30 here because we cannot scroll right now let's give style for our items
22:38 but firstly there is a user div here as you can see
22:41 we have image and user text let's create that before this Ur I'm
22:48 going to say user and it's going to have an image source
22:56 and I'm going to give a size let's say 50 pixels like
23:07 that and for now let's use this image where is our public folder
23:14 here we are going to be using this image because we don't have
23:18 any user yet so I will say avatar.png sorry no Avatar okay
23:30 after this image I can create another div here and it's going
23:34 to be our user detail first one will be our username let's say
23:40 John do and one more and it's going to be the title let's
23:45 give class name username and user title okay right now I can
23:58 give my style firstly it's going to be display Flags our items will
24:03 be horizontal let's Center them and gap between image and title will be
24:09 20 pixels like this let's give margin here 20 pixels and for user
24:19 image let's make this circle border radius 50% and I will say
24:26 object fit cover by the way I don't have any class name that's
24:36 SK okay and let's make them vertical user detail display flex but it's
24:48 going to be vertical okay let's make this Boulder font F 500
24:58 perfect and I can decrease this font size and I'm going to change
25:07 its color and it's going to be our soft color okay what
25:15 about our list firstly I'm going to delete this list decoration let's
25:20 give a class name sorry it's Ali it's going to be list styles.
25:27 list let's use it I will say list style and it's going to be nor let's change
25:36 this category names it's here again it's going to be
25:45 soft font fate will be Bol and font size will be smaller and I'm going to give
25:52 margin to top and bottom let's let's take care
25:58 of our items we have container here I'm going
26:04 to open this here and let's say padding again display Flex
26:09 align item Center I'm going to Center the icon
26:13 and the text and gap between those items will
26:16 be 10 pixels okay right now I can give
26:21 another class name when it's active we can show different
26:24 background for example we are in the dashboard
26:27 and it's going to softer color let's check like
26:30 this and also when I hover over I'm going
26:33 to change the background so I will say when I H
26:43 the background color will be this color and also
26:47 I'm going to give here a condition I will check my URL if this part of the URL
26:53 equals our link path it's going to be active to do that we are going to be using
26:59 use path name hook const path name as you can
27:05 see it comes from next navigation let's see what
27:10 we have I say console lock of course to use
27:14 this hook our component should be a client component
27:17 so I will say use client directive as you
27:23 can see for each link it shows our path
27:26 name and since it's equal to this link it's going
27:30 to be active so let's write here a condition
27:35 and I will say it's going to be container
27:38 but also I'm going to check the path name
27:42 if it equals item path is going to be styles.
27:49 active so let's use this class name I will say
27:53 if it's active it's going to be this color like
27:56 that okay let's give some margin and change the Border radius
28:03 it's going to be five from top and bottom and Border
28:08 radius will be 10 pixels okay perfect this is what
28:15 we want so let's take care of this nowbar I'm going
28:21 to close everything and open up nowb bar and open
28:26 up the s and I'm going to move this here quickly
28:31 let's say container and let's import this CSS actually I
28:36 can use my cipet like that it's much easier and firstly
28:43 we are going to have a title here and again
28:45 we are going to take this title from our path name
28:48 and after we are going to have another container this search
28:51 bar and those icons so I will see use client
29:00 and again my hook here let's import and I'm going
29:04 to import my icons like that it comes from react icons
29:12 firstly we are going to have a title div and I'm
29:17 going to write here the path name but be careful
29:22 here as you can see it's dashboard but if I
29:25 use the users link as you can see the path name
29:29 is dashboard and users if you want to you can
29:32 leave it like that but if you want to use only
29:36 the last item you should use a split function split
29:41 use slash and using this slash I can separate my path
29:46 name and I'm going to take the last item to do
29:50 that I can use pop function let's see and perfect
29:57 let me make this smaller and I will say menu
30:03 do and inside we are going to have the search de
30:08 inside this D yeah I'm going to have this icon
30:12 and input my icon component here MD search and let's create
30:20 an input I'm going to give placeholder and it's going
30:23 to be search and I'm going to give a class name styles.
30:30 input after this search component search D I
30:35 can show my icons and let's paste them
30:42 okay as you can see we can give any size here in this case they are going
30:46 to be 20 pixels like that let's give
30:52 a style firstly our container will be display
30:57 Flex so everything will be horizontal let's separate
31:01 our items using just fire content and I'm going
31:07 to Center them vertically perfect let's give
31:12 a background I'm going to give exactly the same
31:16 color so let's say padding first I'm going
31:20 to give border radius 10 pixels and background color
31:24 will be our soft color let's say BG soft okay let's change this title color will
31:38 be soft uh font weight will be bolt
31:46 and I can capitalize this first letter text transform
31:50 will be capitalize what about this menu again
31:56 it's going to be horizontal and I'm going
31:57 to separate them display Flex align item Center
32:02 and let's separate using Gap and for the search
32:11 I'm going to give this color it's going to beit lighter and I'm going to give
32:15 space here so let's say Gap 10 and background
32:23 color will be these light color let's give
32:26 pad inside and Border radius will be 10
32:32 pixels and for the input there's a default
32:37 background color as you can see it's white
32:40 let's change this I will say transparent we are
32:45 not going to see any background color or any border and the text color will be
32:53 our Tex color okay awesome let's separate them
33:02 and complete our now bar I will say icons gap
33:07 between items will be 20 now we have created our sidebar and now bar by the way
33:16 we didn't use log out icon let's create that button after this URL I'm going
33:25 to create a button and I will say log out let's give a class name and also
33:33 I'm going to use this icon MD log out okay in our example as you can see
33:42 we don't have any background or border it's
33:45 going to be just like these links but it
33:48 has to be a button because we are going to be using Ser actions when I
33:52 explain that you are going to understand better
33:54 but for now let's give our style I will
34:00 say log out I'm going to give exactly the same style as we gave for our links
34:08 but additionally I'm going to delete the background
34:10 color because it's a button or let's say
34:14 background nonone border nonone and the width will
34:19 be 100% okay there is still background okay let's
34:29 change this color it's going to be white and perfect and I can give how effect
34:40 and I'm going to change the background it's
34:44 going to be just like links okay and that's
34:53 all let's delete this console lock and I
34:58 can close everything and let's see what we have here as you can see we have
35:03 some cards here and after this component that shows
35:07 our users and the transactions and we are going to have a chart here and finally
35:14 those sticky boxes and they all are going
35:18 to be inside dashboard UI I'm going to open up
35:23 my sidebar and inside dashboard I'm going to say cart cart jsx and CSS let's say
35:40 container and let's actually copy this and paste
35:46 inside our dashboard and it's going to be chart
35:50 let's change [Music] them and again actually let's
35:59 do two more components and it's going to be
36:10 transactions right bar and what else okay that's
36:23 all card transaction chart and right bar let's
36:27 remove this and let's create our functions okay
36:48 I can close them and let's take care
36:51 of our cards I'm going to take my CSS file here and I'm going to call all
36:56 my components inside my dashboard dashboard page and let's
37:03 create a d and it's going to be
37:05 cards and I'm going to call my card here let's import we are going to have three
37:13 cards by the way let's import our Styles UI and dashboard okay as you can see
37:28 we have two sections this section and this right
37:32 bar section let's create our div firstly I'm
37:36 going to give here class name let's say
37:40 proper and the first section will be let's
37:43 say main section it's going to include all
37:47 our components and other section will be let's say
37:51 site and it's going to contain our right bar after these cards I'm going to call
38:01 transactions and chart let's make this display flag
38:06 first and give size for Main and site because
38:10 in our example as you can see this main block is much bigger than this right bar
38:15 so I'm going to open up my CSS dashboard module CSS as you can see we have
38:20 our main items but inside content we are
38:24 going to have a rapper main block side block
38:30 and inside the main block we have our Cuts
38:34 so let's make this display flex and gap
38:37 between Main and sidebar will be 20 pixels
38:41 and I'm going to give some padding here
38:46 okay let's separate them this main block will
38:49 be bigger so let's say Flex three and it's
38:55 going to be one and I'm going to separate my items inside this main block to do
39:00 that I can use flex box and column and gap between each item will be 20
39:07 like that what about those cards again it's
39:09 going to be horizontal and just why content
39:14 will be space between okay perfect so let's
39:22 take care of our cut component I can close
39:25 here and this page inside our card we are going to have an icon a title
39:32 a number here and is description let's do
39:37 that I'm going to use my icon and the size
39:41 will be 24 pixels and after that I'm going to create a du and it's going
39:47 to include our texts firstly we are going
39:50 to have a title let's say total users let's
39:58 give here any number and finally let's take
40:03 this from here and paste and I'm going
40:07 to change this percentage because each color will
40:10 be different let's give aan and it class name
40:15 will be positive it can be positive or negative we can take this as a prop
40:23 of course but for now it can stay like
40:26 that let's give class name for our title styles.
40:30 title I'm going to copy this and paste here and let's
40:37 say number let's give here also I'm going to say
40:42 detail okay let's give our style firstly I'm going
40:46 to change the background again for the radius our items will
40:51 be horizontal this icon and those texts and this text
40:56 container container again will be display flex but Flex direction will
40:59 be column and I'm going to change Tex sizes let's
41:02 do that and firstly let's give our background color it's going
41:08 to be BG let's give our padding border radius it's
41:13 going to be display flag gap between icon and text
41:17 20 and I will say cursor pointer and for texts
41:23 again display flex but column let's change text sizes for number
41:32 for example is going to be bigger 24 pixels and font
41:36 weight will be 500 and for the detail it's going
41:40 to be smaller 14 and the font weight will be
41:44 300 and if it's positive the text color will be lime
41:51 if it's not it's going to be let's say red
41:56 that but where is our background color oh I said BG
42:01 it's going to be soft of course but their sizes
42:04 are small let's give 100% and perfect and I can give
42:13 different background when I hover over let's take our container
42:19 and H effect and the background color will be softer let
42:23 me copy and paste actually I can assign this as a variable
42:29 but anyway when I hover over it's this color
42:34 and what about this component let's open up I'm going
42:37 to close them and open up my component and it
42:43 CSS file as you can see we have a title
42:50 here and after that we are going to create a table
42:53 and each row is going to include the username and image
42:57 status date and amount inside container I will say h2
43:02 tag and it's going to be our title latest transactions
43:08 and after that a table let's give class name actually styles.
43:14 table and title okay and inside this table and I'm going to create
43:25 my table head and body basically it's going to be our titles
43:31 those titles and body will be our users let's create our rows
43:41 the first one will be name status date and amount and inside
43:51 body we are going to have our users the first one will
43:54 be user IM image and username status date and amount let's create
44:00 our image user image it comes from next image quickly I will
44:06 say source and again we can use no Avatar PNG let's give
44:12 our size it's going to be 40 pixels and height it's going
44:18 to be the same and let's give class name because it's going
44:21 to be a circle so we can change it using this class
44:25 name and I will say user image okay after this let's give username
44:32 John do and we are going to write here status but as you
44:38 can see we have different status here pending on or cancelled
44:42 for each item we can give different span let's say pending for example
44:52 but also I'm going to give a main style I can say styles.
44:57 status and also the style name and I can
45:01 write here any date and any number here okay let's
45:12 give different users and I'm going to change this status
45:17 I'm just going to copy this and the second
45:23 one will be done and canceled okay right now
45:39 I can give my style let's give our background color
45:44 BG soft padding will be 20 pixels and Border radius
45:52 and for this title let's change its color and font
45:55 weight and I'm going to give space here let's say
46:02 20 pixels font weight will be thinner and the color
46:07 will be our soft color tag soft what about
46:13 this table as you can see it's small let's make
46:16 this 100% perfect and for each item inside I'm going
46:25 to give some heading let's use table again and I'm
46:30 going to choose TD and let's say 10 pixels
46:36 did I give any class name here or not okay
46:39 I didn't and before them I'm going to create a d and it's going to be user and I
46:50 can wrap my image and this username okay let's
46:56 say user I'm going to separate them and elign items
47:01 will be Center okay let's change this image it's
47:06 going to be a circle remember we have user image
47:09 firstly I will say object fit it's going to be
47:13 C and Border radius will be 50% and what about
47:20 those STS I'm going to give some border radius 5
47:28 pixels padding will be five again I'm going to decrease
47:32 the font size and the color will be white
47:37 but when it comes to each item I'm going to change
47:40 their colors I mean background colors pending it's going
47:45 to be this color let's duplicate this I will say
47:50 done and canceled and I'm going to paste my color
47:56 like that okay awesome and let's check as you can
48:07 see we have an chart here to do that we
48:10 are going to be using rechart Library let's open
48:13 up our terminal and I will say mpm I
48:17 recharts and the version will be 2.9.0 let's see what
48:25 we can and create let's open up re charts.org.nz
48:55 a data and using this data we can show the numbers
48:59 we can compare them as you can see it's
49:02 comparing PV and UV and after creating our data using
49:09 responsive container and line chart components we can create
49:13 this chart let me copy this let's close everything and open
49:21 up charts inside this container I'm going to create
49:30 my title first let's write any Title Here and After
49:35 I'm Going to paste my items let's import our components
49:40 here I'm going to copy this paste here and also
49:46 we are going to have this data but I'm
49:48 not going to use this one I'm going to use
49:50 my own data let's paste here as you can see
49:55 see we are going to compare the visit and click
49:58 numbers and the name of each section will be
50:01 the days of the week so instead of py I'm
50:05 going to say visit and instead of UV it's
50:09 going to be click let see I can close here
50:15 of course this chart is interactive so we cannot use
50:18 so component it's going to be use client but it's
50:27 going to Infinity to prevent this I should give
50:31 height for the container let's say 450 and perfect let's
50:41 give style for our container I'm going to change
50:43 the background again as you always do I'm going to say
50:47 soft padding and Border radius what about this title
50:54 I'm going to give exactly the same style font fate
50:58 will be smaller color will be softer uh margin bottom
51:07 of course I didn't give class name let's give styles.
51:15 title and there's a trick here if you
51:18 are using responsive container I recommend you to change
51:21 this height and make it 90% other wise you
51:25 can see some overflows and okay awesome as you can
51:32 see this background is white and also we have
51:35 this container behind let's see it's a little bit
51:40 different let's remove that container we don't need
51:45 this and I can remove this from import perfect and I'm
51:56 going to change the background color of this tool
51:59 tip so I'm going to come here and say
52:02 content style the background color will be our main
52:06 color but I cannot use our variables here I should
52:09 drag the pass like that and I'm going
52:14 to remove the Border it's going to be none okay
52:23 what about this right bar we have two items
52:27 and each item has this title another title a subtitle
52:31 here and a description and this button and for the first
52:36 item we are going to have this image let's do that I can close them and open
52:42 up right bar so let's create our first item
52:54 as I said the first item has an image
52:57 so let's create here another do and I'm going
53:00 to say background container and inside I'm going to create
53:03 an image it's going to be this image I'm not going to give size I will just say
53:18 fill so it's going to fill inside the container
53:24 Alt and after that I can create my texts
53:28 so let's say do texts the first one will be
53:34 let's say notification title subtitle and description let's copy
53:46 this actually after that I'm going to say H3
53:52 tag and it's going to be this tag title
53:57 another span uh description let's say P tag okay let's
54:11 give different class names title subtitle and description
54:24 and after we are going to have this button
54:26 and as you can see there's an icon here let's
54:29 create after this P tag I'm going to say button
54:35 and a class name and let's say button
54:38 and inside my icon player icon this one and I
54:44 will say watch and after I'm going to create
54:48 another item and it's not going to have any image
54:51 actually I can directly copy and paste there's nothing
54:57 different we don't have to waste time like that okay
55:05 let's give style let's see first oops there is
55:11 something wrong here this is our container after we
55:16 have item one de is missing here I think
55:23 okay let's import this of course the image is
55:31 too big let's fix this firstly I'm going to say
55:36 BG container so we can see our image I'm
55:39 going to give absolute positioning so I'm going
55:42 to show it on the bottom right bottom zero right
55:47 zero and I'm going to give some size it's
55:49 going to be 50% it's not going to contain
55:52 the whole container of course if you are using
56:00 position absolute the parent should be position relative our parent
56:04 is item okay let's change this object fit it
56:14 looks a little bit weird let's come here give class
56:19 name styles do let's say BG object fit will
56:28 be cover and I'm going to change its opacity
56:35 perfect and let's take care of our items but before
56:39 when I scroll it should stay there so I'm
56:42 going to say position fixed perfect and let's take
56:50 care of our items I'm going to give my background
56:53 color you can directly use background soft
56:59 or in our example there is a linear gradient the top
57:03 of the element will be lighter let me actually
57:06 copy and paste as you can see the bottom
57:11 is darker and the top is lighter and I'm
57:16 going to give some padding from top and bottom
57:19 and Border radius will be as always 10 pixels
57:24 and going to give margin bottom I'm going to separate
57:27 my items it's going to be 20 pixels
57:30 and that's all what about each item inside I will
57:37 say texts display flags flag direction will be column
57:44 I'm going to separate my items perfect let's give
57:49 style for our texts notification font weight will be
57:56 bolt and title is going to be 500 and font
58:01 size will be smaller and let's give soft color
58:07 text soft now finally we have a button I'm
58:13 going to give some padding Insight let's check I'm
58:17 going to separate my items give border radius and background
58:21 color and the text code will be white align
58:26 item Center and let's separate them and the background
58:31 color will be this purple color it's going to be
58:35 white I'm going to delete the Border oops it's
58:40 going to be non and Border radius 5 pixels and we can click on this so I will
58:48 say cursor pointer okay as you can see it
58:54 size is too much so it's going to be maximum
59:01 content okay but as you realize it's cropping
59:04 our image so instead of cover I can say contain
59:10 so it's going to fit inside this container it's
59:13 not going to crop perfect but there is something wrong
59:17 with this second item when I paste my item
59:21 I made a mistake here I think so let's
59:25 don't waste time and copy paste again oh okay
59:31 in our example it was text but we use text
59:36 let's remove this and it's going to fix okay
59:40 perfect it looks really nice so let's take care
59:44 of users page let's see what we have it's
59:49 really easy we are just going to add here
59:51 a container we are going to have top bar
59:55 and this content inside top bar we are going
59:57 to have search container and this button and inside
1:00:01 this content we are going to have table and after we
1:00:04 are going to create this pagination by the way
1:00:07 there's a footer here but we didn't create let's
1:00:10 create quickly I'm going to close them open up
1:00:16 dashboards inside this UI I'm going to say footer I'm
1:00:29 going to create my component and this CSS it's
1:00:35 really easy there is nothing fancy we are going
1:00:39 to have two items let's say logo another D
1:00:45 and it's going to be this text let's say text
1:00:52 let's separate them I will say container ER display
1:00:56 flag align item Center and just fire content space
1:01:01 between and as you can see its font weight
1:01:04 is Bolt and this text is smaller I'm going
1:01:10 to say logo font we will be Bol and text will be 12 pixels let's use it inside
1:01:20 our dashboard I'm going to open up my layout
1:01:24 and after this children I'm going to say show me
1:01:28 my footer as you can see its color is
1:01:34 different and we don't have any space here let's
1:01:39 change firstly I'm going to give here margin top
1:01:44 and the color will be our soft color that's all
1:01:52 so let's take care of our users page I'm
1:01:56 going to close them open up users oops it's dashboard
1:02:02 inside users let's close this so let's create our containers
1:02:11 firstly I'm going to say the main container styles.
1:02:18 container by the way we don't have CSS file let's
1:02:23 import import import styles from App directory UI folder dashboard
1:02:31 UI users and the CSS let's check okay it doesn't
1:02:39 exist let's open up UI dashboards let's close them actually
1:02:45 we can see better okay as you can see we
1:02:49 don't have our Pages yet let's create I will say
1:02:53 users page and inside we are going to create components
1:02:58 belong to this page and also the main CSS file okay
1:03:06 there is no problem anymore let's do the same thing
1:03:09 for products page okay let's create container like that okay
1:03:27 I can close this menu and let's create other containers
1:03:32 as I said top container and content container and after
1:03:37 we are going to add other items so let's say
1:03:42 top another one is going to be let's say bottom
1:03:47 or actually we can directly create our table we don't
1:03:52 have to give any container so class name will be styles.
1:03:57 table okay inside our top container we are going to have
1:04:02 two items search and button but this search component will be functional
1:04:08 when I search for any name it's going to fatch our data
1:04:11 so instead of writing this here directly inside our component I can
1:04:16 create a sub component inside users I'm going to say search component
1:04:24 but but creating this inside our page is not a good idea
1:04:28 because we are using exactly the same functionality for the products
1:04:32 as you can see it's going to be here so this component doesn't
1:04:36 belong to products or users the better option is creating our component
1:04:41 inside dashboard because it's a common component so I'm going to come
1:04:47 here and say search component jsx let's create our function and this CSS
1:05:08 okay so let's use this here search component and as you
1:05:16 can see we have different placeholder here search for product search
1:05:21 for user so we can take it as a prop so I'm going
1:05:26 to say placeholder and I can use it here it's the user
1:05:39 page I'm going to take this prop here I will say placeholder
1:05:44 and I'm going to use it inside my input let's create
1:05:49 our items first first one will be the icon and input and I
1:05:58 can use this placeholder here let's give class name I'm going
1:06:04 to say input and let's give some style let's see first as you
1:06:12 can see it's exactly the same style so I'm not going
1:06:15 to create this again I'm just going to copy and paste it's exactly
1:06:20 the same thing and after let's give a style for our container
1:06:28 as you can see there is no placeholder let's give I can
1:06:31 close this search bar for now and I'm going to say placeholder
1:06:39 search for a user okay let's create our button here I'm going
1:06:53 to give class last name styles do add button of course it's
1:07:00 going to be a link when we click on this button we
1:07:04 are going to open up add new user page so HRA will
1:07:09 be dashboard users and at I couldn't import okay so let's separate
1:07:18 them inside top I'm going to say display Flags align item Center
1:07:23 and justify content will be space between okay by the way let's give
1:07:31 margin for our container and background background color will be our main
1:07:38 color main soft color BG soft I'm going to give padding B
1:07:45 the radius and margin top okay what about this button it was
1:07:57 add button I think let's check okay I'm going to give some
1:08:06 pading and background color will be our purple color remember we use
1:08:11 this for the right bar and the text color will be white
1:08:15 or let's say text color I'm going to delete the Border I'm
1:08:23 going to give border radius is going to be rounded and we
1:08:28 can click perfect and what about our table let's see what we
1:08:38 have first name email created at roll and action by the way
1:08:45 there is a mistake here it should be status and after action
1:08:50 let's create again have hat and bu and the first one will
1:09:02 be name email created at rooll and status and for the buttons
1:09:15 we are going to be creating action column and let's create
1:09:19 our first user I'm going to create a row and the first
1:09:23 item will be the username and the user image so again I can
1:09:29 create a d which is user and inside we have user image
1:09:37 and after username John do let's give our image here no Avatar
1:09:50 size will be 40 pixels and I'm going to give class name
1:09:57 so we can give object fit user image let's create other items
1:10:07 TD and it's going to be user email John gmail.com another one
1:10:13 is going to be date let's give any date here let's say
1:10:21 admin status will be active and our buttons Let's see we have
1:10:27 two buttons View and delete let's create again I'm going to create
1:10:33 a link first I'm not going to write anything here for now
1:10:41 when we patch our users we are going to send here
1:10:44 the user ID let's create here our view button and I'm going
1:10:50 to give class name it's going to be a button button styles do
1:10:56 button but also the view button because its color will be different
1:11:04 styles do let's say view I'm going to duplicate this and it's
1:11:10 going to be delete okay let's see let's q a style I'm
1:11:21 going to open up my CSS file here and let's copy our table
1:11:31 and start firstly it's going to be 100% it's going to contain
1:11:36 all our component and for each item I'm going to give
1:11:40 padding remember how we are doing this let's take care of this user
1:11:53 gap between items will be 10 and I'm going to Center
1:11:57 them perfect let's make this circle quickly user image border radius
1:12:07 and also object fit and for the buttons let's actually create here
1:12:17 a do buttons it's going to contain our view and delete buttons
1:12:25 again gap between them and for each button I'm going to give padding
1:12:32 from top and bottom left and right let's give some border radius
1:12:40 color will be our text color I'm going to delete the default
1:12:48 border and cursor will be pointer like that let's change colors
1:12:55 for view the color will be teal this green color and if it's
1:13:03 delete the background color will be this dark red color perfect and finally
1:13:12 we can create the pagination component let's open up sidebar and again
1:13:18 inside dashboard I'm going to say pagination again it's a common component
1:13:27 I'm not creating this inside users jsx create my component and let's
1:13:39 create this CSS okay let's use it here after table I'm going
1:13:52 to say imagination let's see what we have inside we are going
1:14:01 to have two buttons when it's disabled its color will be different
1:14:05 there is nothing fancy let's quickly create inside pagination let's close here
1:14:13 actually I'm going to create two buttons the first one will be
1:14:22 previous and the second one will be next that's all for now
1:14:29 let's give style I'm going to give some pading I'm going
1:14:34 to separate my items space between and for each button the padding will
1:14:45 be five and 10 csor will be pointer and when it's disabled
1:14:56 the cursor will be not allowed Let's test I'm going to say
1:15:07 disabled okay perfect if you want to you can give different
1:15:11 background or whatever you want for me it's perfect so let's do
1:15:16 the same thing for the products page I'm going to close everything
1:15:22 and let's open up products actually I can copy everything here and just
1:15:31 change my table let's import link image I'm going to import
1:15:45 my Styles main folder app UI dashboard products and CSS let's see oops
1:16:05 it should be dot of course we did an import search
1:16:16 and pagination okay there is no error we are going to change
1:16:25 our rows by the way let's change this placeholder also search
1:16:30 for a product and I'm going to change this link it's going to be
1:16:36 product and let's see what we are going to have we are
1:16:43 going to have title description price created at stock number and actions
1:16:51 let's change them title description again created at but before it's going
1:17:00 to be a price the stock and action and instead of user
1:17:08 I can say product let's copy this actually we can use multiple
1:17:13 times and instead of no a let's check our image it's going
1:17:19 to be no product and after the product name let's say Ione
1:17:34 the description let's write here description for now created at but before
1:17:39 as I said the price and the stock number and that's all
1:17:48 let's see perfect let's give our style it's going to be exactly
1:17:54 the same style the only difference is this user container it's going
1:17:58 to be product container so let's take everything inside users and paste
1:18:07 inside products and I'm going to change here okay by the way
1:18:16 there is a space here to prevent this let's open up
1:18:20 our dashboard module and and I'm going to say minimum height is
1:18:25 going to be 100 VH okay so what else we have we
1:18:32 have this view page as you can see the item image
1:18:36 and a form here that we can edit our item by the way
1:18:41 it looks a little bit ugly maybe we can change here we
1:18:44 can give more space and after that we are going to have
1:18:48 this add page that we can add new product or user let's
1:18:52 create create those pages inside dashboard and product I'm going to say
1:19:03 add page let's say add product page and I'm going to change
1:19:15 this link is going to be app folder UI dashboard products and it's
1:19:23 a different page so I will say add product and the CSS
1:19:32 let's create this inside dashboard products at product folder and it's CSS
1:19:49 file okay let's see if it works or not I'm going
1:19:53 to click here okay there is something wrong oh because I said at.
1:20:01 jsx as I said if you are creating a page it has to be page okay
1:20:08 awesome let's see what we have it's the user page let's open up products as you
1:20:15 can see we have some inputs and text
1:20:19 area and select button here let's let's create
1:20:23 them it's really easy I'm going to create
1:20:26 here a form let's give class name styles.
1:20:31 form and inside let's create our first input placeholder will be title
1:20:39 the product title and the name will be exactly the same it's important
1:20:43 because we are going to push this item into database using this name
1:20:49 and I will say required we cannot send any product without its
1:20:55 title and what else we have select here that we can choose
1:21:00 any category let's create I will say select name will be let's say
1:21:08 category and inside we are going to create some options and the first
1:21:13 one will be let's say kitchen of course we are going to give
1:21:17 here a value again kitchen let's give some more let see phone
1:21:30 computer let's make them capital okay it's enough as you can see it's
1:21:40 here but the initial value is Kitchen instead I'm going to use
1:21:45 this text so I'm going to create one more option here it's going
1:21:52 to be choose a category and the value will be general just
1:22:00 like work press and after that another input at this time is going
1:22:05 to be a number because we are going to pass here our price
1:22:09 placeholder will be price and the name another one is going to be
1:22:16 stock number color size it's going to be a text color and size
1:22:32 and finally we are going to create this text area and it's
1:22:40 going to be the description let's give placeholder and it's going to be
1:22:51 description I can increase rows let's say 16 I can delete columns
1:22:57 and finally a button and I will say submit and the type
1:23:03 will be submit okay let's give our [Music] style I'm going to close
1:23:13 everything here open up the ad page and CSS okay so let's SK
1:23:24 our background as we always do I'm going to say war and BG
1:23:30 soft and again padding and Border radius and margin top after that let's
1:23:37 fix our form I'm going to say display flex and let's give
1:23:43 padding for our input and text area I will say form input
1:23:49 text area and also for the s I'm going to give padding 30
1:23:58 as you can see all items are horizontal but if I say
1:24:03 flx wrap and wrap it's not going to overflow anymore so if I
1:24:10 give some size for my inputs it's going to look better let's copy
1:24:18 this and let's say 45 pixels I don't want to make this 50
1:24:22 because I want to give space here okay there is no space
1:24:26 because we didn't say justy content space between let's give and perfect so
1:24:37 let's remove those background colors and borders it's going to be transparent
1:24:44 color will be our text color and I will give border radius okay
1:24:57 let's use space between them perfect maybe I can give different border let's
1:25:09 say two pixels solid and this gray color Okay much better but why
1:25:17 it didn't work because I didn't give with okay awesome and for this text
1:25:27 area I can give 100% okay and finally this button again
1:25:46 100% I'm going to use some padding and the background color will
1:25:51 be teal let's change the the text color it's going to be white
1:25:57 I'm going to delete the Border default border border radius and finally cursor
1:26:05 pointer okay so let's do the same thing for the users page when
1:26:13 I click here we are going to see the new user page
1:26:16 let's create I'm going to close them open up my menu and here
1:26:21 actually I can copy and paste this and change the name add user
1:26:32 page in this case it's going to be user let's create this actually
1:26:45 again I can copy and paste users is here and I'm going
1:26:53 to change the file name add user and here okay let's see what
1:27:04 we are going to change I'm going to open my example here
1:27:11 username email password phone is admin select is active and address let's change
1:27:20 I'll say username email password phone and let's change them by the way
1:27:33 it's going to be email password phone it's not going to be
1:27:41 required by the way it can be empty select will be is admin
1:27:49 by default it's going to be false let's say is admin and it's
1:27:56 going to be selected and let's say yes and no and false
1:28:12 let's remove this and I will do the same thing for is
1:28:21 active and the default value will be let's say true and after
1:28:26 that address and button let's remove them okay that's all let's see perfect
1:28:45 in our example we don't have any border and this background color is
1:28:49 different let's change it can can be darker I said transparent but I'm
1:28:56 going to change it and it's going to be BG so this dark
1:29:01 color it's much better I think let's do the same thing for other
1:29:09 one okay and one more thing we are going to need and it's
1:29:14 going to be view page when I click here it's going to show
1:29:18 the single users information and we will be able to edit our user
1:29:23 let's check I'm going to click as you can see this is
1:29:27 the user ID there is a user information here and the edit
1:29:33 form let's do that I'm going to come here inside users and I'm
1:29:39 going to create a new folder and it's going to be ID
1:29:43 basically this ID can be anything if we say users and any ID
1:29:50 it's going to show that page and using this ID we will
1:29:54 be able to fetch our user let's create our page and component
1:30:05 and let's say single user page and I'm going to change Here app
1:30:12 UI dashboard users single user and CSS so let's create create this I'm
1:30:22 going to copy inside users I'm going to create new file and paste
1:30:29 this so it's going to create this folder like that let's say
1:30:37 container and let's open up our page firstly we are going to have
1:30:42 two sections information section and the form section so let's say do info
1:30:51 container and one more and it's going to be form container and inside
1:30:59 this info container we are going to show our image and the user
1:31:03 information let's create actually the image container and I'm going to create
1:31:11 an image source will be let's say no Avatar again and I
1:31:20 will say F it's going to fill its container and after that let's
1:31:25 just say John do after that I can create my inputs but each
1:31:31 input has a label so let's say label username let's remove
1:31:38 this and after that input name will be username and the placeholder will be
1:31:45 the latest name of this user as you can see its name
1:31:49 is hello we can see here so let's say joho for now
1:31:56 and I will do the same thing for other inputs let's say email
1:32:05 like that it's going to be email type password type will be password
1:32:18 it can stay like that else we have phone text and phone
1:32:32 and I will say address it's going to be text area it's going
1:32:37 to be a little bit bigger and address New York and what else
1:32:47 we have is admin and is active let's create our label and I'm
1:32:59 going to create a select it's going to be is admin and inside
1:33:04 my options true or false I'm not going to write anything else
1:33:16 if the previous value is false it's going to show no if
1:33:20 it's true is going to show yes but we are going to give
1:33:24 this functionality later let's do the same thing for is active
1:33:34 and that's all I think I'm going to save and let's see okay
1:33:42 our link is different let's open up users page and I'm going
1:33:50 to change this link it's going to be dashboard users and the user ID
1:33:56 for now let's say test and I will do the same thing
1:34:00 for products let's see right now I'm going to click okay there is
1:34:15 something wrong because I forgot slash here okay it's here but there's
1:34:27 something wrong there's a broken image of course it's going to be no
1:34:33 out there and it contains all this screen because we didn't give
1:34:37 any height and width for the parent let's fix that I can close
1:34:42 those pages and move this CSS file here firstly let's take care
1:34:48 of our image container so we can see our items but before let's separate
1:34:55 our sections as you can see this section is smaller so I'm
1:34:59 going to say flx one flax 3 info container flx one of course
1:35:07 it should be display flag let's give gap between them and after
1:35:14 form container uh flax three after that let's give size for the container
1:35:23 image container I will say 100% And the height will be let's
1:35:30 say 300 pixels and if I say position relative it's going to fit
1:35:36 inside this container like that let's give border radius if I do
1:35:45 that it's not going to be visible because it's overflowing so let's say overflow
1:35:50 hidden perfect and let's give background color for the info container BG
1:36:02 soft again padding uh border radius and I can give space here actually
1:36:12 let's give for the container perfect and let's change this font we
1:36:24 and I'm going to give margin bottom here I'm going to separate my image
1:36:28 and this text maybe let's change this color it's going to be
1:36:36 soft color okay so what about this form container let's do the same
1:36:44 thing background padding and Border radius after that I'm going to select
1:36:51 my my form by the way I didn't create any form let's create styles.
1:36:58 form let's drop our items like that okay I will say display flx flx direction
1:37:09 will be column and let's change our items I will say form input text area
1:37:22 and select I'm going to give padding 20 some border I'm going to change
1:37:31 the Border radius 5 pixels and the background color will be dark color so I will
1:37:38 say BG and the text color will be text okay let's give space between them
1:37:50 actually actually I can directly give here and I want to decrease the font size
1:37:57 of labels I'll say form label it's going to be 12 so let's create our button
1:38:14 grab be 100% let's keep padding background
1:38:18 color again till and the color will be
1:38:22 white I mean the text color let's delete default border and give border radius
1:38:35 and we can click let's give space here okay by the way I didn't like
1:38:48 this space I can't change it I'm going to come here info container and I'm
1:38:54 going to say height will be maximum content like this by the way I can delete
1:39:02 this placeholder we shouldn't see our password
1:39:09 like that okay it's not the best maybe
1:39:13 I can make some changes here if I make you can find it in the GitHub
1:39:18 repos story but for now it can stay like this so let's create our login
1:39:22 page and after we can give our functionalities
1:39:26 let's open up login and in our example
1:39:31 I'm going to log out as you can see it's really easy I'm going
1:39:36 to create a box here title to inputs and button and if I give wrong
1:39:41 credentials it's going to show here an error so let's come back and open up
1:39:46 login page let's say container and inside
1:39:55 I'm going to create a form let's import
1:39:59 these Styles app directory UI login page and CSS let's create this and inside
1:40:18 this form we are going to have two
1:40:20 inputs first one will be username and password
1:40:29 and finally a button let's say login let's give a Style by the way it's
1:40:36 inside the login page it should be here okay so what I'm going to do is
1:40:45 giving full size here because I'm going to Center everything think like that uh
1:40:58 for this form let's give background PG soft
1:41:06 I'm going to give some padding and Border
1:41:08 radius let's give width and height and my items will be vertical so I will
1:41:15 say column and I will say justy
1:41:18 content Center okay let's give space between them
1:41:26 perfect and what about inputs I'm going to choose my form and input inside
1:41:35 and again 30 pixels border border radius 5
1:41:45 pixels and the background color will be BG
1:41:50 so so it's going to be darker and the color will be text color
1:41:57 and for the button again 30 pixels background
1:42:07 color will be our green color text color
1:42:11 will be text variable I'm going to delete the border and give cursor pointer
1:42:22 and Border radius here okay that's all but I didn't give any title here I'm just
1:42:34 going to come here and say H1 tag and login of course it should be
1:42:40 inside form it's going to be vertical and I can Center this I'm going to open
1:42:51 up my form and I will say align item Center as you can see
1:42:57 their size are smaller right now because we
1:43:00 centered them so let's give 100% okay perfect
1:43:13 and that's all this is our design the login page and dashboard we can can
1:43:20 see our users we can view single user add new user by the way did
1:43:29 I give same thing for products or not okay I didn't let's create quickly
1:43:35 and after you are going to learn how to fatch data I'm going to copy
1:43:42 this and paste for products remember it's
1:43:48 the UI folder I'm going to change the name
1:43:52 it's going to be product and let's open up our page and create ID and again
1:44:03 I'm going to copy this and paste and I'm going to change my URL here
1:44:10 it's going to be product and let's change here single product page okay I'm not
1:44:21 going to change here because it's going to be dynamic it can stay like
1:44:26 that first table will be title it's going to be the previous title so I can
1:44:34 leave it like that what else we have let's check price stock color and size
1:44:45 it's going to be a number stock let's give any number here color and size
1:45:03 and after that we can choose our category
1:45:06 and finally this description let's change here
1:45:21 is going to be the previous category
1:45:31 and finally description and it's going to be
1:45:37 a text area and the placeholder will be description let's see again I should fix
1:45:57 this link I'm going to open up products
1:46:00 page and actually I created here but there
1:46:03 is something wrong let's remove this and I'm going to click okay right now we
1:46:11 are ready let's see how to fetch data to do that I can open up
1:46:17 my users page and here we have are going to fatch all the users
1:46:22 inside our database but we are going to show here let's say five or 10
1:46:27 items so we are going to be using pagination so let's open up our users
1:46:34 page and fatch our users to do that we are going to need a database
1:46:40 and for this project we are going to be using mongod DP we can use
1:46:44 any other database but it will be easier
1:46:47 for us because we are not using typescript so we will be able to validate
1:46:51 our schema using mongus you are going to understand
1:46:54 what I mean by that but first let's create our database okay let's open cloud.
1:47:03 mongodb docomo show how to create a cluster
1:47:09 it's really easy but there is something
1:47:11 important here after creating your cluster you
1:47:15 should give a permission to your application otherwise
1:47:18 you will not be able to use it I'm going to come here and create
1:47:23 a new user I already have just givea username and a password and the role will
1:47:31 be read and write any database after that you should come here and click
1:47:38 on network access and add your IP address
1:47:42 you can add here your current IP address
1:47:45 or basically allow access from everywhere we
1:47:49 can use it because it's just a development
1:47:52 mode but after deploying our application we are
1:47:55 going to write here our server address okay
1:48:00 it's going to make the changes and after that we will be able to see
1:48:04 our changes here let's click as you can see this is our previous application
1:48:11 but today we are going to create
1:48:13 let's say dashboard database and in that database
1:48:17 we are going to have our users and products if if you check a post here
1:48:22 as you can see the post table has its ID created adate slack title description
1:48:29 image and other properties so basically we should
1:48:33 create this schema we should Define them first
1:48:37 because it's really important to validate your table
1:48:40 items because in our example when we create a new user for example we should
1:48:46 be able to send only username email password
1:48:50 phone and others nothing else and also we are going to Define our types
1:48:55 for example username will be only string email
1:48:58 should be string again but it should be unique we cannot use the same email
1:49:03 or username again and again and password should
1:49:07 be let's say minimum six characters they have
1:49:11 to be bullan true or false and after
1:49:14 defining all these properties everything will be
1:49:17 much easier but how we are going
1:49:19 to do that I'm going to open up my terminal and install a new library I
1:49:27 will say mpm install mongus and after installing
1:49:35 this Library we will be able to connect
1:49:38 to our database and create our models as you can see it creates a new
1:49:44 schema and it says name should be string size should be string and use using
1:49:50 this schema it creates a new model basically our table here one of these tables
1:49:59 to do that we should connect to our database first let's come here and choose
1:50:04 the connection as you can see it's an async function so we can use try and catch
1:50:13 block like that I'm going to copy this and open up my menu and inside
1:50:22 app directory I'm going to create a new folder and I will say library and inside
1:50:30 utils do JS so let's create our connection
1:50:34 method I will say export const connect
1:50:40 let's say connect to DB it's going to be an async function and I will
1:50:47 paste my function here and let's throw
1:50:51 this error let's import mongus and right now
1:50:58 whenever we want to make an operation like
1:51:02 fetching user or product or adding new user
1:51:06 we are going to connect to the database but if I do that it's going
1:51:09 to create a new connection all the time to prevent this we are going to check
1:51:14 first if we are connected or not if we are we are going to use
1:51:18 that connection if not we are going to create a new one so let's create
1:51:23 here an object and I will say cons DB and if we are connected
1:51:30 for the first time we are going to assign
1:51:32 that connection here and it's going to be
1:51:37 DB connections and we are going to take our first connection and ready State
1:51:44 and if it's not empty if we are already connected we are not going to create
1:51:49 a new connection so let's say if
1:51:53 connection is connected just return do not connect
1:51:59 again okay right now instead of this string we are going to pass our URL
1:52:05 to do that I'm going to come here and I'm going to click here connect
1:52:11 we are going to connect through our application
1:52:13 so I'm going to choose that and I'm
1:52:16 going to copy this URL and after the URL you can write here any database
1:52:26 name let's say dashboard and it's ready
1:52:31 but using your secret Keys like that is not
1:52:33 a good idea when you use GitHub everybody can reach your data to prevent
1:52:38 this we are going to be using EMV file I'm going to cut this and inside
1:52:44 my root directory I'm going to create a new file it's going to be EMV
1:52:50 and let's say and it's going to be this URL so let's open up git ignore
1:52:57 file and add here EMV so when you commit your changes it's not going to show
1:53:03 up in the GitHub repository let's use it here I'll say process EMV and okay
1:53:16 right now we are ready to create our models I'm going to come here
1:53:20 and create a new file and let's create our user schema I will say new mongus
1:53:29 do schema by the way let's import this mongus okay and inside I can Define
1:53:40 my properties the first one will be username and its type will be string I
1:53:47 will say required we cannot create user without username and it has to be unique
1:53:56 every user has different username and minimum character
1:54:01 will be three and the maximum will be
1:54:04 20 let's do the same thing for others it's going to be email again string
1:54:11 unique and required let's delete here I will
1:54:16 say password it doesn't have to be unique
1:54:20 I can remove this and we are going to have user image it's going to be
1:54:25 string it's not going to be required what else we have remember is admin is
1:54:33 active type will be bullan and when we create any user by default it's going
1:54:39 to be false it's not going to be admin so I can do the same
1:54:45 thing for is active volume and by default it's going to be true and let's
1:54:53 see what else we have phone and address it's going to be string again but not
1:55:02 required and address and there is something
1:55:08 important here when we create any new item
1:55:14 I want to see the created adate let's see here as we can see it
1:55:20 gives this created ad dat we don't
1:55:22 have to create this manually instead I'm going
1:55:25 to come here and say time stamps and true so whenever we create a new user
1:55:30 it's going to create created at and updated at time so let's do the same
1:55:36 thing for our product we don't need here I will say product schema we are
1:55:45 going to have a title string required
1:55:48 unique I can it here description again string
1:55:55 but it doesn't have to be unique I'm going to give a price and the type
1:55:59 will be number again required but the minimum number will be zero we cannot give
1:56:07 negative price and again image and it's going
1:56:11 to be actually let's remove here I will
1:56:14 say color size and I forgot St let's create stock here again it's going to be
1:56:23 a number and the minimum number will be zero okay that's all so let's export
1:56:31 them and use inside our application so I will say export const user mongus do
1:56:39 model and the table name will be user and we are going to Wate our items
1:56:44 using our schema let's say user schema
1:56:49 but there's something important here if we already
1:56:53 have user table we shouldn't create a new one instead we should use the existing
1:56:58 one to do that I will say check the models and if user exists use
1:57:05 it if not create new one and I will do the same thing for products like
1:57:17 that okay right now every is much easier I'm going to close everything and let's
1:57:24 create a new file and it's going to be data.js basically we are going to fetch
1:57:29 our data using this file let's create the first one I say export con fat
1:57:38 users of course it's going to be an Asing function I will say try catch
1:57:47 if there is an error show this error and also throw that error I'll say
1:57:54 Throw new error and I'm going to pass this error here or directly let's give any
1:58:01 message fail to fatch users okay let's use our model and fatch all the users
1:58:11 I will say const users it's going to be user model and I will say find
1:58:20 and of course it's going to be a wait after fetching our users we are
1:58:25 going to send it of course we are going to add something additional but for now
1:58:31 let's test I'm going to open up my users page here and I'm going
1:58:37 to fatch my data so let's say const users I'm going to use my fatch function
1:58:47 and it's going to return our users of course async let's import and that's all
1:58:57 let's see I'm going to say console log users and I'm going to open up
1:59:02 my terminal I'm not opening my console
1:59:05 on the browser because it's a server component
1:59:08 this is how we can fatch data directly
1:59:10 inside and as you can see there's something
1:59:12 wrong here it throws this error let's
1:59:15 see what happens okay there is something wrong
1:59:18 with our connection let's check our EMV file
1:59:24 it looks okay oh because we didn't connect
1:59:30 I'm so sorry I'm going to come here before fing data of course we should
1:59:35 be connected first I will say connect to DB and let's check and again we
1:59:47 have a problem let's open up up this function and let's check what's wrong if
1:59:52 connection is connected we are not going
1:59:54 to do anything if it's not a wait mongus
1:59:57 connect process EMV and we are going to assign our connection here and I'm going
2:00:04 to console lock this error oops it's
2:00:16 undefined because I said connection is to be
2:00:22 connections finally there is no problem and as you can see it returns an empty
2:00:27 array because we don't have any user yet let's come here and create a new one
2:00:34 by the way if I refresh the page you are going to see our database
2:00:37 and our table it's here and as you can see we have products and users
2:00:48 let's add a new one the username will be drone email password and let's give
2:01:04 any image to do that I can use
2:01:07 pexels.com let's choose any image here doesn't matter
2:01:15 like that and let's say is admin is going to be false of course it's
2:01:20 going to be aoon and again is active it's going to be true okay we don't
2:01:32 have to add phone and address I'm going to insert and it's here let's check
2:01:39 again I'm going to refresh the page and as you can see it returns our user
2:01:47 let's add one more I'm just going to duplicate this and change the name let's
2:02:00 actually add more because I'm going to show you how to use pagination of course
2:02:14 we shouldn't add this manually we can use our ad page but I'm going to show
2:02:19 that later because we don't know nextjs
2:02:21 server actions yet first I'm going to explain
2:02:25 and after we are going to add our own data and let's add one more
2:02:34 and it's going to be enough okay let's refresh the page and see them okay
2:02:46 perfect right now I can use all these users in our page let me close
2:02:55 here and using our array I can add different rows so I'm going to say users.
2:03:03 map and for each user show this row like that there is a warning
2:03:14 because we don't have any unique key and yeah is going to be user.
2:03:21 ID and right now as you can see we have
2:03:24 six items let's change their names and images it's going
2:03:30 to be user do username and I'm going to write here
2:03:34 a condition I will say if user has an image show
2:03:39 it if not show no Avatar PNG and as you
2:03:44 can see there's a warning here because it doesn't allow us
2:03:48 to use any other image source to prevent this we
2:03:51 have to add this host name to our configuration to do
2:03:55 that I'm going to open up my menu and find
2:03:59 next config and inside I'm going to add images we
2:04:04 are going to add a different domain let's say remote
2:04:08 patterns you can specify here your protocol it's going to be
2:04:12 https only for the security and the host name will
2:04:17 be pexels.com okay let's see I'm going to refresh and perfect
2:04:28 let's remove one of them I'm going to edit and delete
2:04:31 this image okay awesome it works let's change others user.
2:04:49 email user.
2:04:51 created at time and we can write here
2:04:55 our condition if the user is admin right here
2:05:00 admin if it's not let's say client and I will do the same thing for is active
2:05:08 let's remove this one and it's going to be is active if it is it's going to be
2:05:13 active if it's not passive and finally instead
2:05:19 of this test I can update my link here
2:05:24 and I'm going to pass here my user id like that okay perfect as you can see
2:05:36 there is something wrong with created adate because
2:05:39 we don't have any created adate let me copy
2:05:43 and paste from my previous data for example I
2:05:50 can copy this and created at dat and I'm
2:06:00 going to paste it here and its type will be date let's see as you can see
2:06:11 there is something wrong because we are sending
2:06:14 a date we cannot show it as a string
2:06:17 to prevent this I'm going to come here and say to string if there is created ad
2:06:25 convert it to string like that and it's going to show you the full date but I
2:06:31 want to get only this part so I can use a slice method and I'm going to take
2:06:38 from the fourth character and 16 like that so
2:06:46 what about this search function ality when we
2:06:49 write any name here we are going to search
2:06:51 for our users normally in react you can create
2:06:55 a use State hook and store whatever you
2:06:58 write here and you can create a user fact
2:07:01 hook and whenever it changes you can trigger
2:07:05 the search functionality but we don't have to use use
2:07:08 State we don't have to use use effect
2:07:10 so let's open up the search component and I'm
2:07:15 going to store my input inside my browser
2:07:19 URL so when we search for John for example
2:07:22 we are going to add it here like query and John and using this query we are
2:07:28 going to reatch our users to do that we
2:07:31 are going to be using next navigation we are
2:07:34 going to need our path name and also
2:07:37 the search params basically whatever after this URL let's
2:07:41 use them and you are going to understand better
2:07:44 firstly of course it should be a client component
2:07:48 use client and I will say const search
2:07:55 params and use search params hook as you can
2:07:59 see it comes from next navigation and path name
2:08:08 let's see what we have inside I'll say console
2:08:11 lock search params and path name I'm going
2:08:17 to refresh open my console as you can see
2:08:21 this is our path name we already know how to use it and this is a function
2:08:27 that we can create a new URL and pass inside any query we want let me show
2:08:33 you how to do that I'm going to close here and let's create a new URL I will
2:08:38 say const perms new URL search parms and I'm
2:08:46 going to pass my search parms here and after
2:08:49 that I can set any query perams do set let's say test and the value will be
2:08:56 let's say value and using these new perms I can change my URL to do that we
2:09:03 can use replace method I'll say const replace it's
2:09:08 going to come from use R hook again next
2:09:11 navigation and using this method I can change
2:09:14 my URL I'm going to use my path name
2:09:19 remember it's dashboard and users and additionally I'm
2:09:23 going to add my search params here let's see
2:09:27 but before there's a mistake here we should
2:09:30 call our function okay and as you can see
2:09:36 it automatically adds this value so what can I
2:09:39 do when I change this input I can take this value and add as query let's do
2:09:49 that I will say on change method that's call
2:09:53 a function handle search let's create our function so
2:10:02 I'm going to take the event and create new
2:10:06 PRS let's move them inside and I'm going
2:10:09 to set search query and its value will be
2:10:13 un Target and value let's try I'm going
2:10:21 to remove here and try here JN as you can
2:10:28 see it's immediately here if I change it's
2:10:33 changing perfect so right now in this page using
2:10:37 this query I can refetch my users let's come back and I'm going to take my query
2:10:44 to do that we can use search params and and you can get any query you want
2:10:50 in our case it's going to be C let's do that I will say const query it's going
2:10:57 to be search parms do query and by the way it can be empty so I'm going
2:11:03 to put here question mark and if it doesn't
2:11:06 exist it's going to be an empty string so let's pass this query into our F users
2:11:14 function I'm going to take it here and I'm
2:11:17 going to write my condition the username should include
2:11:20 this query if you write here directly your query
2:11:23 you have to write the exact name but we are going to search every single letter
2:11:28 to do that we are going to be using
2:11:30 rejects const rejects I'm going to create a new
2:11:37 expression and it's going to include our query
2:11:40 and I can give here a new Option and it's
2:11:42 going to be I and it means it's going to be case insensitive so if I write
2:11:49 here any capital letter it doesn't matter they
2:11:51 all are going to be lowercased and let's use
2:11:55 it here rejects will be rejects okay I'm
2:12:01 going to do one more thing here I'm going
2:12:03 to write a condition if event Target and value
2:12:09 exists we are going to set this perms if
2:12:12 it's not we are going to delete that query
2:12:19 because when we write here anything and delete it
2:12:21 shouldn't show this query anymore let's try I
2:12:25 will say John it's here but if I delete it's gone but it's not fetching I said
2:12:34 John but it's not here let's see what's wrong
2:12:39 let's open our console let's remove those users
2:12:51 and those console locks and let's come here and check
2:13:03 if we have query or not okay it's empty because I said query it should be Q
2:13:25 okay it's here and our user okay perfect if I say Jane Just J as you can
2:13:36 see John and Jane okay awesome but searching users
2:13:40 for every single letter is not a good idea
2:13:43 because anytime I enter new item here it's
2:13:47 going to search for for users and this calculation
2:13:50 will be expensive to prevent this you can write
2:13:53 here a condition and say if it's less than
2:13:56 three characters don't search let's do that I'm
2:14:00 going to come here and I will say if
2:14:04 event Target value more than two we are going to set this query let's try I say
2:14:14 j o as you can see it's not searching but if I I say of course length
2:14:25 let's try it's not here if I say h and perfect what else you can do you can
2:14:33 add debounce functionality and you can wait user
2:14:37 to finish typing to do that we can use
2:14:40 use debounce Library let's say mpm install use debounce
2:14:47 and I'm going to write right here my version
2:14:50 okay right now using this Library I can wait for my users to finish their typing
2:14:57 to do that I'm going to come here
2:14:59 and rub my function with use debounced call back I'm
2:15:06 going to rra this like that and I'm going to add the time period let's say 300
2:15:14 milliseconds let's import this from our library right now
2:15:26 if I write quickly as you can see it's not searching but when I finish it weighs
2:15:32 300 millisecs and search for users and this is
2:15:37 how you can prevent abusing your database requests okay
2:15:42 so what about this pagination I want to see
2:15:46 here only two items only two users to do that again I'm going to add here
2:15:51 a query and it's going to be Page by default it's going to be one and we are
2:15:56 going to search for our users if there are
2:15:59 more than two items we are going to enable
2:16:01 this next button and when I click here
2:16:04 we are going to update this query it's going
2:16:06 to be two and when I click here one again let's do that by the way we
2:16:14 are going to use exactly the same functionality
2:16:16 for the search component so let's add here a new
2:16:20 query I will say perms set page and it's
2:16:27 going to be one because whenever we change
2:16:29 our input it's going to show the first page so even if we are in the second
2:16:36 page or third page or whatever when we write
2:16:38 anything it's going to reset here and in our users
2:16:43 Page by default it's going to be one let's say page if there is no page
2:16:49 it's going to be one and again I'm going to pass this page here let's take it
2:16:56 in our function let's remove this console lock
2:17:01 and I'm going to create here how many users I
2:17:04 want to see so let's say const item per page let's say two of course
2:17:11 in a real world example it should be five or 10 but we don't have that much user
2:17:17 for for the task purpose it can be two and I can write here limit and using
2:17:23 this item per page I can limit my query
2:17:27 in this case it's going to patch only two items
2:17:30 but how I'm going to see the others it's
2:17:32 really easy I'm going to come here and say
2:17:36 skip item per page multiply by Page minus one
2:17:41 so what this does is it skips a certain
2:17:45 amount of items for example when the page is 1 1- 1 will be 0 0 multip
2:17:52 by anything it's going to be zero again so
2:17:55 it's not going to skip any item it's going
2:17:57 to show us the first two items but if we are in the page two it's going
2:18:02 to be 2 minus 1 1 2* by 1 is going to be two it means it's
2:18:08 going to skip the first two items and show the other two items so if I change
2:18:14 here if I make this page two as you can see Harold Jane page three John and Mike
2:18:24 so using this page query I can update
2:18:28 my pagination component let's open again it's going
2:18:34 to be use client let's take them again I'm
2:18:41 going to copy here and paste and I'm going
2:18:47 to going to import them okay right now I
2:18:51 can create a new search params like that and again
2:19:00 I'm going to need item per page because
2:19:02 I'm going to make some calculation item per page
2:19:07 again it's going to be two if you want to you can store this in your em
2:19:11 view file but it can stay like that let's take our page by the way const Page
2:19:18 search params get and the page if it exists we are going to store this if it's
2:19:26 not it means we are in the first page
2:19:30 and right now we can make our calculation I'm
2:19:33 going to create two variables first one will
2:19:37 be has PR and the second one will be
2:19:41 has next if we have the previous page we will be able to click on this button if
2:19:46 it's not yeah are going to disable that's right
2:19:49 here if we don't have previous page and I
2:19:53 will do the same thing here disabled and we
2:19:55 don't have any next page okay so let's make our calculation I will say item per
2:20:05 page multiply by Page minus one but remember it's
2:20:11 a string we should convert this so I will say par in and if it's more than
2:20:22 zero let me explain let's say we are in the first page 1- 1 is going to be
2:20:29 0 0 multip by any number doesn't matter it's going to be zero again and it's not
2:20:35 bigger than zero it means we cannot click
2:20:38 on this button it's going to be disabled if
2:20:41 we are in the second page here is going to be 1 1* by 2 is going
2:20:47 to going to be two and it is more than zero so we can click what about here
2:20:53 again item per page multiply by our page minus
2:20:59 one it's exactly the same but also I'm going
2:21:02 to add here item per page and it should
2:21:06 be smaller than the total number of our users
2:21:10 in our case it's six of course we are going to take this as a probe
2:21:15 but let me explain for the second page here is going to be 1 1* by 2
2:21:21 it's going to be 2 2+ 2 it's 4
2:21:24 and it's smaller than six smaller than total number
2:21:28 but when it comes to third page here is going to be two two multiply by 2
2:21:34 4 4+ 2 6 so it means we don't have any other user we are at the end
2:21:41 of the page so it's going to be disabled so instead of six let's take our count
2:21:50 as a prop and I'm going to pass it
2:21:55 here you can directly say cons count equals users.
2:22:03 length but it's not a good idea because
2:22:05 remember it returns only two items it's not
2:22:09 returning the total numbers of users so we
2:22:12 cannot use it like that instead we should use
2:22:15 our database here and hatch all the user numbers and send it as a response
2:22:21 with these users so I'm going to create
2:22:24 a new query I'll will say const count await user
2:22:29 dot find again I should use this rejects
2:22:33 because we are going to use pagination for search
2:22:36 functionality also and I'm going to say count
2:22:41 and this function is less expensive it's not
2:22:44 actually get any user information it's just going
2:22:47 to find and count so let's use it inside
2:22:50 an object count and users oops count and let's
2:22:56 take it here it's not returning users anymore
2:23:00 it's returning count and users and I can send it to my pagination okay and what
2:23:16 else whenever we click on previous or next
2:23:19 button we are going to change our URL we are going to set new page and change
2:23:26 the url using replace method let's do that I
2:23:30 will say on click event and let's call
2:23:33 a function handle change page and I'm going
2:23:38 to pass here my type and it's going to be previous let's do the same thing
2:23:42 for the next button and the type will be
2:23:46 next next let's create this function const and it'll
2:23:53 change page I'm going to take the type and I'm going to write my condition if
2:23:59 the type equals previous params do set page
2:24:07 and I'm going to take the previous one previous page
2:24:12 number and I'm going to decrease and if
2:24:18 it's not I'm going to increase this number
2:24:24 it's that easy and finally using this page
2:24:30 number I can replace my URL question mark
2:24:38 and parms let's see I'm going to delete
2:24:43 this page as you can see at the beginning
2:24:46 it's disabled when I click here page will
2:24:50 be two so we can click on previous let's click again we are in the first page
2:24:59 second and third and right now it's disabled
2:25:04 and if the calculation is confusing for you
2:25:07 don't worry you going to use this calculation thousand
2:25:10 times and once you learn it it's going to make more sense okay let's do the same
2:25:16 thing for product let's open up prly I'm
2:25:20 going to come here and copy them and I'm
2:25:24 going to open up products page here that's
2:25:32 paste I will say async let's import this next
2:25:44 navigation and it's going to be patch product
2:25:47 of course we didn't create yet let's create
2:25:50 I'm going to come here duplicate this and change the name and instead of user we
2:26:01 are going to be using product model and instead
2:26:08 of username we are going to be using
2:26:10 the product title let's say products okay we
2:26:20 can use this function right now let's open up
2:26:23 our page and import and it's going to be
2:26:27 products and using this products we can show
2:26:31 different rows map for each product show this TR
2:26:44 by the way it's the wrong place it's our hat it should be body okay let's
2:27:01 give our unique key it's going to be product.
2:27:07 ID and I'm going to write here if product has an image use
2:27:13 it if not no product of course slash here and it's going to be
2:27:21 product title description price date but remember
2:27:39 we are going to convert this to string
2:27:44 and take fourth and 16 characters and this is going to be what's
2:27:52 that stock and I'm going to change this H dashboard products and the product
2:28:06 ID as you can see we don't have yet but if we create it's
2:28:24 going to be a number and stock that's create two more of course we
2:28:48 don't have created at but let's test as you can see there's a problem if
2:28:57 it exists and perfect and when I click here it's going to show
2:29:05 the product ID it's that easy guys and if I search for any item oops
2:29:13 there is something wrong here it's not updating and also we cannot see
2:29:18 the next button because we didn't send here count okay it's here but what about
2:29:31 this it's not updating oh because I said minimum three characters so I'm going
2:29:40 to search for test three and again it's not here let's check search PRS
2:29:49 query okay we are sending this query and Page query and Page let's see
2:30:01 again okay it's not showing because I'm
2:30:06 using navigation it's a page we should take
2:30:11 this as a prop okay it works okay perfect okay guys right now you
2:30:21 know how to Fat data how to search them how to use pagination right
2:30:26 now let's learn how to use NEX js14 server actions after this new feature
2:30:33 we don't have to create any API by the way I still prefer creating apis
2:30:38 it's more reliable and testable but I want to show you how you can
2:30:43 do this without any API layer let's close everything to test server actions I'm
2:30:52 going to create a test page let's say test folder and Page Insight let's
2:31:03 create a component and I'm going to create here a form before actions we were
2:31:08 not using this action remember what we were doing if there's an input we
2:31:14 were creating here comp input set input
2:31:18 use State and we were making this component
2:31:21 a client component and using use State we were updating our input using
2:31:29 this set method let's say on change event Target and value and using a button
2:31:39 we were creating on click event or unsubmit event in the form and we
2:31:45 were sending our data to database but after actions we don't need use State
2:31:53 we don't need client components we don't need any listener here we are able
2:32:00 to send everything inside this form using
2:32:03 server actions so let's say action and I'm
2:32:07 going to create any function here handle
2:32:11 form and let's create this function and here
2:32:18 I'm going to use use server directive
2:32:21 and it means everything inside this function
2:32:24 is going to run on the server let's say console lock hello and let's
2:32:31 open up our console Let's test and as you can see there's a warning
2:32:39 here server actions must be async functions because we are going to make
2:32:46 some post requests and let's see I will say John and I will send
2:32:55 and as you can see our text is here but the best thing is
2:33:00 we can reach any input inside this form I'm going to write here form data
2:33:05 and let's see what we have inside but we cannot see our input
2:33:14 because we didn't give any name here let's say username I will send again
2:33:23 and as you realize in this form data object we have our input object
2:33:28 and it includes the name and its value so using this object I'm able to use
2:33:34 this name so if I say const username it comes from from data
2:33:40 and I will use the get method and write here the name of the input
2:33:44 and its username right now I can use it here and if I click
2:33:51 right now it's undefined because I D
2:33:54 structure this of course it should be without
2:33:58 object and it's here and it means inside the server actions we can take
2:34:05 any input value and send it to our database and right now we can
2:34:10 turn back to our users page and add new user page and here we
2:34:16 can collect all the data from this form and send it to mongod DP
2:34:21 using server actions and the best thing is after sending our data to database
2:34:28 we can actually refresh this data here let me show you how we can
2:34:32 do that I'm going to close here and inside Library I'm going to create
2:34:38 new file and it's going to be actions let's create our first action I will
2:34:44 say export const it's going to be add user Asing function let's get
2:34:52 our input values the first one will be username form data of course we should
2:35:00 get this from here get and the input name username and I can do
2:35:08 the same thing for email passwords phone
2:35:10 address and others but instead of writing them
2:35:13 one by one I can directly D structure them I will say username email
2:35:20 password phone address is admin is active
2:35:27 and remember the form data is an object
2:35:30 to D structure our items I can use object from entries and form data
2:35:40 right now using all these data I can create a new user and add
2:35:45 it to my mongod DB so I'm going to use try catch block if
2:35:50 there is an error firstly we are going to console loog and after throw
2:35:55 this error and let's say failed to create user let's create our user here
2:36:07 using our model const new user new user model and I'm going to pass
2:36:18 my items here let's save it to database I will say await new
2:36:26 user and save that's all of course we should be connected to mongodb like
2:36:34 that so let's use this action by the way we didn't write here use
2:36:39 server directive don't forget that otherwise it's
2:36:42 not going to work so I can open
2:36:45 my ADD user page and inside my form I can call my action and it's
2:36:53 going to be add user Let's test by the way it's not the design
2:37:01 part anymore so let's come here and I'm going to give username I'm going
2:37:11 to give some password phone number his admin will be false is active will
2:37:18 be true and let's give some test I'm going to submit let's see I'm
2:37:26 going to refresh this page and as you can see our user is here
2:37:36 so what actually happens here is let's open up our Network Tab and write
2:37:43 another user and they are not required they can stay like that and when I
2:37:55 submit as you can see it's actually making a request and the end point
2:38:00 is dashboard users and add it's just like an API request and it returns
2:38:07 to 100 successful let's check our payload as you can see we are sending
2:38:13 username and other user data here and there is something important here you have
2:38:18 to validate your inputs without sending data
2:38:20 to database because even if you write
2:38:23 here required and type should be email or any other validation users can send
2:38:30 different data using this endpoint what we should do is validating our data
2:38:36 in this action but remember we are already
2:38:39 using models here so even if different data
2:38:43 comes in it's not going to work because our schema accepts only those items
2:38:48 with some types and other requirements so we don't have any problem right now
2:38:54 and also don't use your entries like that let's say data and directly send
2:39:01 a data instead D structure every single items in this case you can make sure
2:39:07 which data you are using and I'm going to come here and I will
2:39:12 say revalidate path and I'm going to write the path which has the data
2:39:18 that I want to refresh so it's going to be this path I'm going
2:39:22 to copy and paste here so as soon as you create a new user it's
2:39:28 going to refresh this data in our example we are using different page
2:39:32 but imagine you have your data and also you have a form here and thanks
2:39:37 to revalidate path as soon as you click to add new user button you'll
2:39:43 be able to see your user here so you don't have to use usequery
2:39:47 you don't have to use S WRR everything is much easier right now
2:39:53 and in our project when I click here I want to redirect my users
2:39:57 to this page and again I'm going to use same path I will say redirect
2:40:06 and paste my path that's import it's
2:40:10 going to come from next navigation don't use
2:40:13 anything else and let's see and a password here and let's send and it's
2:40:28 here of course our password is to week let's come here and our user
2:40:35 is there okay but there is something wrong here let's check our database
2:40:42 and as you realize when we send any p password we are storing it
2:40:47 in a plain text but you should never ever store your passwords like that you
2:40:52 have to Hash it first and store it like that so when user enters
2:40:57 their password Here we are going to Hash this also and after we are
2:41:01 going to compare them if they are equal it means it's the correct user let's
2:41:07 do that I'm going to Hash my password to do that I'm going
2:41:11 to use a library and it's going to be bcrypt mpm bcrypt and I'm going
2:41:17 to write the version let's see how we can use I'm going to zoom
2:41:26 in as you can see we are using the hash method and passing here
2:41:30 our plane text and we are passing the generated salt here and after it
2:41:36 returns us the hashed password let's do that after this connection I will say
2:41:43 const salt a bcrypt generate salt you can give a number here by the way
2:41:52 let's import this and after that I'm going to Hash my password hash password
2:42:05 again await bcrypt do has method I'm going to pass here my password comes
2:42:12 from user and I'm going to use this Sal and it's going to generate
2:42:17 a new password and right now instead of this plain text I can use
2:42:23 it let's see I'm going to create new user secure user again from 1
2:42:38 to six I'm going to submit let's check I'm going to refresh and as you
2:42:50 can see the password is hashed right now it's much secure so let's do
2:42:56 the same thing for the product I'm going to duplicate this and it's going
2:43:01 to be add product and we are going to take title description price stock color
2:43:11 and size we are not going to need that we are going to be
2:43:17 using product and I'm going to paste my data here by the way
2:43:30 if you are using multiple server action by the way let's remove here you
2:43:37 don't have to write them inside every single action you can just use it
2:43:43 at the top of the file like that so we don't need this okay
2:43:51 let's import product model and I will do exactly the same thing I'm going
2:43:57 to open up add product and form action will be add product and if everything
2:44:06 is okay we are going to revalidate and redirect to products page let's see Ikea
2:44:22 task any price stock and description I'm going to submit there is an error
2:44:30 because I had splice is going to be slice let's open up products
2:44:42 and it's here okay so let's do the same thing for this delete action
2:44:49 so what I'm going to do is creating here a form and when I click
2:44:53 on this button I'm going to send my product ID to action and we
2:44:58 are going to delete this from our mongod DB let's do that I'm going
2:45:02 to come here let's duplicate this I will say delete product and inside form
2:45:14 data we have we're going to have only ID and I will say product find
2:45:22 by ID and delete and I'm going to pass here my ID if there's
2:45:27 a problem we are going to throw this error and in this action you
2:45:31 are going to understand this part better of course we are not going
2:45:34 to be redirected to anywhere and let's open up products and before this button I
2:45:43 will say form and the action will be delete product here and of course
2:45:53 we are going to need an input it's going to be text and I'm
2:45:57 going to pass here product ID and in this case we are going to see
2:46:05 this input here but I don't want to do that so I will make
2:46:08 this hidden perfect and when I click on this Buton button we are going
2:46:15 to send this ID don't forget this name and we are going to take
2:46:20 that ID from this form data and we are going to delete that product
2:46:26 let's do that and let's remove this Ika desk I'm going to click as you
2:46:34 can see it's gone let's delete perfect it works it's that easy guys let's
2:46:44 do this the same thing for product sorry user and I'm going to open
2:46:53 up users page and I'm going to do exactly the same thing here input
2:47:09 is going to be hidden name will be ID and the value will be user
2:47:19 ID okay right now you know how to use server actions you can
2:47:24 do exactly the same thing for update page let's open up ID page users
2:47:32 and ID and firstly I'm going to fatch my data we are still using
2:47:38 our design here to do that I'm going to open up my data and if
2:47:42 you remember we are fetching our data using this file file right now I'm
2:47:46 going to fatch a single user fatch user we don't need rejects or pagination
2:47:56 I'm going to delete them actually let's delete here and I will say const
2:48:01 user await user model find by ID and I'm going to pass here the ID
2:48:08 comes from our client and right now I can return this let's say F
2:48:18 user and I'm going to do exactly the same thing for products okay that's
2:48:33 all let's open up our page right now using this function I'm going
2:48:37 to fatch my user of course it's going to be async const user P user
2:48:49 and I'm going to pass my ID here it's really easy to take
2:48:53 this only thing I should do is write here params and I'm going to take
2:49:02 the ID from this params I can do that because remember the page name
2:49:08 is ID if you write here slack or something else it has to be slack
2:49:14 or and other things I can pass this ID here and user do username
2:49:24 and again let's copy this if there's an user image show it if not
2:49:31 show no AAR okay and after that we are going to update our user
2:49:37 let's open up our action and copy here sorry this one and I'm going
2:49:47 to paste and this time it's going to be update user in this case
2:49:54 I need my ID also and I can delete here right now let's say update
2:50:04 so what I'm going to do here if you remember those inputs are empty
2:50:08 right now if you don't write anything here when I click on this button it's
2:50:14 going to send an empty string and if we are sending empty string we
2:50:18 shouldn't update that part we should update only whatever we change here to do
2:50:24 that I'm going to need a condition firstly let's create our Fields const update
2:50:33 Fields it's going to be username email
2:50:37 password phone address and is admin and is
2:50:44 is active right now I'm going to check those inputs if they are empty
2:50:50 or undefined I'm going to delete them from these update Fields if they are
2:50:54 not empty I'm going to use them and update my user so let's say
2:51:01 object Keys updated fields we are going to check every field here so I'm going
2:51:08 to use for each I'm going to take the key and I'm going
2:51:12 to check if update field key equals an empty string or undefined I'm going
2:51:24 to delete that key I will say delete that key of course it's ending
2:51:33 here okay so using these update fields we can update our user so I will
2:51:41 say await user find by ID and update and I'm going to pass here
2:51:49 the user ID and after update Fields Let's test I'm going to save here
2:51:58 let's change those placeholders by the way it's going to be username user email
2:52:09 we don't have to write here phone and address let's see by the way why
2:52:21 it's not fetching let's see our ID okay it's here but oh I
2:52:42 didn't say await okay so let's try of course we are going to need
2:52:50 our ID let's close here and create an input and it's going to be
2:52:58 hidden name will be ID and the value will be user ID and let's give
2:53:07 our action update user let's see and as you can see all these data
2:53:15 is here let's update this username and as you can see it's here and others
2:53:28 are still the same actually it's changing
2:53:31 this role because by default it selects
2:53:36 the first value so I can write here a condition if user is admin it's
2:53:45 going to be true and is not admin I will do the same thing
2:54:02 here let's see this one it's client and active so it's going to be
2:54:07 false and true false and true okay let's change here for example phone I'm
2:54:20 going to update and perfect it's here okay this is how we are using actions
2:54:32 you can do exactly the same thing for products just duplicate this and say
2:54:45 update product and change here like that if they are empty it's going to delete
2:54:59 and after product find by ID and update if there's an error it's going
2:55:07 to be update product and after that we are going to revalidate our products
2:55:16 and our users and products are ready we can add delete update and fch
2:55:23 data so let's take care of authentication for the authentication we are going
2:55:31 to be using OJs let's get started normally to use next off we should
2:55:43 create an API route and write all the configuration inside the API folder I also
2:55:50 prefer this method it's much easier but since we focus on server actions
2:55:55 and handling data without an API layer let's do it without creating an API
2:56:01 and this is what the nextjs documentation recommends us as you can see it uses
2:56:10 next off but be careful here you
2:56:12 should install the beta version because this version
2:56:15 is compatible with NEX js14 let's install I'm going to open up my console
2:56:22 and I will say mpm install next off and beta actually let's write here
2:56:29 the exact version number in order to prevent any possible errors so the version
2:56:34 will be 5.0 and beta and after that we are going to need to create
2:56:43 all secrets and URL basically this script is used for creating session tokens
2:56:49 and this is for creating authentication Pages like our login page so let's copy
2:56:55 this and paste to EMV file I'm going to open up EMV and paste
2:57:02 it here you can write here any secret key it doesn't matter you can use
2:57:12 this command on your terminal and create a if secret but it doesn't matter
2:57:16 it can stay like that and after that we are going to create our configuration
2:57:23 let's create a new file I'm going to create it here and it's going
2:57:27 to be config.js I will say export const off config I'm going to write
2:57:37 here my login page Pages the signin page will be the log L URL
2:57:45 this is important because if we are not authenticated we are going to be
2:57:48 redirected to this signin page after that we are going to create a callback
2:57:54 that we can write the authorization logic because if we are not logged in it's
2:57:59 not going to allow us to see this dashboard it's going to redirect us
2:58:03 to the login page and also if we are logged in we are not
2:58:06 going to see this page it's going to redirect us to the dashboard let's
2:58:11 do that I will say callbacks authorized and it's going to take our session
2:58:20 and also the request so we can check the request URL so firstly I'm
2:58:27 going to check my session I'll say const is logged in if there's a user
2:58:34 inside our session it means we are logged in right now we can check
2:58:39 if we are in the dashboard or any other page I'll say const is
2:58:44 on dashboard so we are going to check our request URL and the path
2:58:52 name and if it starts with dashboard it means we are on the dashboard
2:59:00 right now I can write my logic I will say if is on the dashboard
2:59:06 and if it's logged in we are going to return true so user can
2:59:13 stay on the dashboard but if it's not logged in we are going
2:59:17 to return false and it's going to redirect
2:59:20 unauthenticated users to login page and else
2:59:25 if is logged in so we are not on the dashboard but we are
2:59:30 logged in we are going to be
2:59:32 redirected to dashboard so I'll say return response.
2:59:40 redirect I'm going to create a new URL and it's
2:59:44 going to be dashboard and I'm going to pass
2:59:46 here request and next URL and finally if we are
2:59:53 not on the dashboard we are going to return true
2:59:56 and in this case users can stay wherever they
2:59:59 are so right now we have to run this function
3:00:03 for every request to do that we can use nexj
3:00:06 as middleware let's check the documentation as you can see we
3:00:16 are going to pass our configuration here and it's going
3:00:19 to run this function on every request except of this matcher
3:00:25 and it includes our API and static files we
3:00:29 should write this otherwise we won't be able to see
3:00:32 our images so let's copy this and paste here
3:00:37 of course I should change here it's all config
3:00:43 by the way it's here I'm going to move
3:00:46 this to app folder okay right now we can create the login
3:00:52 function let's check the documentation as you can see
3:00:56 we should create here our provider and it uses
3:00:59 the GitHub provider but in our application we are going
3:01:02 to be using our username and password so I'm going
3:01:06 to use the credential authentication in OJs the recommended
3:01:10 way to login is using social accounts or email codes
3:01:15 but most of the websites are still using username and password
3:01:19 credentials and for this kind of dashboard application it's not
3:01:22 a good idea to log in with Facebook or something
3:01:26 so we are going to be using our credentials so
3:01:32 I'm going to create providers and inside credential provider
3:01:36 and finally we are going to hatch our user but there
3:01:39 is something important here if you remember we are using
3:01:42 BP to hash and compare our passwords but we are
3:01:46 using this configuration in the middleware and the problem is
3:01:50 the bcrypt library is not JS dependent so I'm not
3:01:53 going to write my providers here instead I'm going
3:01:57 to create a new file let's say OJs and after
3:02:07 I'm going to create my provider let's copy this and paste
3:02:13 and and I'm going to remove here we are
3:02:15 going to fatch our user outside of this function let's
3:02:18 say const login we are going to take the credentials
3:02:26 and it's going to be an ASN function and we
3:02:28 are going to fatch our user compare our password if
3:02:32 everything is okay we are going to return our user
3:02:35 here but before let's spread everything inside our config let's
3:02:43 import like that and instead of export default I can
3:02:55 destructure my sign in and sign out functions that we
3:02:58 can use in the login page I will say const
3:03:04 sign in sign out and also I'm going to destructure
3:03:10 all session so using this function we can fetch
3:03:14 our user and use it in the sidebar okay let's
3:03:19 fetch our user I'll say try catch if there's
3:03:26 an error console lock this error and throw and new
3:03:31 error and I will say failed to login let's connect
3:03:36 to our DB and after I will say const user
3:03:45 await user model and I will say find one
3:03:50 because we are finding only one user and I'm going
3:03:53 to write my condition here and it's going to be
3:03:57 username should be credentials username and I'm going to write here
3:04:04 a condition and I will say if there is no
3:04:07 user in the database with this username we are going
3:04:10 to throw an error and let's say wrong credentials
3:04:19 and after if there's an user we can compare our passwords
3:04:23 I will say const is password correct and we are
3:04:30 going to be using bcrypt let's import this and we
3:04:39 are going to use the compare method and we are
3:04:42 going to pass here our plan password which is credentials.
3:04:46 password it comes from the login form and we are going
3:04:50 to compare this with the user do password basically the password inside
3:04:58 our database this hashed password so if they are not equal again
3:05:04 we are going to throw an error if it's not correct I'm going
3:05:10 to throw exactly the same error and finally if everything is okay
3:05:16 we can send our user return user let's call this function here
3:05:26 I will use try catch again if there is an error we
3:05:32 are going to return null in this case the login process will fail
3:05:37 let's say await login and I'm going to pass my credentials
3:05:42 and finally I'm going to take this user and return this user so
3:05:49 next off is going to take this user and pass it to session
3:05:54 let's see okay we are still in the dashboard there's something wrong
3:06:04 with the middle R okay it's not running if I move this here
3:06:19 okay right now it works but there's something wrong with our configuration
3:06:24 because we didn't add here any provider I'm going to leave it
3:06:28 empty because we passed our providers here inside OJs and right now
3:06:37 as you can see there's a typo here starts with and as you
3:06:43 can see it redirects us to login page that's try dashboard
3:06:49 and I cannot see that page okay and right now we can
3:06:53 log in don't forget to create your middleware in the root don't create
3:06:58 inside app directory or Source directory it has to be inside root
3:07:05 okay right now using this form we can complete the login process
3:07:10 let's create an action and take those fields and try to log
3:07:16 in inside library and actions I'm going to say export const let's say
3:07:27 authenticate we are going to take the form data and we are
3:07:33 going to fatch our user let's say async so let's just structure
3:07:38 our username and password remember how we are doing this object from entries
3:07:48 and form data I will say try catch block if there's an error
3:07:58 throw this error and I'll say await sign in function remember it
3:08:06 comes from next off and I'm going to write here the provider
3:08:13 name it's going to be credentials if you are using any social
3:08:18 media it's going to be like Google GitHub or whatever but we are
3:08:22 using the username and password and I'm going to pass my username
3:08:27 and password here let's say console lock error and throw this error
3:08:38 okay let's use this action in our form I'm going to open
3:08:41 up the login page page and pass it here but don't forget
3:08:48 writing your names it's going to be username let's import this and let's
3:09:02 try so let's say user one I'm not sure have we
3:09:07 created this user or not that's login and as you can see
3:09:13 we have an error because we didn't create that user we are going
3:09:16 to handle this error and show it somewhere here but for now
3:09:20 let's complete our process this is correct one test user I'm going
3:09:29 to login and as you can see we are in the dashboard
3:09:33 so if I try to go to the login page as you can
3:09:37 see it doesn't let me to go okay perfect right now let's
3:09:42 use our off function and Patch our image and username and after we
3:09:48 are going to handle our error remember we have this function let's
3:09:53 use it in our sidebar I will say async const session await off
3:10:11 function that's see what we have inside I'm going to open
3:10:16 my console as you can see it has the expires at date
3:10:21 and a user and this user includes only email but we are going
3:10:26 to need this image and username by the way there is an error
3:10:31 here there is something wrong with our images it's probably because
3:10:36 of this middleware and mature we are going to handle this but for now
3:10:41 it can stay like that that let's try to add our username
3:10:45 and image to our session to do that I'm going to open
3:10:52 up OJs and write different callbacks when you log in by default
3:11:01 next up is storing your email address into JWT token but we
3:11:06 can change it we can store something else like username and image
3:11:11 to do that we are going to be using J WT function I
3:11:14 will say async JWT and it has the token and the user
3:11:21 and I'm going to check the user first in any case and I'm
3:11:25 going to pass some other information to my token so token dot
3:11:31 username will be user do username and the image will be user.
3:11:40 image and after I can return my to token but to reach this data inside
3:11:49 our component we should pass the token
3:11:52 information to session to do that I'm going
3:11:56 to create another function and it's going
3:12:00 to be session and it includes the session
3:12:05 and the token it's exactly the same thing we are taking the data from user
3:12:11 and passing the token and we are going to do exactly the same thing here
3:12:15 we are going to take the data from the token and pass it to session
3:12:21 so let's a token and it's going to be session and finally we are
3:12:33 going to return this session so let's see right now I'm going to log out
3:12:39 and try again by the way we don't have our functionality here let's use
3:12:44 our log out function remember it's here we can use it where is our sidebar
3:12:53 here and what I'm going to do is creating here a form and wrap
3:13:00 my button and when I click on this button we are going to call our function
3:13:06 of course we are going to create here a server action to do that I
3:13:10 will say asnc remember server action should be async and I'm going to write here
3:13:18 my directive and await sign out function
3:13:25 let's import and that's all let's see I'm
3:13:30 going to click as you can see we are not logged in anymore what was
3:13:35 the name test user I'm going to log in and let's check our console
3:13:45 here and right now before this image error you are going to see that we
3:13:50 have username here but we don't have image because in our database as you can
3:13:56 see it doesn't have any image let's add actually I'll say image and let's choose
3:14:05 an image here this one I'm going to save by the way there was something
3:14:22 wrong here because we should pass it inside user object let's do that I'm going
3:14:29 to come here instead of directly session I will say session do user okay let's
3:14:40 see I'm going to log out test user and perfect right now we can use
3:15:06 them let's take our user directly and and I will say user do username
3:15:19 and if user has an image we are going to use it if not we
3:15:24 are going to use this image okay it's here so let me check this middleware
3:15:42 okay this is the correct one you can find it in the GitHub reposit story
3:15:46 as you can see there is no error right now we can login but if
3:15:53 you remember there is something wrong here
3:15:57 if I write any wrong credentials it shows
3:16:01 up this error component but I want to show my error somewhere here let's say
3:16:07 after button but if you are using your form inside the server component it's not
3:16:14 possible to catch the error and show it here so what you can do
3:16:19 you can come here and create an error layout of course it should be use
3:16:29 client and show your error inside this component okay we can see our error
3:16:38 but this is not what we want because user has to go back and and write
3:16:42 the credentials again to prevent this we should use a client component so I'm
3:16:48 going to take my form from the login page and create a new component let's
3:16:54 do that inside login page I'm going to create new component let's say login form
3:17:02 let's create our function and CSS and I'm going to take my form style here
3:17:21 from the parent and paste it here and right now let's open up the login
3:17:35 page I'm going to delete this form instead I'm going to call my component login
3:17:41 form right now we don't need this action here and let's paste our form
3:17:55 for now let's leave it empty okay there
3:18:00 is something wrong because I forgot dot here
3:18:08 okay as you can see it's exactly the same right now now I'm going
3:18:12 to convert my login form component to client
3:18:19 component and create here a new function handle
3:18:26 login we are going to take the form data and we are going to call
3:18:31 our action here so it's going to be async and I will say const data
3:18:38 is going to be our server action and we are going to pass this form
3:18:45 data let's open this function and instead of throwing error I'm going to return
3:18:51 let's say error equals wrong credentials let's
3:18:57 close everything and open up login form I
3:19:02 will say if data do error set an error so I will say const error
3:19:10 set error use State hook and I'm going to set my error here and if
3:19:21 there's an error I'm going to show it here let's use this function here
3:19:31 and let's try I'm going to write some different username and password and login
3:19:38 and as you can see wrong credentials but there is is one more way if you don't
3:19:44 want to use use State and this function you can use use form State hook
3:19:51 this hook allows us to update our state based on the form action let me
3:19:56 show you how it works let's check the example as you can see we are
3:20:01 creating this hook and we are passing here the initial State and when we click
3:20:06 on this button we are calling this form
3:20:09 action and it triggers our increment action
3:20:13 and this action is taking the previous state and returns a new state so we
3:20:19 can use this state inside our component after
3:20:22 this button for example so in our case
3:20:25 what we can do the state can be our error message at the beginning
3:20:30 we can Define this as undefined and when we call our action if there's
3:20:35 an error we can update our state and show it after our button let's do
3:20:40 that and you are going to understand better I'm going to copy this and paste
3:20:46 here I'm going to delete this use State
3:20:49 let's import okay let's import manually from react
3:20:58 Dom and we are going to pass our form action here and it's going
3:21:02 to trigger our server action and at the beginning
3:21:08 our error will be undefined and I
3:21:12 will say if there's a state show that state let's open up our server action
3:21:20 right now we are going to need one more parameter and it's going to be
3:21:23 previous state and right now if there is an error I can directly send
3:21:29 this error let's try I'm going to refresh
3:21:39 and let's give some username and password
3:21:42 and login and as you can see it's here and the best thing is even
3:21:47 if you disable the JavaScript it's still going to work and this is one of its
3:21:58 awesome features okay let's log in again
3:22:07 and right now we can authenticate fat users
3:22:12 products add new one or update by the way you can do exactly the same
3:22:17 thing for those forms you can make them client components and show the error
3:22:22 here I'm not going to do exactly the same thing again and again and that's
3:22:28 all this is how we are using NEX js14 I'm going to explain every single
3:22:33 thing about nextjs 14 in the next video but for now you know the basics
3:22:42 so let's deploy our application okay before
3:22:47 the deployment I'm going to build my application
3:22:50 for the test purpose let's check if everything is okay or not I'm going
3:22:55 to say mpm run build as you can see there is no problem right now
3:23:06 we can upload our files to the server and after we can build and start
3:23:11 our application let's open our project I'm
3:23:15 going to select everything here but we don't
3:23:17 need do next git and not modules I'm going to take the rest and I
3:23:24 will compress and we are going to upload the zip file to our server
3:23:30 let's open up our hosting panel this is our server it's up and running let's
3:23:36 come here this is the cloud panel URL let's click and remember our username it
3:23:45 was admin and we created a password I'm going to login and right now we
3:23:55 can create our website I'm going to click here we are going to create
3:23:59 a not JS application because nextjs is using not JS under the hood and here you
3:24:06 can write your domain name for this project I'm going to be using dashboard Lama
3:24:13 Dev and this is our username we are going to use this later but don't
3:24:18 worry you don't have to memorize everything
3:24:20 is inside your hosting panel let's create okay
3:24:27 let's manage our website and I'm going
3:24:29 to install the SSL certificate so our application
3:24:34 is going to use https connection I'm
3:24:38 going to come here and choose this certificate
3:24:42 let's create and install okay it's ready as you can see everything is much
3:24:51 easier thanks to Cloud panel and by the way
3:24:55 don't forget to redirect your website
3:24:58 to this IP address if you don't know how to do that you can search
3:25:02 for changing DNS records it's really easy
3:25:05 there is nothing complex and let's come here file manager and this is the main
3:25:13 directory of the application I'm going to choose
3:25:16 my website and right now I can upload my zip file here I'm going
3:25:21 to take this and upload let's extract it's going to be the main directory okay
3:25:34 right now we can connect to our server and build our application let's get back
3:25:40 to the hostinger let's click here and using this command we are going to connect
3:25:47 to the server but to do that we have to add our SSH key I'm
3:25:52 going to come here SSH keys and I'm going to add my key here let's
3:26:00 create a key I'm going to open up my terminal and create my key okay
3:26:12 it's ready so let's copy this key using
3:26:15 this command by the way all these commands
3:26:18 will be in the description below don't worry about them and let's come here
3:26:24 and paste our key and let's give a name it doesn't matter and it's going
3:26:32 to take a while and after that we will be able to connect to our server
3:26:37 okay it's ready let's come here and copy
3:26:43 the connection command I'm going to paste
3:26:47 it here I will say yes and we are connected the First Command I'm
3:26:54 going to write here is sud sudo 2 and llama dashboard let's get back
3:27:02 to the main folder and let's see what's inside as we can see this is
3:27:12 the folder that includes our websites let's get
3:27:15 inside HD docs and inside this folder you
3:27:20 are going to see our website let's open CD and our website and if you
3:27:27 check inside you are going to see that all the files we uploaded are here
3:27:32 let's install our libraries I will say mpm install okay we can use this command
3:27:44 because remember we have created a not
3:27:46 JS application so everything is ready to use
3:27:50 let's build our application I'm going to open the production mode and I will say
3:27:54 mpm round build as you can see there is no problem it works as expected
3:28:08 but I forgot something remember in the EMV file our authentication URL is still
3:28:16 Local Host let's change here otherwise we
3:28:19 cannot login so I will say dashboard l.
3:28:23 Dev of course it's going to be https I'm
3:28:27 going to save and let's build again during this process
3:28:36 let's update our mongod DB remember in the network
3:28:41 app access we are not using any specific IP
3:28:44 address and it allows everyone to access our mongod
3:28:48 DB to prevent this I'm going to write here
3:28:51 the server IP let's come back and copy this IP
3:28:57 and I'm going to paste here and right now only
3:29:02 our server has the access right now it's much
3:29:06 secure and it's ready to run I'm going to start
3:29:09 my app and let's see I'm going to refresh
3:29:18 my page and as you can see our homepage
3:29:24 let's try to open dashboard it doesn't allow because
3:29:30 we are not logged in let's log in okay wrong
3:29:40 credentials I forgot what was the user test user
3:29:47 or let's see and it's ready let's check our users
3:29:57 okay they are here let's check the pagination perfect
3:30:03 I'm going to delete this one and this one
3:30:08 perfect let's try to add new user test from website
3:30:22 I'm going to submit it opens to users page
3:30:26 and let's check and it's here perfect it works
3:30:37 we have only one product and let's try to log
3:30:43 out okay all functionalities work and that's all guys
3:30:48 I hope you liked it remember the next video will
3:30:51 be the complete nextjs 14 tutorial and if you
3:30:55 have any questions if you didn't understand any part
3:30:59 of this tutorial I highly recommend you to watch
3:31:01 the next tutorial okay if you learned something new today please
3:31:06 like the video you can support Lade using the link
3:31:09 in the description below or by joining the channel
3:31:12 don't forget to follow lad's social media accounts I
3:31:16 hope I will see you in the next tutorial goodbye