Elgato Wave MK2 -- Pro Streaming Audio Is Easier Than Ever
Senpai
0:00 All right, I need to say something before we start.
0:02 Uh, if you got an audio setup, it works great.
0:04 It gets the job done.
0:05 Don't buy something because it's new and shiny.
0:08 You buy something because it's what you need.
0:10 That's a general rule of this channel, but I feel I have a duty to say
0:13 that before this one because Elgato dropped a handful of things.
0:16 They are shiny and new.
0:17 They will be tempting, but if you don't need them,
0:19 need you to stay strong with me.
0:21 All right.
0:22 All right.
0:25 I needed to say that ethically because there are
0:27 some things I will be overexited about in this video.
0:29 There have been a number of times in the streaming lifespan where
0:33 there have been uh there's been a monumental step forward in streaming audio.
0:36 I'd say the Go XLR was the first one.
0:38 First time we got multi-fader, multi- channelannel audio for streamers.
0:42 The Elgato Wave 3 was probably the second one.
0:44 First time we got submixes where you could
0:46 control what you heard versus what your audience heard.
0:48 And I would say the beacon stuff was probably the third one.
0:51 Next level mic effects.
0:52 the first time we can get four individual channels to two PCs over USB.
0:56 A lot of really cool stuff.
0:57 Uh today is, I think, the fourth one.
1:00 A lot of exciting stuff here.
1:01 Three new audio devices, a completely redesigned Wavelink audio software.
1:06 Actually, a fourth new device if you watch
1:07 the one on the new stream deck Chongus.
1:09 That's not the official name, but it's what I've been calling it.
1:11 Separate video on that launched today also.
1:13 I'll link to that down below.
1:14 So much to talk about here.
1:15 I'm going to focus on the juicy stuff.
1:16 Let's jump in.
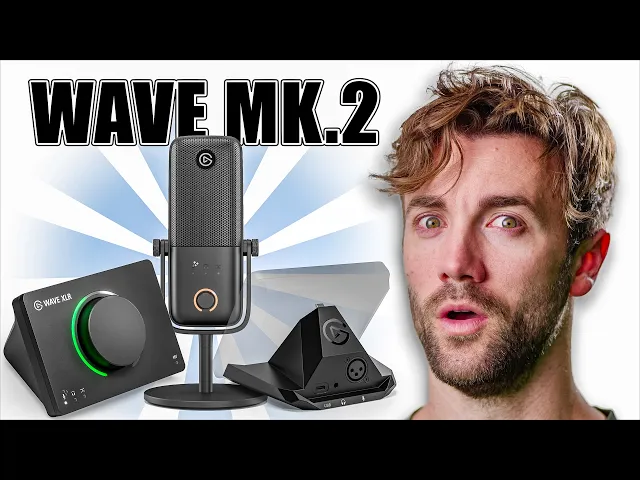
1:17 The Wave 3, the Wave XLR, and that backpack,
1:20 the XLR dock for the Stream Deck Plus.
1:22 They've all got a Mark I launching today
1:23 and it's pretty much the same upgrades across the board.
1:25 I'm going to grab the Wave XLR here.
1:27 We're going to take a look at it.
1:28 Here we go.
1:29 First thing you're probably going to notice is that big old LED ring around it.
1:33 Gives you way clearer feedback about levels and controls.
1:37 And it I think it just looks cleaner.
1:38 Nice touch.
1:39 And down here, you'll also notice one other little difference.
1:42 One extra LED in the bottom with a little
1:44 bit of like little sparkle looking LED.
1:46 We'll get into what that is when we get into the software,
1:49 but the important upgrades to it are all on the inside.
1:52 There is an upgraded preamp.
1:54 You're not going to notice a difference there.
1:55 The last one is just fine, but you got a couple more dB of gain.
1:58 I'm recording this whole video on the SM7B going into this right now.
2:01 So, you're hearing what this sounds like.
2:03 But the big thing is the new effects processor built into this.
2:06 Meaning things like your EQ, your compression, your noise gate,
2:10 all that stuff is being processed on the device
2:12 instead of on your computer using your computer's resources.
2:16 We'll get to why that's really important
2:17 in a second because a lot is happening in here.
2:19 In fact, we're going to do that right now.
2:20 We're going to jump into the software and I'm
2:21 going to show you what we're looking at.
2:23 So, here we have the brand new Wavelength 3.0.
2:25 It has been completely redesigned.
2:26 It looks nothing like the last one.
2:27 And in my opinion, it is a massive step forward,
2:30 not just for Elgato Wavelength, but for all streaming audio.
2:33 They did some new stuff that's never been done.
2:35 They added a ton of new features that's totally new for streamers,
2:39 and they somehow made it simpler to use than it's ever been.
2:42 You can see on the left here, we have our two main tabs.
2:44 We have our Elgato devices that are plugged in and our mixes.
2:47 We're going to start up here.
2:47 And you can see if I plug in another device
2:50 like the old Wave XLR that pops up right here.
2:52 And so I can jump back and forth between the two.
2:54 You can see the old design works the same way.
2:56 Here on my Wave XLR Mark I,
2:57 we have all of our settings for our hardware on the right side.
3:00 So on the first tab, we got our inputs and outputs.
3:03 So like our microphone and our headphones.
3:04 Very straightforward.
3:05 If you need phantom power, you turn it on here.
3:07 If you want clip guard, their new Clip Guard 2.0,
3:09 which by the way, just turn this on.
3:11 This means if you scream into your mic, it is almost impossible to clip.
3:15 I tested it.
3:16 I cranked this all the way up and yelled into it, zero clipping.
3:20 You'll never sound like XQC.
3:21 It's very impressive.
3:22 We got our headphone volume.
3:23 We got our monitoring so you can hear how loud you sound in your own headphones.
3:26 We got high power mode for high impedance headphones.
3:29 And we have something here called direct monitoring,
3:31 which I'm very excited to show you in just a second.
3:33 The effects tab is where you're going to spend most your time.
3:35 Here we have all the effects that are being processed on the device itself.
3:39 These are hardware effects.
3:40 They're built in and they work very simply.
3:42 For the most part, you don't have to really adjust anything.
3:45 But if you do, if you want to, you hover over it,
3:47 you hit these little levels on the right side and you can adjust stuff.
3:51 But you got your low cut that cuts out like rumbles from your desk.
3:54 You got the expander, which is basically a noise gate,
3:56 but like a smoother noise gate,
3:58 so you don't get that like choppy cut in and out when you talk quietly.
4:01 Voice tune is very cool.
4:03 And that's actually what that extra little LED is on the corner here.
4:07 You can see if I turn that up and down, that moves it from weak to strong there.
4:11 And what that's doing is that's just beefing up your voice.
4:14 It's a preset effect by Elgato that uses some compression,
4:17 probably a little EQ just to make it sound more radioy.
4:20 And honestly, if you use this, you don't really need to use the compressor.
4:25 And then of course, we have EQ, which you can go in and adjust yourself.
4:28 I'm going to get to voice focus just a second,
4:30 but at the bottom here, we have sound check, where you can record yourself.
4:33 Hey, this is an audio test, so I can hear how I sound.
4:36 And then if you hit play, it'll play it on repeat while you adjust
4:39 your settings and you can see what sounds the best.
4:41 So I can hear how I sound.
4:43 Hey, this is an audio test, so I can hear how I sound.
4:46 Hey, this is an audio test, so I can hear how I sound.
4:49 Hey, very cool.
4:51 And this sound check persists across all the settings here,
4:54 so you can use it whenever you're adjusting anything.
4:56 Now, all of these up here are hardware effects built onto a chip.
5:00 And so they're adding almost zero latency to your voice.
5:02 But for the most part, anytime you add some kind of processing to your voice,
5:06 you are going to add a delay.
5:07 It's called latency.
5:08 If you get down here to the software effects
5:10 and you turn these on or even add your own VSTs,
5:13 that's where you're going to start
5:13 seeing a significant amount of latency happening.
5:16 For example, this voice focus one, this is an AI powered noise removal tool.
5:19 So, it gets rid of the sound from the walls,
5:21 gets rid of the noise from the fans, gets rid of a leaf blower sound if
5:24 for some reason you stream with a leaf blower.
5:26 The problem is if you turn this on, it
5:27 adds about 60 to 70 milliseconds of latency.
5:30 So, if you like to monitor your voice in your ears,
5:33 if you turn that on, you're going to hear a delay
5:35 between when you say it and when you hear it,
5:38 and that can completely throw you off.
5:39 It's not enough that your audience will see it.
5:41 You won't have to reync stuff in OBS, but it's enough to make it hard to talk.
5:44 I was really bummed when I first noticed that because I thought,
5:47 I really like this voice focus.
5:48 I have PC fans right there.
5:50 It's solving all my problems,
5:51 but I need to be able to hear my voice and I can't when this is on.
5:56 Well, if you turn on direct monitoring here,
5:58 what that does is in your monitoring,
6:00 the voice that comes back to your headphones,
6:02 it keeps all the hardware effects on, but it eliminates the software effects.
6:07 The software effects is still going to your stream.
6:09 It's just not in your monitored headphones,
6:11 so you can still monitor with zero latency.
6:14 Very cool.
6:15 I found this and then I DM'd the Elgato team and I was like, "Thank you.
6:18 This is genius." So, so much control over your voice.
6:21 And I think the first time we actually
6:22 have AI noise removal built into a device.
6:25 So your PC doesn't have to be running AI noise removal while
6:29 it's also trying to stream in OBS and get frames in your game.
6:33 But let's go into my favorite tab, the mixes tab.
6:36 And from the beginning, it's looking a little weird,
6:38 but some of you might recognize what this is.
6:41 This is a routing table.
6:42 Elgato finally has a proper routing table like the ones that we
6:45 saw in the Go XLR and the Beacon stuff where you can say,
6:48 "Hey, these are my inputs.
6:50 These are my sounds.
6:51 These are my mixes.
6:53 Which ones go where?" The thing is,
6:56 they've done something a little bit different here.
6:58 You'll notice it more if I do this.
7:00 They've combined routing and mixing onto the same page.
7:05 And I didn't think I would like it.
7:06 It turns out this is the simplest, easiest solution.
7:09 Let's create a simple mix real quick just so you can see how this works.
7:12 Right now, we've only got two audio sources.
7:14 We got my mic and we have music.
7:16 That way, if you want to play Stream Beats,
7:17 copyright free music for all your live streams and YouTube videos,
7:20 route it in right through here.
7:21 And I'm setting it in through my personal mix so I can hear it.
7:24 and I'm setting it in through my stream mix.
7:25 Now, I like to have music in my headphones a little bit lower than my stream.
7:30 That way, I can still hear it.
7:31 I know it's playing,
7:32 but it doesn't distract from what I'm doing or distract from the game.
7:35 So, I can set this to be at 80% while this one's at 100.
7:38 And then, if I want to turn it all down, I just do this.
7:42 Now, you can see I'm not turning it on in my chat
7:44 mix because I don't want to send my music to Discord.
7:47 Let's also add another channel for game sounds and regular system sounds.
7:50 So, we have all of our apps at the top here,
7:52 including all of our Elgato hardware at the very top.
7:54 But down at the bottom, an empty channel.
7:56 This is where we have our virtual output.
7:58 So, we can just create system,
7:59 and that's what we can make our default output for all our PC sounds.
8:02 So, all the games, YouTube, everything is going to come through here.
8:04 We're going to add it to the personal mix.
8:05 I want to hear it.
8:06 We're going to add it to the stream mix, but we also want to create a VOD mix
8:09 for Twitch where it has everything except the music.
8:12 That way, Twitch doesn't mute our VOD.
8:13 So, we're going to go to the plus button here.
8:15 We're going to add another mix.
8:17 Let's name this one VOD.
8:20 And we're going to add my voice.
8:21 We're going to add the system.
8:22 We are not going to add the music.
8:24 We don't want that going in there.
8:25 But hey, what if we want one more mix?
8:27 Maybe we want to record the system audio separately so I
8:30 can easily cut stuff up for YouTube and have my voice isolated.
8:33 We're creating a fifth mix here.
8:35 This is the first routing table I've seen with five different mixes.
8:38 We're going to name this one system only.
8:42 Makes it easy to recognize later.
8:43 And I'm just going to add system into it.
8:46 So, that's all it's recording.
8:47 And you know what?
8:47 Maybe this is being recorded on a separate PC
8:49 and I want to send this out of the line out.
8:52 I'm going to click on this and I'm going to add an audio output.
8:55 And if I had something plugged into line out, I'd be able to click it here.
8:58 And any of these can be used for anything you want.
9:00 Maybe I don't need a chat mix cuz
9:02 I'm just grabbing my straightup mic output here.
9:04 I can plug in another Elgato device, make this headphone 2,
9:09 and create a second mix for a second person plugged into a different device.
9:13 Then we can add Discord in here.
9:15 Here, we're going to add that to our personal mix,
9:16 our stream mix, and our VOD mix.
9:19 And with any of these inputs, we can add effects.
9:21 So, maybe on my system audio, I want to add some EQ.
9:24 That way, I can make footsteps a little bit louder in my headphones.
9:28 Or maybe on Discord, I want to add some noise removal so
9:32 that my friend who's got a really loud keyboard, I'm not hearing that.
9:35 It's filtering it out.
9:36 And because we have all of our mixes and routing tables in one place,
9:39 it's been simplified where there's no more unlinking your two mixes,
9:44 adjusting the offset, linking them back together.
9:46 It's just, hey, do you want to lower Discord only
9:50 for myself or do you want to lower it for everyone?
9:52 And if you're real nitpicky and you want to know this detail,
9:55 because I'm excited about this, when you adjust the whole channel,
10:00 it adjusts them at a ratio.
10:02 You can see they both at zero at the same time now.
10:06 Oh, hallelujah.
10:06 And so, now that I've got everything set here, I'm going to do one last thing.
10:10 And I'm going to go into the Stream Deck software,
10:12 and I'm going to start putting some things on my Stream Deck Chongus here,
10:16 which by the way, new video on that.
10:18 Uh, I'll link to it in the description.
10:19 I've got a button to mute my microphone from the Stream Deck.
10:22 I've got some buttons to turn on and off effects.
10:25 I've got some faders down here to easily control my volume.
10:27 I've got these buttons here to record and play back sound effects live.
10:32 I think that's going to just about do it.
10:33 I mean, the last thing I really have to show you is still kind of a secret,
10:36 but it's something I've been testing for the last couple days,
10:38 and I'm very excited to show you more about the Wave XLR Pro.
10:42 I got to really outdid themselves.
10:44 But as always, happy streaming.