The Physics Behind the Thumb Trick
Practical Engineering
0:01 Have you ever filled a bucket with water from the garden hose?
0:04 It’s kind of a slow process.
0:06 Or at least it feels slow while you’re standing there waiting.
0:09 If you played with a garden hose at all,
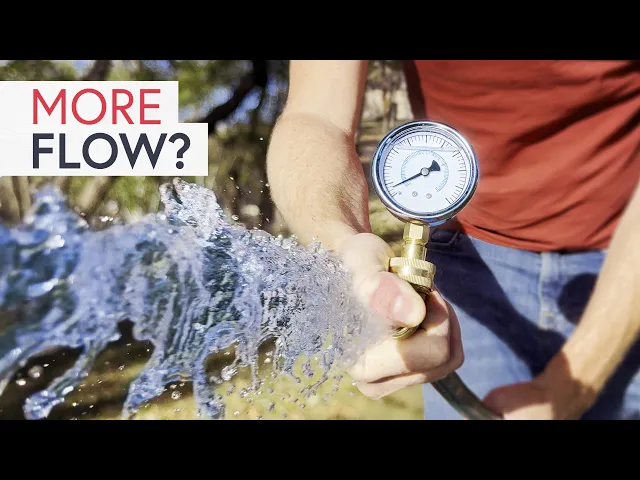
0:11 you know the trick of putting your thumb over the end to get a stronger jet.
0:15 Obviously, the water is flowing faster with your thumb on than off.
0:19 So if you do that- put your thumb over the end of the hose- to fill your bucket,
0:23 do you think it’s going to fill faster, slower, or take the same amount of time?
0:28 Seems like kind of an elementary question,
0:30 but I found this in the online notes for a college physics class.
0:34 The only issue with the professor’s answer to the question is that it was wrong.
0:39 Pipes seem simple, but there are a lot
0:42 of misconceptions about pipes and how they work.
0:45 The field we sometimes call Closed Conduit Hydraulics is
0:49 a place where intuitions don’t always serve you well.
0:52 And “closed conduits” matter.
0:54 Lots of essential parts of our lives depend on fluids moving through pipes.
0:59 So I put together a few demonstrations
1:01 in my garage to try and correct some misconceptions.
1:04 Let’s take a look at what really happens inside a garden hose,
1:09 or really any pipe system to gain some intuition.
1:12 I’m Grady and this is Practical Engineering.
1:25 The question I posed about filling up a bucket was from a lesson on continuity.
1:30 The basic idea is that water isn’t very compressible.
1:33 So in any closed system,
1:34 there has to be the same amount coming in as there is going out.
1:39 In mathematical terms, that looks like this.
1:42 Velocity multiplied by a pipe’s cross-sectional
1:44 area is the volumetric flow rate.
1:47 So v-in, a-in is equal to v-out, a-out.
1:50 The professor’s answer was that the time to fill up the bucket will be the same,
1:54 regardless of whether your thumb is over the end or not.
1:58 The velocity out is higher, but the area is smaller.
2:01 The volumetric flow rate should be the same in both cases.
2:05 It sounds reasonable.
2:06 Let’s test it out and see if that’s true.
2:09 I’m going to speed this up so you
2:11 don’t have to suffer through the full duration.
2:13 I used a big bucket to show the difference better.
2:16 It’s not night and day or anything,
2:18 but this makes it pretty clear that putting your thumb over
2:20 the end of the hose actually slows down the flow rate.
2:25 This is probably not earth-shattering news for you,
2:28 but the reason for the difference is a little complicated.
2:32 Just to be clear, this demonstration
2:34 doesn’t violate the principle of continuity.
2:36 In engineering and physics,
2:38 when we use conservation rules to solve problems or answer questions,
2:42 we have to be explicit about the boundaries.
2:46 Usually, that means applying a control volume,
2:48 a defined region of space where we
2:51 can easily describe inputs and outputs of flow, energy, momentum, and so on.
2:56 In my demonstration, I can define a control volume here,
2:59 and it’s easy to show that the flow rate through
3:01 the hose is the same as that coming out of the end.
3:04 Same thing with my thumb over it:
3:06 the velocity in the hose is lower than the velocity leaving,
3:09 but the area of the hose is larger than
3:12 the nozzle I’ve formed with my thumb, so it equals out.
3:16 But you can’t apply the principle
3:18 of continuity across different control volumes.
3:21 In other words, these are completely different situations.
3:24 And if I change this demo up a little bit, it will be more obvious.
3:28 Now I have a mechanical thumb to constrict the end of the hose.
3:33 In other words… a valve.
3:35 Functionally, this does the exact same thing.
3:38 When I turn the valve,
3:39 it creates a varying obstruction across the pipe from wide open to fully closed.
3:45 Let’s measure the flow rate for a full
3:48 range of valve positions and see what happens.
3:50 This is a chart of the data,
3:53 and you can see there’s a pretty clear relationship.
3:56 More restriction; less flow.
3:57 This is the answer that the professor missed by assuming
4:00 the flow rate IN was the same in both cases.
4:04 Again, probably not earth-shattering news to anyone that when
4:07 you close a valve the flow rate goes down.
4:10 But you might not have ever considered, “Why?” To answer that question,
4:15 we have to look at a different conservation equation: energy.
4:20 Basic physics separates energy into two forms:
4:23 potential energy that is stored in some way,
4:27 and kinetic energy: the energy of motion.
4:29 Fluid in a pipe has both.
4:32 Potential energy takes the form of pressure or elevation,
4:36 kinetic energy in the form of velocity.
4:38 The trick is that you can convert between types of energy,
4:42 and of course, the total amount of energy in a closed system doesn’t change.
4:47 And knowing this allows you to answer all kinds of questions.
4:51 Let me show you an example.
4:53 This is a basic hydraulic system.
4:55 A tank on the left and a pipe that constricts down, then expands back out.
4:59 You know I love graphs, and there is a graph that makes
5:03 solving closed conduit hydraulics problems a lot simpler.
5:06 It’s called the hydraulic grade line,
5:09 and it basically describes the potential energy in a fluid along its path.
5:13 In the tank, there’s hardly any velocity,
5:15 so all the energy in the fluid is potential energy.
5:18 The hydraulic grade line is equal to the free surface.
5:22 But once water enters the pipe, it picks up speed,
5:25 so the hydraulic grade line drops down.
5:27 The difference is the potential energy converted to kinetic.
5:31 At any snapshot in time,
5:32 we know that the volumetric flow through a pipe is constant.
5:36 You really can’t have more water coming in than going out,
5:40 just like we discussed with continuity.
5:41 So the hydraulic grade line is constant as long as the velocity is constant.
5:47 The fluid has to accelerate as it goes into the narrower pipe.
5:50 That converts more of the potential energy to kinetic energy,
5:53 so the hydraulic grade line drops again.
5:56 Same thing on the other side.
5:57 The flow slows down as it expands into the larger pipe,
6:00 so you get a conversion of kinetic energy back into pressure.
6:04 If this seems complicated, just remember that the hydraulic grade line
6:07 is basically the answer to the question:
6:09 “If I tapped a vertical riser into this part of my pipe system,
6:13 how high would the fluid go up it?” I think this is intuitive for most people.
6:18 It’s Bernoulli’s principle in action.
6:19 But it’s missing something that makes it
6:22 impossible to apply to our garden hose demo.
6:25 Let’s hook up some pressure gauges, and you’ll see what I mean.
6:28 I put a pressure gauge at the beginning of the hose and one at the end.
6:32 When I turn on the water, we see a pressure just under 70 psi
6:36 or about 450 kilopascals at the upstream end.
6:39 At the downstream end where the water’s coming out, it’s basically zero.
6:44 That doesn’t jive with what we’ve learned
6:46 so far about the conservation of energy.
6:49 Let’s sketch out the hydraulic grade line to figure it out.
6:52 Here’s our hose.
6:53 It’s close enough to level that we can neglect differences in elevation,
6:57 so all the potential energy is in pressure.
7:00 On the upstream end, it was 70 psi, and on the downstream end, essentially zero.
7:04 That makes sense because the end of the pipe is exposed to the atmosphere.
7:09 You can’t really have any pressure if you don’t have a pipe.
7:12 That means our hydraulic grade line looks like this.
7:15 We know in a pipe with a constant
7:18 cross-section that the flow velocity isn’t changing,
7:20 and yet, we’re still losing potential energy along the way.
7:25 Where’s it going?
7:26 Well, we need to talk about losses.
7:29 Of course we know energy can’t be created or destroyed,
7:32 only converted from one form to another.
7:35 We talked about pressure, elevation, and velocity already.
7:38 But there’s also heat through friction in the system.
7:42 No pipe is perfect.
7:44 You’re always going to lose some energy along the way.
7:48 Unlike pressure or velocity, frictional losses are unrecoverable.
7:51 Once they’re lost, they’re lost.
7:53 The garden hose example shows it perfectly.
7:56 Let’s assume the inlet pressure is always constant.
7:59 It’s not really, since there are more pipes
8:02 upstream of this point in my house’s plumbing.
8:05 But assuming a constant inlet pressure,
8:07 this hydraulic grade line is always going to look the same.
8:11 You can make the pipe smoother, rougher, longer, or shorter, wider, or narrower.
8:15 As long as the shape doesn’t change along its length,
8:19 you’re always going to have the inlet pressure on the left,
8:22 zero pressure on the right, and a straight line connecting the two.
8:26 In other words, you’re always going to lose 100% of the potential
8:30 energy in the water to friction from one side to the other.
8:35 How’s that possible?
8:36 It’s because the flow in the pipe will speed up or slow down until it’s true.
8:41 Frictional losses are roughly a function of the fluid’s velocity squared,
8:46 so higher speed means more losses.
8:48 Again, assuming you can maintain a constant pressure
8:51 on one side of the system, in effect,
8:53 what controls how much flow you can get out of the other
8:57 end of the pipe is how much friction happens along the way.
9:00 And, by the way, that’s kind of a tough question to answer.
9:04 The friction is a function of pipe roughness and turbulence.
9:07 Turbulence is a function of the flow rate, so you have to know the flow rate
9:12 to calculate the friction to calculate the flow rate.
9:15 So these computations usually require some
9:17 iteration or at least some simplifying assumptions.
9:21 I said that generally friction scales as a function of flow squared.
9:25 I can show that in my demo with the pressure gauges.
9:28 If this valve is closed, we get the full static pressure.
9:32 There’s no movement, so there’s no frictional losses anywhere in the hose.
9:36 I have the same amount of energy at the end
9:39 of the hose as I do at the beginning.
9:41 When I open the valve,
9:42 the difference in pressure grows because the flow speeds up.
9:45 And if we plot the difference in pressure as a function of flow rate,
9:50 it looks something like this.
9:52 Friction goes up a lot faster than velocity.
9:55 But friction in a pipe isn’t the only source of energy losses.
10:00 Any transition in geometry is going to have losses, too.
10:03 And now, we’re back to the thumb.
10:06 We sometimes call pipe friction the “major” losses in a system
10:10 and those at transitions “minor losses.”
10:13 Researchers have measured all kinds of situations,
10:16 making it possible to estimate how a pipe system will behave,
10:19 no matter how complicated it is.
10:22 And the results are pretty interesting.
10:24 For example, at a sharp-edged inlet into a pipe,
10:28 the minor loss coefficient can be around 0.5.
10:31 A higher number means more energy lost.
10:33 If you round the inlet, you can get that coefficient down to 0.03.
10:39 Huge difference.
10:40 Same thing with expansions or contractions.
10:43 If you have a sudden change,
10:45 especially when the difference between sizes is larger,
10:48 you get high loss coefficients.
10:50 If you make the transition gradual, the coefficient goes down,
10:54 since there’s less turbulence and gentler
10:57 acceleration as the fluid changes speed.
11:00 And every type of transition has an associated loss coefficient that can
11:04 vary a lot depending on how smooth and consistent that transition is.
11:08 In fact, valves take advantage of minor
11:11 losses to give you some control over flow,
11:14 and we already said that a valve is basically a mechanical thumb.
11:18 I have one more demonstration to show you.
11:21 I’m going to fill this tank two more times.
11:24 In one case, I put a cap over the hose with a hole drilled into it.
11:28 In the other, I 3D printed this nozzle that has a smooth taper
11:32 from the hose diameter down to the exact same diameter I drilled in the end cap.
11:37 With an understanding of minor losses,
11:39 it should be an easy guess which one can flow more water.
11:43 And here’s the proof.
11:44 Both hoses are discharging through the same-sized hole,
11:48 but the one with a smoother transition lets a lot more water through.
11:52 And if you compare the 3D printed nozzle with the fully open hose,
11:56 it’s not quite the same flow rate, but it’s close, and it’s a lot closer than
12:01 the sharp contraction created by the cap with the hole.
12:04 The point I’m trying to show with this is
12:06 that a nozzle or any other type of obstruction
12:08 you put in a pipe system doesn’t increase
12:11 or decrease the flow from one side or the other.
12:14 It just creates a loss in energy that slows down the whole system.
12:19 Transitions and pipe roughness create friction,
12:22 and the flow rate naturally adjusts itself until the available
12:26 energy between two points is equal to that friction.
12:30 And this is not necessarily intuitive.
12:33 For example, we often compare water in pipes to electricity in wires:
12:37 pressure is like voltage,
12:39 flow rate is like current, and a narrow or rough pipe is like a resistor.
12:44 That analogy works pretty well for building intuition,
12:47 but it breaks down once you care about the details.
12:50 In a wire, resistance is usually close
12:53 to constant for a given material and temperature,
12:56 so current tends to scale more neatly with voltage.
12:59 In a pipe, the “resistance” isn’t a fixed number.
13:02 Friction losses grow faster than the flow
13:05 and can change as the flow becomes more turbulent.
13:08 But of course, you can build that intuition.
13:11 Think about firefighters.
13:13 The operator’s job is to run the pump.
13:15 They choose a throttle setting based on the pressure needed at the nozzle.
13:20 How do they make that choice?
13:22 Well, that depends on the diameter of the hose, the length of the hose,
13:26 the elevation of the nozzle if you’re pumping up a hill or a ladder,
13:30 and the characteristics of the nozzle itself.
13:33 It’s important to get this right.
13:35 Too little pressure at the nozzle,
13:36 and you don’t get enough flow to quench the flames.
13:39 Too much pressure and you can damage equipment
13:42 or throw the nozzle operator around with excessive reaction forces.
13:46 Firefighters learn the basics of hydraulics in training,
13:49 but there are no desks with graph paper set up
13:52 at a fireground to work through a bunch of engineering equations.
13:56 Operators need good hydraulic instincts
13:58 about how different configurations of hoses,
14:01 apparatuses, and nozzles will affect the required pump settings.
14:06 Even the plumbing in your house follows these same simple hydraulic principles.
14:09 If you have narrow pipes, or lots of bends, turns, and transitions,
14:14 you’ll definitely notice if someone flushes
14:16 the toilet while you’re taking a shower.
14:18 The shared lines see higher total flow,
14:21 meaning more friction, meaning less pressure.
14:23 I mentioned earlier that we couldn’t really assume
14:26 a constant inlet pressure at my hose bib.
14:28 That’s because there are a lot
14:30 of pipes and transitions from that point upstream.
14:33 And it’s true from my house through my service line through the water mains
14:38 all the way to the water towers and high service pumps at the treatment plant.
14:42 The pressure and flow rate I can get out are almost entirely
14:46 a function of how much friction the water encounters along the way,
14:49 which is a function of both the flow rate and the geometry of the pipes.
14:54 You may even notice that your water pressure drops in the mornings
14:57 or evenings when everyone in your neighborhood is using more.
15:01 It’s the same issue: more flow through the water mains creates more friction,
15:05 converting kinetic energy into heat so you get less at the end of the line.
15:10 The garden hose is a backyard version of the same
15:14 problem engineers and operators deal with every day:
15:17 how much flow can you get through a real system,
15:20 and what does it cost you in pressure?
15:22 In a perfect world, you’d convert pressure
15:24 to speed and back again with no penalty, but real pipes always take a cut.
15:29 Sometimes that cut is spread out over a long run of pipe.
15:33 Sometimes it’s concentrated in a single valve, elbow, or your thumb.
15:38 Either way, the flow rate adjusts until
15:41 the available pressure is fully “spent” on those losses.
15:45 Once you see it as an energy budget, the weird stuff starts making sense.
15:51 I’ve been making videos like this one for more than 10 years now,
15:55 which is crazy to say.
15:56 And over all that time,
15:57 the central thesis of Practical Engineering has always been what’s in the name:
16:02 not just the theory,
16:03 but how engineering is actually applied to our everyday lives.
16:07 To accomplish that goal, I use these physical,
16:10 real-world demonstrations, built in my garage,
16:13 not only to illustrate the concepts,
16:15 but to prove that the theory actually works.
16:18 Some of these models are actually pretty complicated,
16:21 and for the past year or so,
16:23 I’ve been getting some help from today’s sponsor, Send-Cut-Send.
16:26 I could buy raw materials like steel and acrylic and cut stuff out myself,
16:31 and I’ve done so much of that, but just look at this.
16:34 An entire idea from my head shipped to my door.
16:37 The quality’s better, the cuts are way more precise than I would make,
16:41 and I don’t have a day's worth of measuring, cutting, and cleaning up to do.
16:45 They have a huge catalog of materials they can cut, bend, countersink, and tap,
16:50 so the limit is practically what you can dream up and put into CAD.
16:54 Parts are made in the USA and usually out the door in a few days,
16:59 which makes rapid prototyping a dream.
17:01 They just started offering CNC machining,
17:03 so I’m going to have to try that out soon.
17:05 I can’t recommend Send Cut Send enough.
17:07 If you have projects that use sheet goods,
17:10 the link below is going to give you a discount on your first order.
17:13 I really appreciate their support, and I hope you give them a try.
17:16 Thank you for watching, and let me know what you think.